Why You’ll Love This DIY
DIY Frankincense Face Mask for Fine Lines offers a wonderful opportunity to rejuvenate your skin with natural ingredients. This simple, three-ingredient recipe is designed to help you achieve a smoother and more youthful appearance. Frankincense has long been cherished for its skin-enhancing properties, making it an ideal addition to your skincare routine.
You’ll love this DIY for its ease of preparation and high effectiveness in addressing wrinkles and fine lines. With just water, frankincense granules, and aloe vera gel, you can create a nourishing mask that hydrates and revitalizes your skin.
Easy to make and quick to apply, this face mask is perfect for those seeking an effective, at-home solution. Enjoy the benefits of natural skincare and embrace a glowing complexion!
Gather the Ingredients
Choose high-quality ingredients to boost the effectiveness and safety of your DIY beauty products.
- Distilled Water
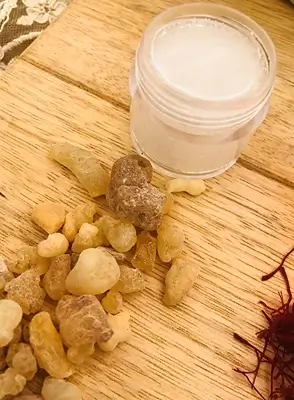
- Frankincense Granules
- Natural Aloe Vera Gel
- Frankincense Essential Oil (Optional)
Did You Know?
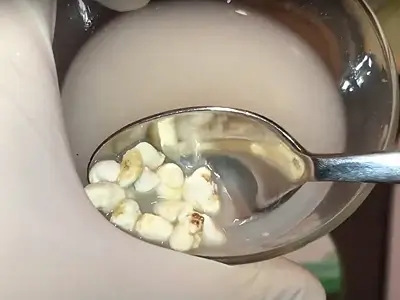
To determine if your frankincense granules are genuine, soak them in distilled water for a minimum of 8 hours or overnight—as we will do later in the recipe steps. Genuine frankincense will turn the solution a milky white, while fake granules will leave the liquid unchanged. This is why it’s wise to purchase a small quantity first when trying a new store to test the authenticity of the product.
Gather the Gear
- Medium bowl
- Small bowl
- Teaspoon
- Small whisk
- Small container to store your DIY Frankincense Face Mask
Prior to use, ensure that both your utensils and containers are properly cleaned and disinfected. Wash them with warm soapy water, dry with a tissue, and then sanitize by spraying with 70% medical alcohol. Wipe them clean and let them air dry before use.
Let’s Make DIY Frankincense Face Mask for Fine Lines
The quantity we are preparing is enough for two applications. Be sure to store any leftover mask in the fridge and use it within one week to ensure maximum freshness and benefits. After one week, discard any leftovers. This is why it is best to prepare small quantities.
Prepare Frankincense Solution
1- Place 1 teaspoon of frankincense granules in a small bowl.
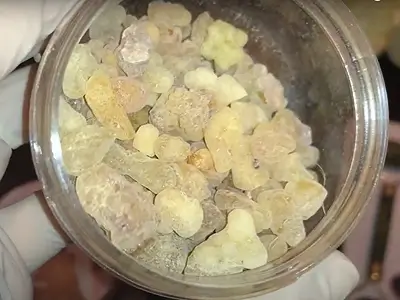
2- Pour 1/2 cup of distilled water over the frankincense granules.
3- Allow the frankincense to soak in the water for a minimum of 8 hours or overnight. As mentioned earlier, the solution will turn milky white if the frankincense is genuine.
Note: The quantities above yield more than what’s needed for this face mask recipe. You can use the remaining solution as a frankincense face toner or as an ingredient for DIY creams and other products. If you prefer a smaller amount, soak 1/2 teaspoon of frankincense granules in 1/4 cup of distilled water.
Make the Face Mask (After the Soaking Duration)
4- In a separate medium bowl, place 2 slightly heaped teaspoons of aloe vera gel. A slightly heaped teaspoon is when the ingredient is piled above the spoon’s edge but not overly heaped.
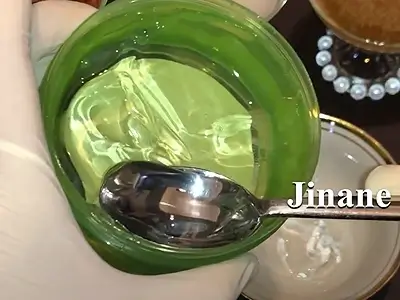
5- Add 3 teaspoons of the frankincense solution prepared earlier to the aloe vera gel.
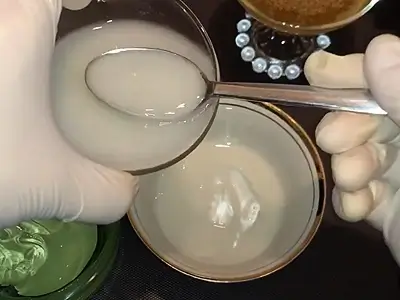
6- Use a small whisk to stir the ingredients vigorously until well blended. The longer you whip the mixture, the thicker it becomes.
7- As an optional step, for those aged 50-55 and older who wish to address excessive fine lines, add 2 drops of frankincense essential oil. Those under 50 with fewer fine lines can skip this step, as the mask without the essential oil is sufficient over time.
8- Give the mixture a final thorough stir.
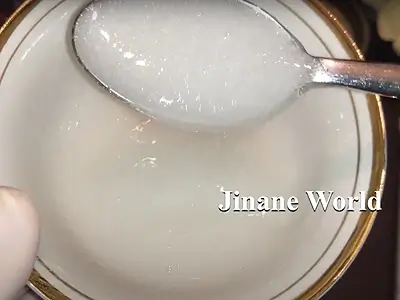
9- Pour the mask into a small container. If you’re not using it immediately, store it in the fridge. Be sure to use it within a week, after which it should be discarded.
Using It Right
To make the most of your DIY Frankincense Face Mask for Fine Lines, follow these simple steps:
a. Apply the mask evenly over your entire face and neck, ensuring a generous layer for optimal benefits.
b. Leave the mask on for 20 minutes, allowing your skin to absorb its nourishing properties.
c. Use Face Roller (Optional): After 20 minutes, it is recommended to use a face roller to enhance circulation and promote a lifted appearance. Use it to gently roll and pull the skin upwards for a few minutes.
d. Rinse the mask off first with warm water to help open your pores, then follow with cold water to close them. This dual temperature rinse helps refresh your skin.
e. Finish by applying a moisturizing cream to lock in hydration and keep your skin feeling soft and supple.
Enjoy the revitalizing effects of your face mask and embrace your glowing complexion!
The Sweet Rewards
Using this DIY Frankincense Face Mask brings a multitude of benefits that your skin will love:
Smoother Skin: Frankincense is known for its skin-enhancing properties, helping to reduce the appearance of fine lines and promote a smoother complexion.
Youthful Glow: Regular use of this mask can help improve skin texture and elasticity, giving your face a radiant, youthful glow.
Hydration Boost: The natural aloe vera gel provides deep hydration, leaving your skin feeling plump and refreshed.
Fast Results: This easy-to-make mask delivers noticeable improvements in just a short time, making it perfect for a quick self-care session.
Natural Ingredients: With only three simple, natural ingredients, you can feel good about what you’re putting on your skin, free from harsh chemicals.
Embrace the sweet rewards of your DIY skincare routine and enjoy the journey to healthier, more vibrant skin!
Continue Your DIY Adventure
Browse through these articles on similar products to enrich your natural beauty care. Each one offers recipes and tips to enhance your crafting experience!
- How to Make Your Own Face Cream and Primer: 2-in-1 Recipe for Beautiful Skin
- DIY Jasmine Body Butter Recipe: Luxurious, Easy, and All-Natural
- DIY Rice Cream for Glowing Skin: Nourishing Blend of 5 Natural Ingredients
- Quick DIY Home Remedy for Melasma: See Results in 1 Day with Turmeric and Milk
- DIY Natural Face Cream for Brightening: Stunning Results Naturally
See How It’s Done on Jinane World YouTube
The steps to make the DIY Frankincense Face Mask for Fine Lines are demonstrated in this video starting at timestamp 03:10.
