DIY Orange Cold Process Soap lets you create natural, skin-brightening soap at home using ingredients like olive oil, coconut oil, and orange carrier oil. This guide makes it easy for anyone to craft their own rejuvenating soap.
Not only are you making your own natural soap, but it’s also a satisfying hobby. Crafting soap from scratch is both enjoyable and rewarding, allowing for customization and enhancing your skincare routine.
Ingredients Needed
Choose high-quality ingredients to boost the effectiveness and safety of your DIY beauty products.
- Distilled water
- Sodium hydroxide (also called caustic soda or lye). While sodium hydroxide is a necessary ingredient for making soap, it is derived from a chemical process and not considered natural. However, it is used in the soap-making process and transforms into soap during saponification.
- Olive oil
- Coconut oil
- Palm oil. Look for certified sustainable palm oil.
- Orange carrier oil, used here as superfat.
- Rosehip carrier oil, used here as superfat.
- Titanium dioxide powder. It is commonly used as a white pigment in various cosmetic products, including soaps, to achieve a desired color and appearance.
- Vegetable glycerine
- Oil soluble color powder – Orange color
- Dried orange slices for decoration
Tools Needed
- Safety items: Latex gloves, safety goggles, face mask
- Scale to measure quantities
- 2 glass beakers
- 2 medium-sized bowls, preferably stainless steel. Do not use aluminum.
- Silicone spatula
- Glass mixing rod
- Electric hand mixer
- Soap mold, rectangular shape
Prior to use, ensure that both your utensils and containers are properly cleaned and disinfected. Wash them with warm soapy water, dry with a tissue, and then sanitize by spraying with 70% medical alcohol. Wipe them clean and let them air dry before use.
Safety Precautions
We are using the cold process soap making technique in this guide. This requires mandatory safety measures that you should take during the process:
- No part of your skin should be exposed at any time during the process (a long-sleeved shirt and an apron are good ideas here)
- Don’t let any children or pets come near your soap making work table
- Your soap making table should be in a ventilated area at all times (an open window is a good idea )
- Latex gloves, safety goggles, and face masks should be worn at all times
- Only use silicone, plastic, and stainless steel tools
- All utensils and tools used for cold process soap making should be dedicated solely to this purpose and not used for food preparation.
Steps: DIY Orange Cold Process Soap
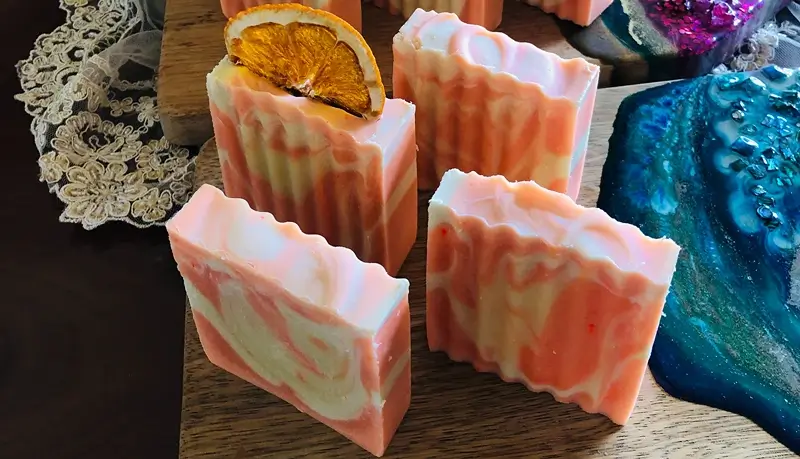
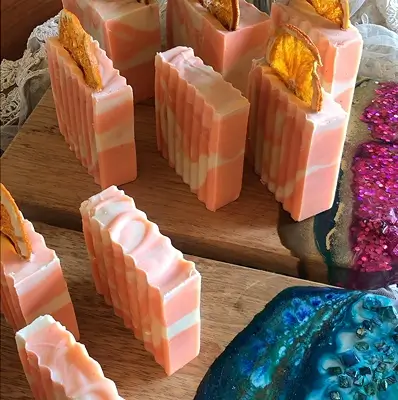
The natural soap we are making is of two colors, orange and whitish, which when poured in the mold in layers will result in a very attractive soap design.
Preparing the Sodium Hydroxide
1- Ensure that you are applying the necessary safety precautions mentioned above before starting.
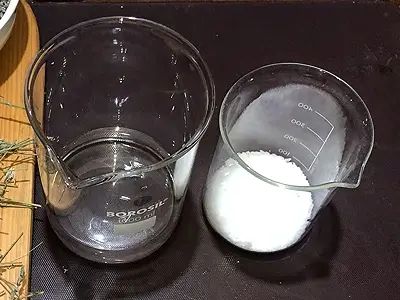
2- Put 150 grams (5.29 oz) of sodium hydroxide in one beaker.
3- Pour 350 grams (12.34 oz) of distilled water into a second beaker.
4- Slowly empty the beaker containing the sodium hydroxide into the beaker containing the distilled water:
- Start with a small amount and mix with a spatula; continue until you add all of the sodium hydroxide.
- It is important not to do this in the opposite way: it’s dangerous to pour the distilled water on top of the sodium hydroxide!
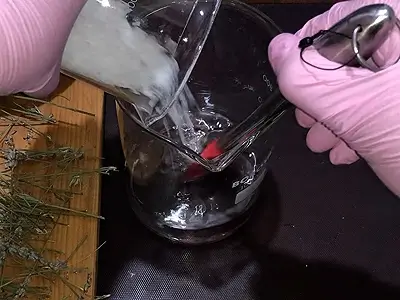
5- After the sodium hydroxide has dissolved fully, let the contents cool down. Ensure the beaker containing the sodium hydroxide solution is safely out of reach of children and pets.
Making the Soap
6- Pour 500 grams (17.63 oz) of olive oil in a bowl.
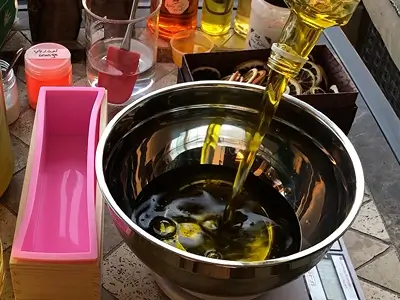
7- Add 250 grams (8.81 oz) of coconut oil. As you see in the image below, the coconut oil is liquid as I am preparing the soap in summer. In cold weather, the coconut oil is semi-solid, hence requires that you melt it in a bain-marie beforehand.
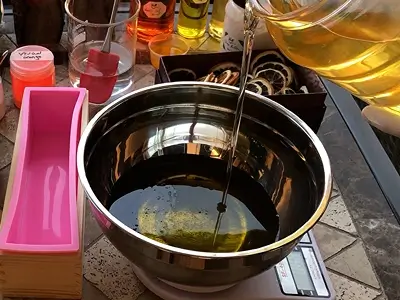
8- Add 250 grams (8.81 oz) of palm oil.
9- Mix the oils with a silicone spatula.
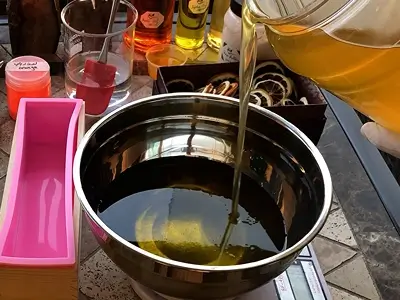
10- Ensure that the mixture of oils and the sodium hydroxide solution are at an equal ambient temperature. Only then can we mix the two together: Slowly, and while stirring with the spatula, pour the sodium hydroxide solution into the oils. Do not pour the oils over the sodium hydroxide solution.

11- Mix thoroughly with the spatula.
12- Using an electric hand mixer, whip the contents for 5-10 seconds, then stop the electric mixer and stir with the silicone spatula or with the mixer shaft itself for a few seconds.
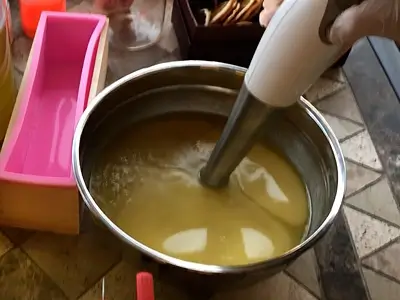
Continue alternating between the electric mixer and manual stirring, till you see the soap mix partially thicken: a viscous, slightly thick layer covers the lower part of the shaft of the electric mixer. This means that the saponification (the process of making the soap) is progressing. Before we complete the saponification process, we want to add the superfats of the next two steps.
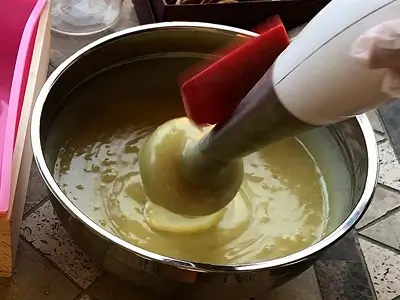
13- Add 25 grams (0.88 oz) of orange carrier oil.
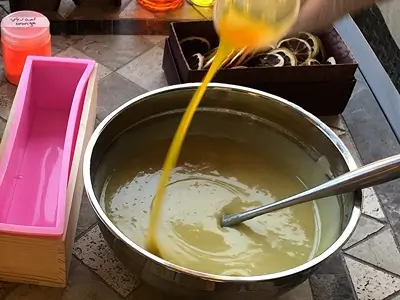
14- Add 25 grams (0.88 oz) of rosehip carrier oil.
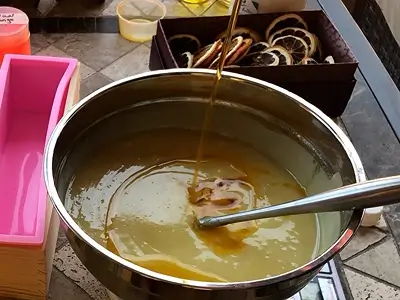
15- Mix thoroughly with the spatula.
16- Beat the mixture with the electric mixer for about 10 seconds to ensure a uniform blending, and to complete the saponification process.
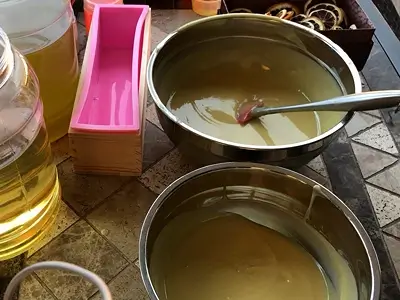
17- Pour half the mixture into a second bowl, thus resulting in two equal quantities.
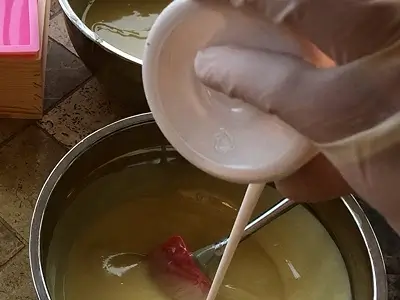
18- Prepare the titanium dioxide solution by thoroughly mixing 3 grams of titanium dioxide powder with 6 grams of vegetable glycerine. This solution will be used to lighten the color of one part of the soap mixture till it becomes whitish.
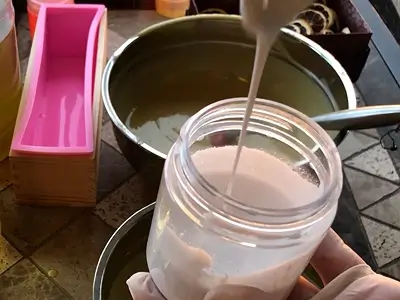
19- Add some of the titanium dioxide solution to one bowl, and mix rigorously with the spatula. If the color is not whitish enough, add some more.
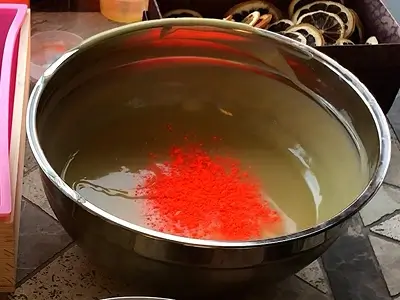
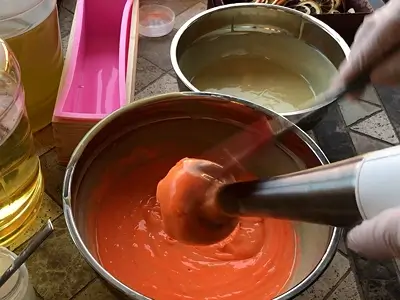
20- Add some oily color powder into the second bowl. Choose an orange color. Use the electric mixer to mix the color and ensure a good, uniform blending.
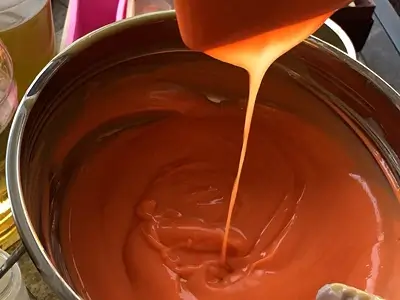
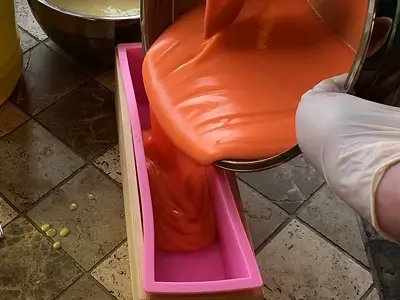
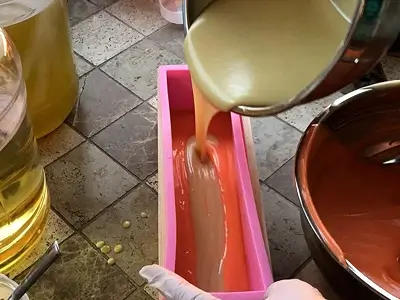
21- Pour both halves of the soap into a mold, alternating with one layer of orange and one layer of whitish color. With the rectangular mold I use, I ended up with 3 layers of each color, poured alternately.
Note: After pouring each layer, tap slightly the mold on the work table to allow the soap mix to settle.
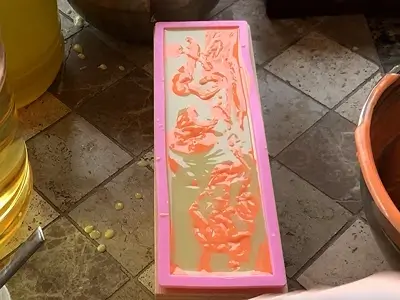
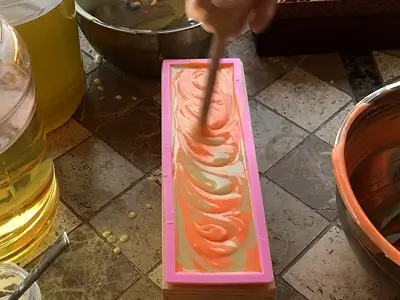
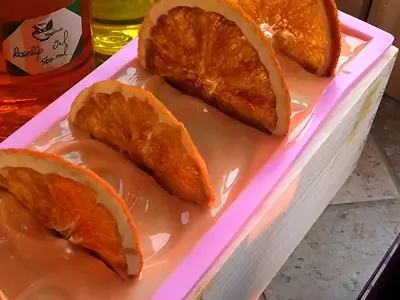
22- After pouring the soap mixture into the mold, tap the mold repeatedly on the table to remove any air bubbles. Use a glass mixing rod to create a continuous circular design on the surface. You can dip the glass rod below the surface and trace the same circular motion lightly.
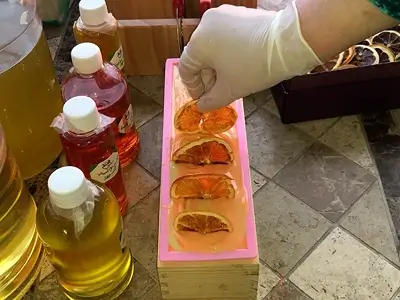
23- Insert dried slices of orange into the soap surface for decoration.
24- Allow the soap to harden for 24 hours.
25- After 24 hours, remove the soap gently from the mold, and cut it into appropriate size.
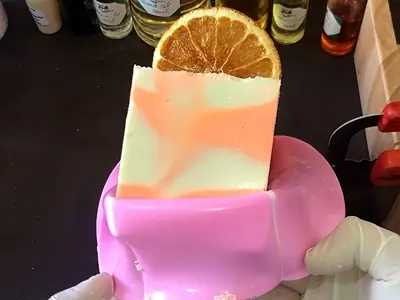
26- Important: Now, you must leave the soap bars to cure for 6 weeks. This will allow the sodium hydroxide to dissipate completely. Only then can you use the soap or package it for gifting.
How to Use: DIY Orange Cold Process Soap
To use the DIY Orange Cold Process Soap, follow these simple steps:
- Wet: Wet your hands or body with water.
- Lather: Rub the soap between your hands or directly on your body to create a rich lather.
- Cleanse: Gently massage the lather onto your skin, focusing on areas you want to cleanse.
- Rinse: Thoroughly rinse off the soap with water.
- Pat Dry: Pat your skin dry with a towel.
- Moisturize: Follow up with your favorite moisturizer to keep your skin hydrated.
Enjoy the refreshing citrus scent and the brightening effects of your homemade soap!
Benefits
The DIY Orange Cold Process Soap offers several benefits due to its natural ingredients:
Olive Oil: Provides moisturization and helps maintain skin’s elasticity.
Coconut Oil: Cleanses gently while adding moisture and a natural lather.
Orange Carrier Oil: Rich in vitamin C, it brightens and revitalizes the skin, promoting a radiant complexion.
Palm Oil: Contributes to a stable lather and adds conditioning properties.
Rosehip Carrier Oil: Contains antioxidants that help repair and regenerate skin cells, promoting a youthful appearance.
Vegetable Glycerine: Acts as a humectant, attracting moisture to the skin and leaving it feeling soft and smooth.
Together, these ingredients create a soap that cleanses, nourishes, and brightens, making it ideal for enhancing your skincare routine naturally.
Here are more articles you might like:
- Quick and Easy DIY Musk Soap Recipe for Your Daily Pampering
- Effervescent DIY Bath Salt Recipe: Craft Your Own Sparkling Spa Treats
- Arabian Treasure DIY Herbal Soap: Moroccan Black Soap with 12 Herbs
- DIY Detox Bath Salts for Feet and Body: Unlock Tranquility
- DIY Bath Bubbles Powder: Transform Your Tub for Pampered Soaks
Video How-To on My Channel | Jinane World
The steps to make DIY Orange Cold Process Soap are demonstrated in this video.