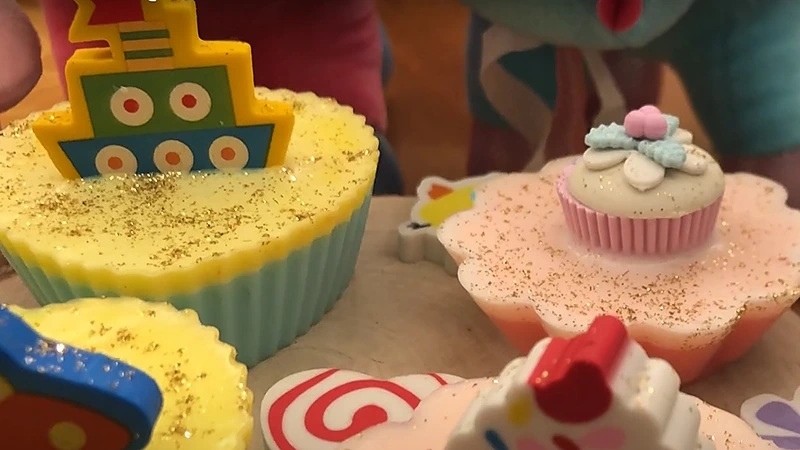
This article brings a splash of color and fun to your kids’ handwashing routine! Discover the joy of crafting Colorful DIY Glycerine Soap with Toys, a delightful project that not only encourages proper hygiene but also adds an exciting twist to the daily ritual. By incorporating tiny toys into the glycerine soap, you’ll create a captivating experience that will have your little ones eager to wash their hands.
Join us as we take you through the steps to make this interactive soap, bringing smiles and cleanliness to your kids’ lives. Get ready to dive into the world of creativity and cleanliness with this wonderful DIY activity!
Ingredients Needed
- Glycerine soap (known as melt and pour soap)
- Glitter
- Tiny toys or tiny kids’ erasers, to place in melted soap. This way when the soap cools down, it will be attractive to kids and encourage them to wash their hands.
- Fragrance oil
- Food coloring – Choose 3 colors
Notes on Ingredients
Choose high-quality ingredients to boost the effectiveness and safety of your DIY beauty products.
When an essential oil is included, I use either concentrated or diluted essential oils. If using concentrated essential oils, use up to 0.5% by weight to ensure safety for all skin types. To use diluted essential oils, mix 1 gram (0.035 oz) of concentrated essential oil with 100 grams (3.5 oz) of sweet almond oil or jojoba oil.
If a recipe calls for fragrance oil, you can use diluted essential oil instead to benefit from both its scent and therapeutic effects. This provides a natural alternative to synthetic fragrance oils and offers additional benefits.
Tools Needed
- Scale to weigh quantities
- Glass beaker
- 3 stainless steel cups
- Wooden toothpick
- Medical alcohol 70%
- Small silicone molds with different shapes
Prior to use, ensure that both your utensils and containers are properly cleaned and disinfected. Wash them with warm soapy water, dry with a tissue, and then sanitize by spraying with 70% medical alcohol. Wipe them clean and let them air dry before use.
Steps: DIY Glycerine Soap with Toys
Each toy soap requires 80 grams (2.82 oz) of glycerine soap. We are making here 4 toy soaps, so we need 320 grams (11.2 oz). Because of possible wastage and spilling, we will use 400 grams (14.1 oz) of glycerine soap.
Preparing the mix
1- Start by cutting 400 grams (14.1 oz) of glycerine soap into small pieces.
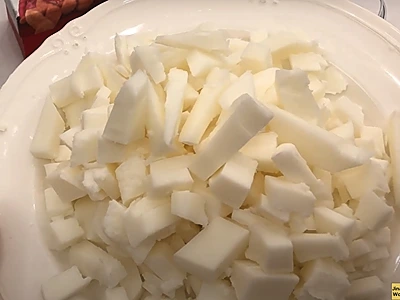
2- Place 300 grams (10.58 oz) of the glycerine soap pieces into a beaker. The remaining quantity will be used later.
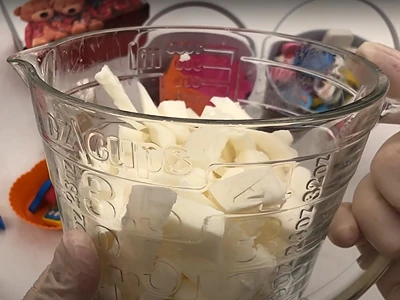
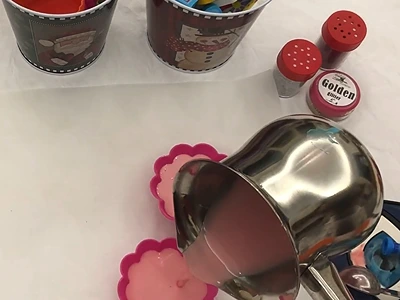
3- Melt the glycerine soap pieces in a hot water bath (bain-marie). A bain-marie is done by placing the beaker in a larger pot of hot steaming water. This will gradually melt whatever is inside the beaker without causing it to burn. As the contents of the beaker melt, make sure to mix every now and then.
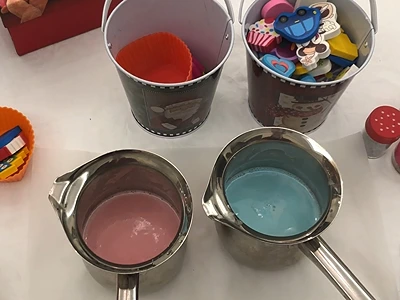
4- Split the liquid glycerine soap into 2 stainless steel cups.

5- Add 5 drops of a fragrance oil of your choosing in the first cup. Here I use raspberry fragrance oil.
6- Add 2-3 drops of blue food coloring to the first cup.
7- Mix well the contents of the first cup.
8- In the second cup, add 5 drops of another fragrance oil. Here I will use tutti frutti fragrance oil.
9- Also in the second cup, add 2-3 drops of red food coloring.
10- Mix well the contents of the second cup.
Ready to pour into the molds
11- First, spray 2 of the silicone molds with medical alcohol 70%.
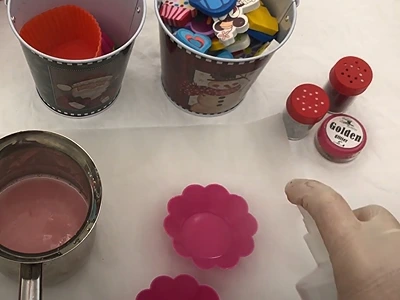
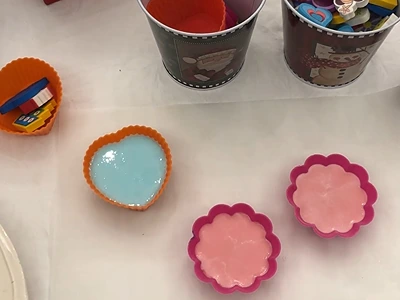
12- Pour the red mix in these 2 molds, but do not fill them fully. We want to fill them only partially, say three quarters (75%) of each mold.
13- Spray the surface with medical alcohol 70% to eliminate any bubbles.
14- Leave these 2 molds to cool down.
15- Spray a 3rd empty mold with alcohol, and fill it partially with the blue mix. Spray its surface with alcohol.
16- To the remainder of the blue mix in the cup, and for colorful variety, add 2 drops of yellow food coloring. Mixing it should give you a green color.
17- Spray a 4th empty mold with alcohol, and fill it partially with the green mix. Spray its surface with alcohol.
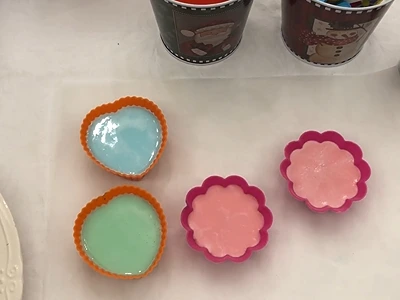
18- Leave all the molds for about an hour to cool down and solidify.
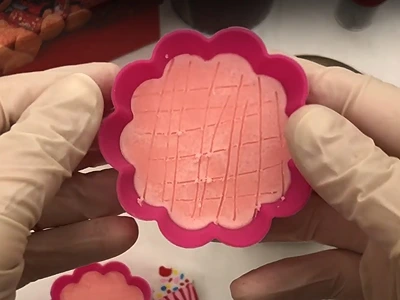
19- After the molds have cooled and solidified, use a toothpick to scratch the surface of each mold, forming a crisscrossing pattern, as in the image below.
The purpose of this is to ensure good bonding between the solid layer and the final liquid glycerine layer that we will pour next.
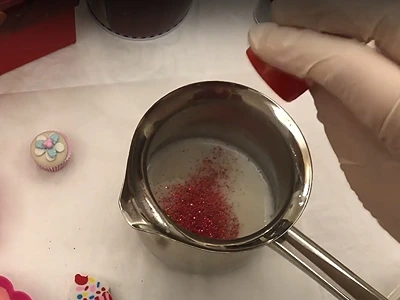
20- Put the balance 100 grams (3.52 oz) of the glycerine soap pieces in a 3rd stainless steel cup and melt them in a bain-marie, as we did previously.
21- Add a little glitter into the 3rd cup and mix.
22- Place one tiny toy or colorful eraser in the middle of the 2 molds containing the red mix, and pour the last layer of the liquid glycerine soap from the 3rd cup. After pouring the final layer, spray the surface with alcohol.
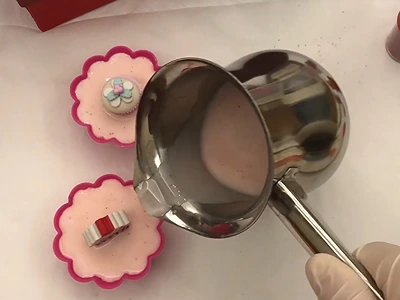
Note: You can add color to the last layer. You can be as creative as you want. For the molds containing the blue and green mix, I added 2 drops of yellow food coloring to the last layer.
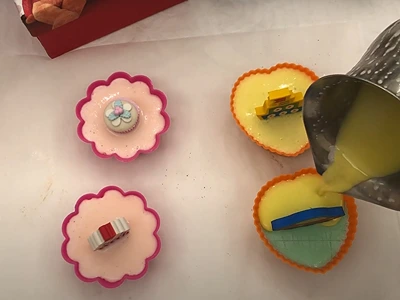
23- Leave the molds to cool and harden. Once the soaps are solid, remove them carefully from the molds. You can use them on the next day. Enjoy them with your kids!

How to Use the Colorful DIY Glycerine Soap with Toys
Congratulations on creating your very own Colorful DIY Glycerine Soap with Toys! Now, let’s dive into the excitement of using this delightful soap that combines cleanliness with playfulness. Follow these simple steps to make handwashing an enjoyable experience for your kids:
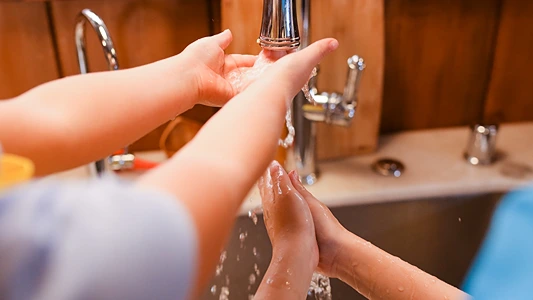
1. Wet Hands: Begin by wetting your hands with water. Make sure the water is at a comfortable temperature for your child.
2. Grab the Soap: Pick up the DIY Glycerine Soap with Toys, and admire the vibrant colors and adorable toys nestled inside.
3. Create Lather: Rub the soap between your palms to create a rich and gentle lather. The glycerine-based soap will cleanse the hands effectively while keeping the skin soft and moisturized.
4. Explore the Toys: As your child washes their hands, encourage them to play with the toys while scrubbing their hands, making the handwashing routine more engaging.
5. Thoroughly Wash: Encourage your child to wash their hands for at least 20 seconds, ensuring all parts of their hands are covered with the foamy lather. You can even make this fun by singing a song or playing a handwashing game together.
6. Rinse Off: After washing, rinse your hands thoroughly under running water to remove all the soap and any lingering dirt or germs.
7. Dry Hands: Pat your hands dry with a clean towel. Avoid rubbing vigorously, as it may cause irritation to the skin.
8. Enjoy Clean and Fresh Hands: Now, revel in the joy of clean and fresh hands with a hint of fragrance from the soap. Your child’s hands will be not only clean but also pleasantly scented.
Remember, the DIY Glycerine Soap with Toys not only makes handwashing fun but also reinforces the importance of maintaining good hygiene habits. Encourage your little ones to use this special soap every time they wash their hands, making it a cherished part of their daily routine. Enjoy the smiles and happy handwashing moments that this creative soap brings to your family!
Benefits: DIY Glycerine Soap with Toys
Here are 7 benefits of using the Colorful DIY Glycerine Soap with Toys:
Promotes Healthy Hygiene Habits: The interactive nature of the soap encourages kids to look forward to handwashing, making it easier to instill essential hygiene habits.
Enhances Handwashing Duration: The excitement of discovering toys in the soap keeps children engaged for longer, ensuring a more thorough and effective handwashing experience.
Reduces Resistance to Handwashing: Children who may have been resistant to handwashing in the past will be more willing to wash their hands with this playful and enjoyable soap.
Gentle on Young Skin: Glycerine-based soap is gentle and moisturizing, making it suitable for delicate children’s skin, helping to prevent dryness and irritation.
Boosts Creativity: The DIY aspect of making the soap allows children to express their creativity by choosing toy designs, colors, and scents, promoting imaginative play.
Elevates Mood and Joy: The vibrant colors and toys create a positive and joyful experience during handwashing, uplifting children’s spirits and making hygiene routines fun.
Makes Gift-Giving Special: Handcrafted soap with surprises makes a unique and thoughtful gift for birthdays, holidays, or special occasions, spreading joy and fostering a sense of appreciation.

Tips and Tricks for Making DIY Glycerine Soap with Toys
Toy Selection: Choose small toys or kids’ erasers that are suitable for embedding in the soap. Avoid using toys with sharp edges or small parts that could be a choking hazard for young children.
Layering Colors: For a visually stunning effect, create layers of different colored glycerine soap in the molds. Allow each layer to cool, then scratch it before pouring the next one. Scratching the cooled layer allows proper bonding with the next layer.
Temperature Control: To avoid melting the toys, make sure the glycerine soap is not too hot when pouring it into the molds. Let it cool for a few minutes after melting.
Custom Fragrances: Experiment with various fragrance oils to add a delightful scent to the soap. However, be cautious with the amount used, as some fragrances can be overpowering.
Storage and Shelf Life: Store the finished soaps in a cool, dry place away from direct sunlight to maintain their color and fragrance. Glycerine soap typically has a shelf life of about one year.
Creative Packaging: Consider creating custom packaging for the soaps, such as wrapping them in colorful paper or placing them in clear bags tied with ribbons. This adds a personal touch and makes them perfect for gifting.
Exploration through Themes: Experiment with different themes for the toys and soap colors to match holidays, seasons, or your child’s interests, making the soap-making process even more exciting.
Educational Opportunities: Use the DIY soap-making activity as an opportunity to teach kids about the importance of handwashing and proper hygiene in a fun and engaging way.
By following these helpful tips and tricks, you’ll elevate your DIY Glycerine Soap with Toys to new creative heights. Enjoy the process of crafting these wonderful soaps and witnessing the joy they bring to the little ones in your life!
Here are more articles on how to make your own natural soaps:
- DIY Musk Bath Bomb: Elevate Your Home Spa with Ultimate Relaxation
- DIY Rose & Frankincense Soap: A Luxurious Beauty Essential
- Invigorate Your Skin with DIY Matcha Creamy Soap: A Refreshing Tutorial
- DIY Creamy Soap with Blue Nila: Nourish Your Skin with Homemade Bliss
- Unlock Beauty Secrets with DIY Rose Creamy Soap: Enhance Your Skincare Regimen
Video How-To on My Channel | Jinane World
The steps to make the DIY Glycerine Soap with Toys are demonstrated in this video.