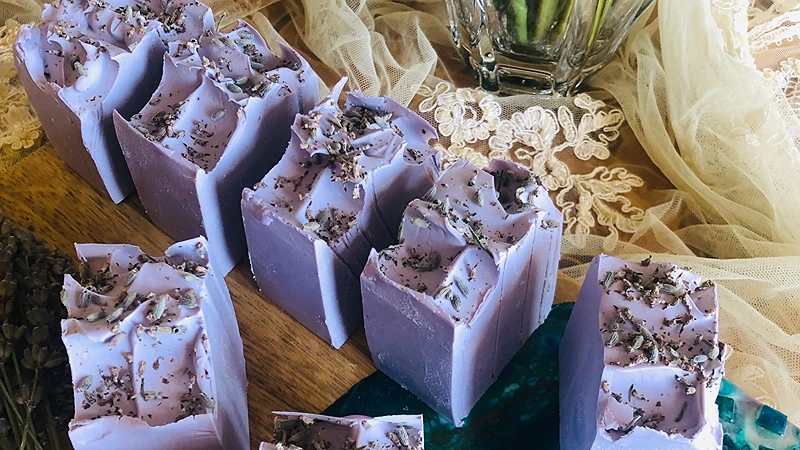
Discover the essence of tranquility as you embark on a journey to make your very own DIY Cold Process Lavender Soap. In this comprehensive guide, we unveil the step-by-step process of creating this soothing bar.
Elevate your self-care routine with the calming aroma of lavender, carefully crafted by your hands. Get ready to immerse yourself in the world of Crafting Soothing Self-Care through the art of soap making.
Ingredients Needed
- Freshly collected lavender, or dried lavender flowers
- Olive oil
- Distilled water
- Sodium hydroxide (also called caustic soda or lye). While sodium hydroxide is a necessary ingredient for making soap, it is derived from a chemical process and not considered natural. However, it is used in the soap-making process and transforms into soap during saponification.
- Coconut oil
- Palm oil. Look for certified sustainable palm oil
- Sweet almond oil (5% superfat to be added last)
- Titanium dioxide powder. It is commonly used as a white pigment in various cosmetic products, including soaps, to achieve a desired color and appearance.
- Mica color powder
- Vegetable glycerine
Choose high-quality ingredients to boost the effectiveness and safety of your DIY beauty products.
Tools Needed
- Safety items: Latex gloves, safety goggles, face mask
- Large stainless steel pot
- Large plastic container
- 2 glass beakers
- Sieve
- Tablespoon
- Large silicone spatula
- Electric hand mixer
- Rectangular silicone mold to hold 800 grams (28.2 oz) of soap mix
Prior to use, ensure that both your utensils and containers are properly cleaned and disinfected. Wash them with warm soapy water, dry with a tissue, and then sanitize by spraying with 70% medical alcohol. Wipe them clean and let them air dry before use.
Safety Precautions
We are using the cold process soap making technique in this guide. This requires mandatory safety measures that you should take during the process:
- No part of your skin should be exposed at any time during the process (a long-sleeved shirt and an apron are good ideas here)
- Don’t let any children or pets come near your soap making work table
- Your soap making table should be in a ventilated area at all times (an open window is a good idea )
- Latex gloves, safety goggles, and face masks should be worn at all times
- Only use silicone, plastic, and stainless steel tools
- All utensils and tools used for cold process soap making should be dedicated solely to this purpose and not used for food preparation.
Quick Steps to Make DIY Cold Process Lavender Soap
- Follow Safety Precautions: Ensure all safety measures are in place.
- Prepare Lavender: Wash and dry 15 grams of fresh lavender, flowers with sticks.
- Infuse Olive Oil: Heat 15 grams of dried lavender in 250 grams of olive oil, then strain.
- Prepare Lye Solution: Mix 75 grams of sodium hydroxide with 175 grams of distilled water and let cool.
- Mix Ingredients: Combine infused olive oil with 125 grams each of coconut oil and palm oil, and 25 grams of sweet almond oil. Add the lye solution.
- Blend and Color: Mix until thickened, then add 2 teaspoons of titanium dioxide and 4 grams of purple mica.
- Mold and Decorate: Pour into a mold, design the surface, and sprinkle with dried lavender.
- Cure Soap: Let it harden for 12-24 hours, cut into bars, and cure for 6 weeks.
Detailed steps are below.
Steps: DIY Cold Process Lavender Soap
A- Preparing the Fresh Lavender
1- If you can, gather naturally-growing lavender, flowers with sticks. This is what I did. If not available near you, you can buy dried lavender and skip to sub-section B.
2- Put 15 grams (0.53 oz) of lavender flowers with sticks in a stainless steel pot.
3- Pour water over the lavender in the pot to wash them properly. Using a sieve, get rid of the dirty water and repeat again with clean water. Do this for a total of 3 times to ensure all dust and impurities are removed.
4- Spread the washed lavender over a tray, and let them dry in sunlight for 2 days.
5- Now you have natural lavender that has been washed and dried.
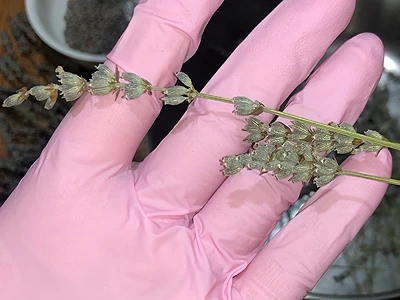
B- Preparing the Lavender Essence
1- Put 15 grams (0.53 oz) of dried lavender in a clean pot.
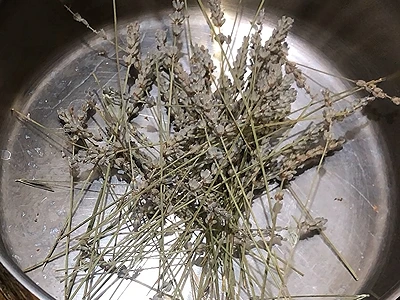
2- Add 250 grams (8.81 oz) of olive oil.
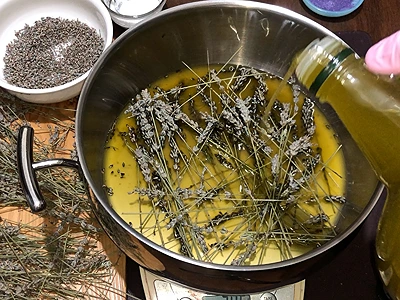
3- With a tablespoon, press the lavender to squeeze its oil out and to ensure that the lavender is properly soaked in the olive oil.
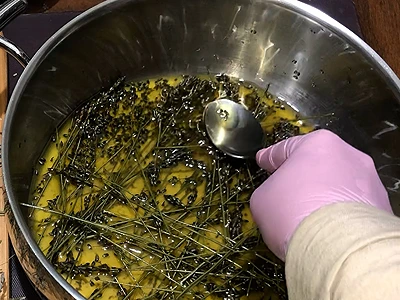
4- Place the pot on a low-temperature stove eye, to warm the olive oil with the lavender. Don’t let the oil boil, as this will cook the lavender! Let the olive oil warm up, then remove the pot. It should take approximately 7 minutes to warm the olive oil.
5- Filter the contents into a large container to collect the warm olive oil with the lavender essence. Check that the weight of the collected mix is 250 grams (8.81 oz). If not, add some olive oil.
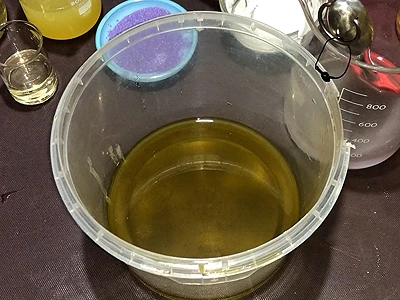
6- Cover the container and let it cool down.
C- Preparing the Sodium Hydroxide
1- Ensure that you are applying the necessary safety precautions mentioned above before starting.
2- Put 75 grams (2.64 oz) of sodium hydroxide in one beaker.
3- Pour 175 grams (6.17 oz) of distilled water into a second beaker.
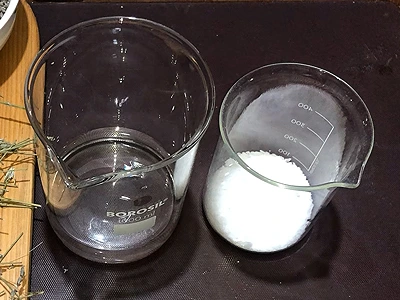
4- Slowly empty the beaker containing the sodium hydroxide into the beaker containing the distilled water:
- Start with a small amount and mix with a spatula; continue until you add all of the sodium hydroxide.
- It is important not to do this in the opposite way: it’s dangerous to pour the distilled water on top of the sodium hydroxide!
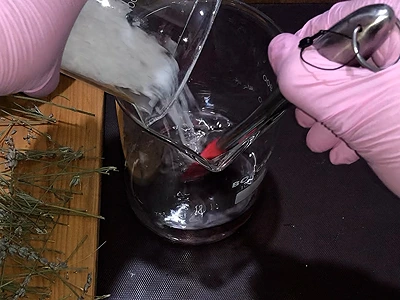
5- After the sodium hydroxide has dissolved fully, let the contents cool down. Ensure the beaker containing the sodium hydroxide solution is safely out of reach of children and pets.
D- Making the Soap
1- After about one hour, both the mix of “olive oil and lavender essence” and the mix of “sodium hydroxide and water”, should be at room temperature.
2- Let’s prepare the quantities of the remaining ingredients first:
- Coconut oil: 125 grams (4.40 oz)
- Palm oil: 125 grams (4.40 oz)
- Sweet almond oil: 25 grams (0.88 oz)
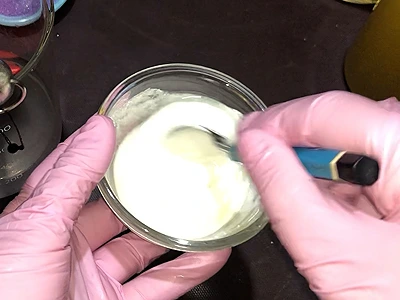
- Prepare a mix of 2 teaspoons of titanium dioxide powder, and 2 tablespoons of vegetable glycerine
- Mica powder, purple color: 4 grams (0.14 oz)
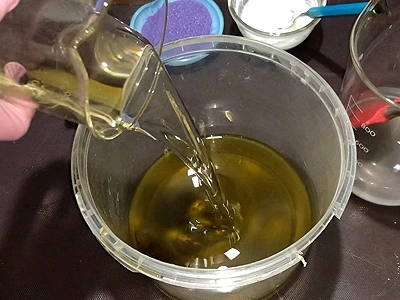
3- Pour the 125 grams (4.40 oz) of coconut oil into the olive oil and lavender essence container.
4- Add the 125 grams (4.40 oz) of palm oil.
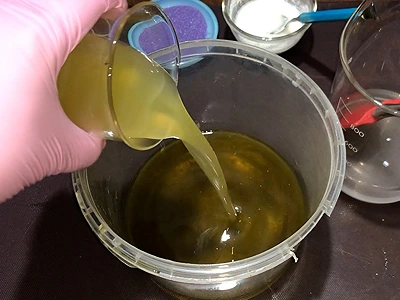
Note: As you can observe from the images, the coconut oil and palm oil I am using are in liquid form due to the warmer summer temperatures. Had I been making this soap in winter, they would have been solid. In such a scenario, when adding them to the mixture of olive oil and lavender essence, I would have needed to melt them by placing the container in a hot water bath. Then, I would have cooled them to room temperature.
5- Mix the oils and the lavender essence with a clean silicone spatula.
6- Slowly, and while stirring, pour the mix of “sodium hydroxide and water” into the oils.
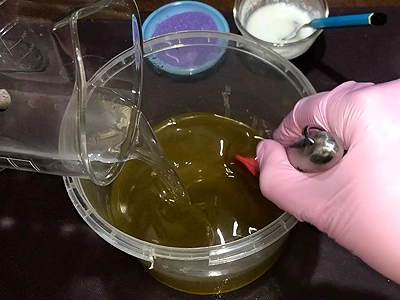
Note: Stir only with a silicone spatula, large wooden spoon, or stainless steel spoon.
7- Using an electric hand mixer, whip up the contents for 3-5 seconds, then stop the electric mixer, and stir with the spatula for a few seconds. Repeat the process one more time.
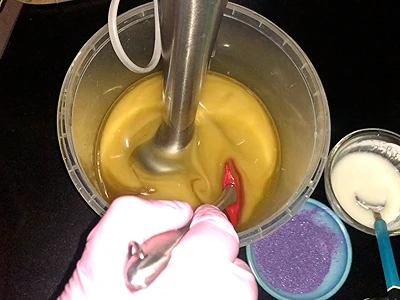
8- At this stage, we can add the titanium dioxide solution. Why are we using this ingredient? Because the soap mix in the container is currently yellow in color; we want to lighten it to be able to add purple mica color in order to give our final soap the lavender color.
Slowly, add the titanium dioxide solution, and keep alternating every few seconds between mixing with the electric mixer and manual stirring with a spatula.
9- Now that you have added the titanium dioxide solution, you can see that the yellow color of the mix has lightened considerably.
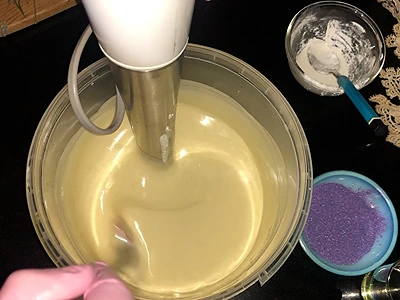
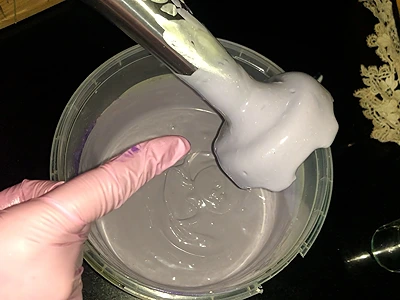
10- Continue alternating between the electric mixer and manual stirring, till you see the soap mix thicken. When you achieve this thickening, and you do not see any oil layer on the surface, this means that the saponification (the process of making the soap) is about to finish.
11- Add the 4 grams (0.14 oz) of purple mica color, and mix alternately with the electric mixer and the spatula.
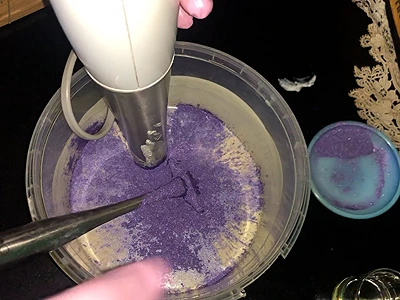
12- Add the 25 grams (0.88 oz) of the sweet almond oil (5% superfat).
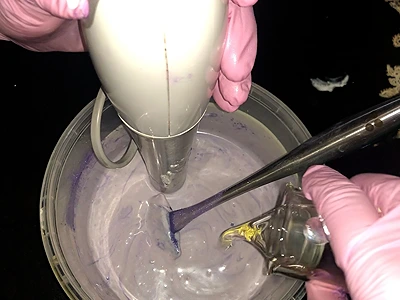
13- Now, continue mixing, alternating between the electric mixer and the spatula to complete the saponification process. Don’t let the mix thicken excessively, as this will make it difficult to pour into the soap mold.
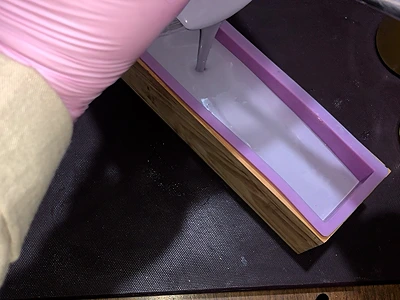
14- Pour the soap mix into the rectangular mold.
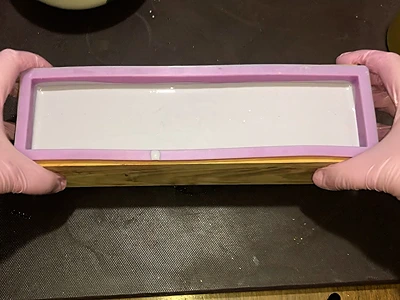
15- Holding the filled mold with both hands, gently shake it, and tap it a few times on the work table, to allow the mix to settle and to get rid of any air bubbles.
E- Decorating the Soap and Finishing
1- Let the mold cool down for 10 minutes, for the soap to harden a little. This will allow us to imprint a design on the soap surface.
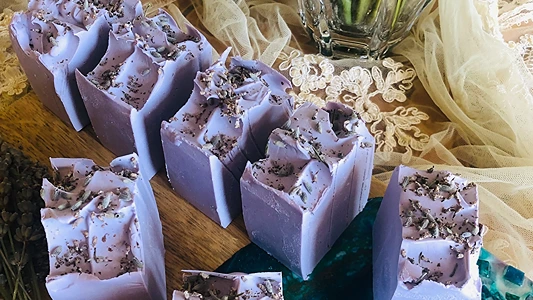
2- With a spoon, make a nice design on the surface of the soap, as per the image below. With the back of the spoon, push the soap starting at the edge toward the center. Repeat on the other side.
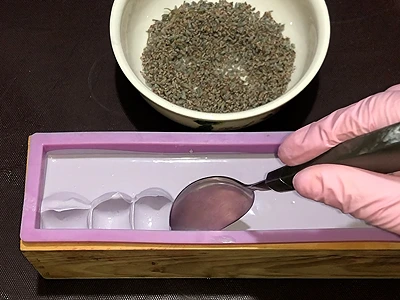
3- Sprinkle some dried lavender on the surface.
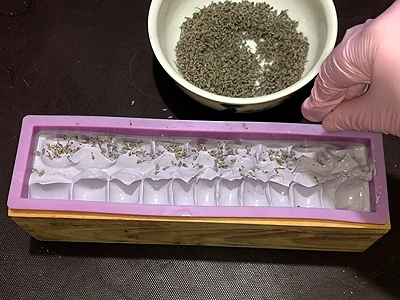
4- Don’t mistake it for an ice cream cake and eat from it!
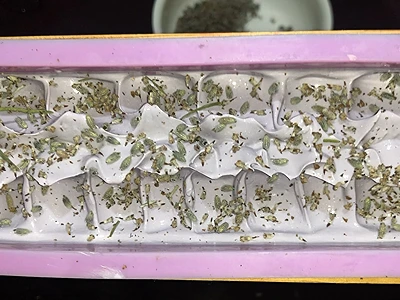
5- Let the soap in the mold cool down and harden for 12-24 hours, depending on your room temperature.
6- After the soap has fully solidified, carefully remove it from the mold.
7- Cut the soap with a knife into appropriate bar size.
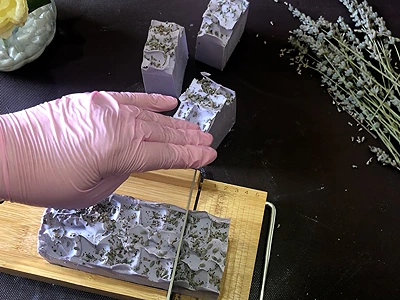
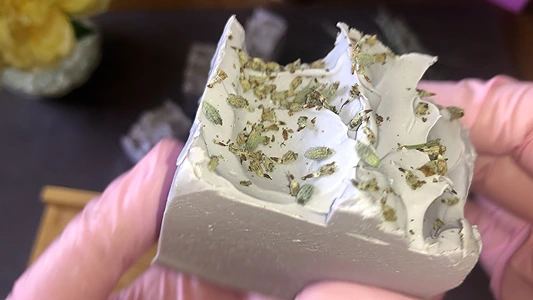
8- Important: Now, you must leave the soap bars to cure for 6 weeks. This will allow the sodium hydroxide to dissipate completely. Only then can you use the soap or package it for gifting.
How to Use: DIY Cold Process Lavender Soap
a. Begin by wetting your hands or body under a gentle stream of running water.
b. Take hold of your beautifully crafted lavender soap bar.
c. Gently rub the soap between your hands or glide it directly over your body to produce a lavish lather.
d. Massage the creamy lather across your skin, ensuring a thorough and indulgent cleanse.
e. Rinse off the soap using water, allowing the calming lavender scent to linger as you wash away impurities.
f. After rinsing, delicately pat your skin dry with a soft towel, relishing the delicate scent and newfound softness.
Embrace this serene moment of self-care, letting the soothing properties of your handmade lavender soap envelop you in relaxation.
Benefits
Top 5 benefits of using your own DIY Cold Process Lavender Soap:
Calming Aromatherapy: Lavender is renowned for its relaxing aroma, which can help reduce stress and promote a sense of tranquility. Using the soap allows you to immerse yourself in its gentle scent, transforming your shower routine into a therapeutic experience.
Skin-Nourishing Ingredients: The soap’s blend of natural oils like olive oil, coconut oil, and sweet almond oil provides your skin with essential nutrients and hydration. These oils contribute to a soft, supple complexion, making your skin feel rejuvenated after each use.
Gentle Cleansing: The cold process method preserves the integrity of the soap’s ingredients, ensuring a gentle yet effective cleanse. Unlike harsh commercial soaps, your homemade lavender soap respects your skin’s natural balance while removing dirt and impurities.
Handmade Artistry: Crafting your soap imbues each bar with a personal touch. The time and care you invest in making it translate to a luxurious bathing experience, offering a sense of accomplishment and a connection to the creative process.
Reduced Chemical Exposure: By creating your soap, you have control over the ingredients, omitting harmful chemicals commonly found in store-bought alternatives. This empowers you to make conscious choices for your skin’s health and overall well-being.
Frequently Asked Questions
FAQ 1: Is making cold process lavender soap difficult for beginners?
Reply: Not at all! Our step-by-step guide simplifies the process, making it beginner-friendly. Just follow the instructions carefully, and you’ll be crafting your own soothing bars in no time.
FAQ 2: Will the soap leave my skin feeling dry?
Reply: No. The combination of oils like coconut, olive, and sweet almond helps maintain your skin’s moisture, leaving it soft and supple after each use.
FAQ 3: Can I customize the soap’s color and design?
Reply: Absolutely! Feel free to experiment with mica color powders to create unique hues. You can also use molds to shape your soap as you like.
FAQ 6: Is it safe to use lye in soap making?
Reply: Yes, when used correctly. Lye is an essential component of soap making, but it’s crucial to handle it with care. Follow safety precautions and instructions meticulously to ensure a safe and successful soap-making experience.
FAQ 7: Can I gift these soaps to others?
Reply: Definitely! Handcrafted lavender soap makes a thoughtful and personalized gift. Wrap them creatively, and you’ll be sharing the benefits of your soothing self-care with your loved ones.
Here are more articles on how to make your own natural soaps:
- Create Dazzling DIY Glycerine Soap for Gifts: Lively and Unique!
- DIY Natural Soap for Oily Skin with Green Clay: Reveal Your Best Skin
- Colorful DIY Glycerine Soap with Toys: Making Handwashing Fun for Kids
- DIY Musk Bath Bomb: Elevate Your Home Spa with Ultimate Relaxation
- DIY Rose & Frankincense Soap: A Luxurious Beauty Essential
Video How-To on My Channel | Jinane World
The steps to make the DIY Cold Process Lavender Soap are demonstrated in this video.
