Introducing our DIY Natural Soap for Oily Skin with the magic of Green Clay! This simple yet powerful recipe will help you achieve the clear, radiant complexion you’ve always dreamed of. Say goodbye to excess oil and hello to your best skin ever!
Let’s dive into the world of green clay and discover the wonders it holds for oily skin. Get ready to pamper yourself with this amazing homemade soap that promises to rejuvenate and revitalize, all while providing you with the confidence of naturally beautiful skin. Let’s begin!
Ingredients Needed
- Glycerine soap, of high quality. Otherwise, when you melt the soap, it won’t give you time to work with it as it will begin hardening.
- Green clay powder
- Orange essential oil
- Optional – Mica color powder, green
Notes on Ingredients
Choose high-quality ingredients to boost the effectiveness and safety of your DIY beauty products.
When an essential oil is included, I use either concentrated or diluted essential oils. If using concentrated essential oils, use up to 0.5% by weight to ensure safety for all skin types. To use diluted essential oils, mix 1 gram (0.035 oz) of concentrated essential oil with 100 grams (3.5 oz) of sweet almond oil or jojoba oil.
If a recipe calls for fragrance oil, you can use diluted essential oil instead to benefit from both its scent and therapeutic effects. This provides a natural alternative to synthetic fragrance oils and offers additional benefits.
Tools Needed
- Scale to weigh quantities
- Bowl
- Tablespoon
- Small silicone spatula
- Silicone mold for the soap
Prior to use, ensure that both your utensils and containers are properly cleaned and disinfected. Wash them with warm soapy water, dry with a tissue, and then sanitize by spraying with 70% medical alcohol. Wipe them clean and let them air dry before use.
Steps: DIY Natural Soap for Oily Skin
1- Start by cutting up 120 grams (4.23 oz) of glycerine soap into pieces.
2- Place them in a bowl.
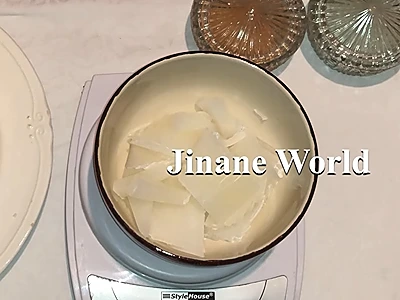
3- Melt the glycerine soap pieces in a hot water bath (bain-marie). A bain-marie is done by placing the bowl in a larger pot of hot steaming water. This will gradually melt whatever is inside the bowl without causing it to burn. As the contents of the bowl melt, make sure to mix every now and then.
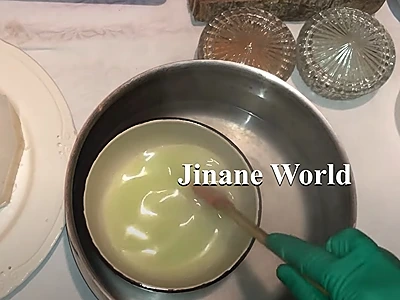
4- Optional – Add 0.5 grams (0.017 oz) of mica powder, green color. You don’t really need to add color as the clay powder is green in itself. However, if you prefer to obtain a stronger color soap, add a little of mica.
5- Mix well.
6- Add 1 full tablespoon of green clay powder (approximately 7.6 grams or 0.26 oz).
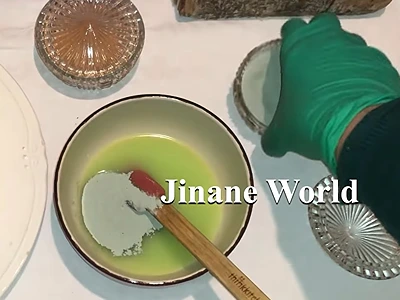
7- Mix thoroughly.
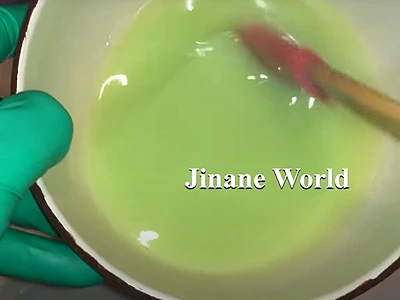
8- Add 4 drops of orange essential oil.
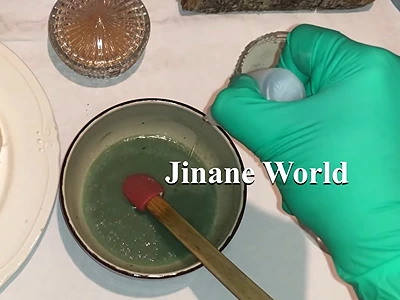
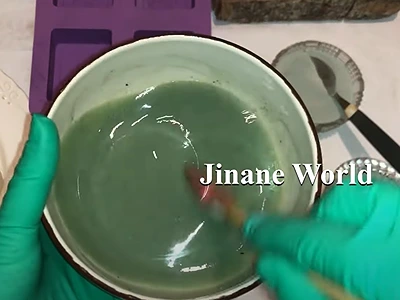
9- Mix again.
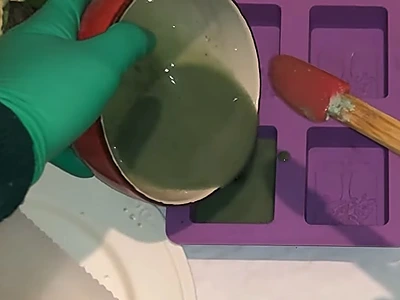
10- Pour the soap mix into the mold.
11- Leave it to cool down and solidify.
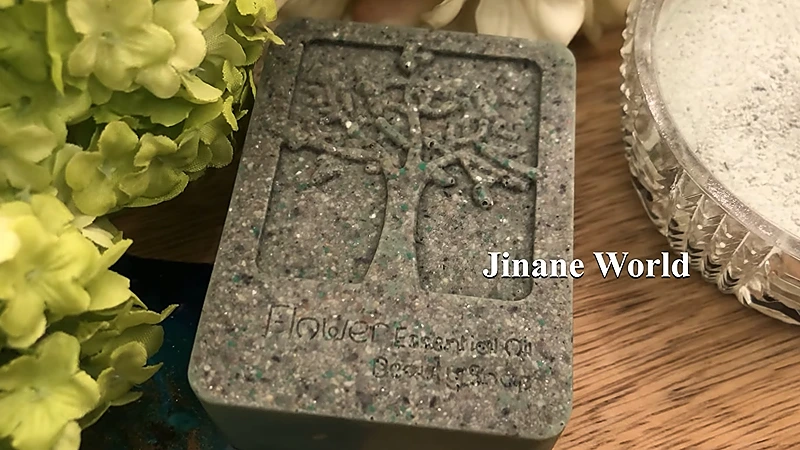
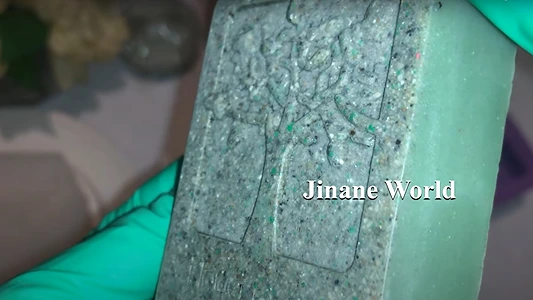
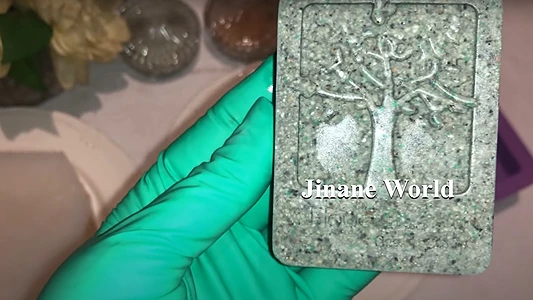
12- After the soap has fully hardened, remove it carefully from the mold.
13- Your DIY Natural Soap for Oily Skin with Green Clay is now done!
How to Use the DIY Natural Soap for Oily Skin
Step 1: Begin by wetting your face with lukewarm water. This will help open up your pores and allow the soap to work more effectively.
Step 2: Take the DIY Natural Soap for Oily Skin in your hands and create a lather by rubbing it between your palms. The creamy foam will be gentle on your skin.
Step 3: Apply the lathered soap to your face, focusing on areas that tend to get oily, such as the T-zone (the area of your face encompassing the forehead, nose, and chin). Gently massage the soap onto your skin using circular motions, allowing the green clay to absorb excess oil and impurities.
Step 4: Let the soap sit on your skin for 5 minutes. This step allows the green clay to work its magic and deeply cleanse your pores.
Step 5: After 5 minutes, rinse your face thoroughly with cool water to remove the soap completely. The cool water will help to close your pores, leaving your skin feeling refreshed.
Step 6: Pat your face dry with a clean towel, avoiding rubbing to prevent any irritation.
Step 7: For best results, follow up with your favorite oil-free moisturizer to keep your skin hydrated without adding extra oil.
Step 8: Repeat this daily skincare ritual, ideally in the morning and before bedtime, to maintain balanced and glowing skin.
With the power of green clay and the nourishing properties of this DIY natural soap, you’ll soon notice a visible difference in your skin’s texture and appearance.
Benefits: DIY Natural Soap for Oily Skin
Controls Excess Oil: The star ingredient, green clay, has natural absorbent properties that work wonders in controlling excess oil production on your skin. By gently removing excess sebum, the soap helps prevent clogged pores and reduces the occurrence of acne breakouts.
Deep Cleansing: The combination of natural ingredients in this DIY soap provides a thorough and deep cleansing experience. Green clay acts as a magnet, drawing out impurities, dirt, and toxins from the skin, leaving it feeling fresh and revitalized.
Balances Skin’s pH: Oily skin is often associated with an imbalanced pH level, which can lead to various skin issues. With regular use, this natural soap helps restore the skin’s pH balance, promoting a healthier complexion and reducing excessive oiliness.
Soothes and Calms: Green clay is renowned for its soothing and calming properties, making it perfect for irritated or inflamed skin. The soap’s gentle formulation helps reduce redness and inflammation, providing a soothing effect on sensitive oily skin.
Enhances Skin Radiance: As the DIY natural soap effectively detoxifies and purifies the skin, it allows your natural radiance to shine through. Regular use reveals a brighter, more radiant complexion, giving you the confidence to embrace your best skin ever.
With these top benefits, incorporating DIY Natural Soap for Oily Skin with Green Clay into your daily skincare routine is a surefire way to achieve a balanced, glowing, and oil-free complexion.
Frequently Asked Questions: DIY Natural Soap for Oily Skin
1. Is this DIY natural soap suitable for all skin types, or is it specifically for oily skin?
This DIY natural soap is specially formulated to cater to the needs of oily skin. The inclusion of green clay helps regulate excess oil production and purifies the pores. However, those with dry or sensitive skin might find it too drying.
2. How often should I use this soap for the best results?
For optimal results, use this DIY natural soap twice a day – once in the morning and once before bedtime. The soap’s daily application will help keep excess oil at bay, maintaining a more balanced and glowing complexion over time.
3. Can I leave the soap on my skin for longer than the recommended 5 minutes?
It’s best to adhere to the recommended 5-minute duration. Leaving the soap on for longer may cause over-drying or irritation, especially if you have sensitive skin. If you wish to extend the treatment time, consider performing a patch test on a small area of your skin first to gauge your skin’s reaction.
4. Can I customize the DIY natural soap with additional ingredients for specific skincare concerns?
Absolutely! The beauty of DIY skincare lies in its versatility. You can add other beneficial ingredients like essential oils (lavender, tea tree, etc.) or aloe vera gel to address additional skincare concerns. Just ensure that any added ingredients are compatible with your skin type and won’t cause any adverse reactions.
5. How long can I store this DIY natural soap, and what’s the best way to keep it fresh?
Since this soap is made with natural ingredients, it’s best to use it within 3 to 6 months for optimal efficacy. To prolong its shelf life, store the soap in a cool, dry place, away from direct sunlight and moisture. Using an airtight container can help maintain its freshness and effectiveness.
Remember, while DIY natural soap offers numerous benefits, individual skin responses may vary. Always perform a patch test before using any new skincare product and discontinue use if you experience any irritation or discomfort.
For specific concerns or persistent skin issues, consult a skincare professional for personalized guidance. Enjoy your journey to naturally radiant and balanced skin with this DIY natural soap!
Here are more articles on how to make your own natural soaps:
- Colorful DIY Glycerine Soap with Toys: Making Handwashing Fun for Kids
- DIY Musk Bath Bomb: Elevate Your Home Spa with Ultimate Relaxation
- DIY Rose & Frankincense Soap: A Luxurious Beauty Essential
- Invigorate Your Skin with DIY Matcha Creamy Soap: A Refreshing Tutorial
- DIY Creamy Soap with Blue Nila: Nourish Your Skin with Homemade Bliss
Video How-To on My Channel | Jinane World
The steps to make the DIY Natural Soap for Oily Skin with Green Clay are demonstrated in the first 14m 15s of this video.