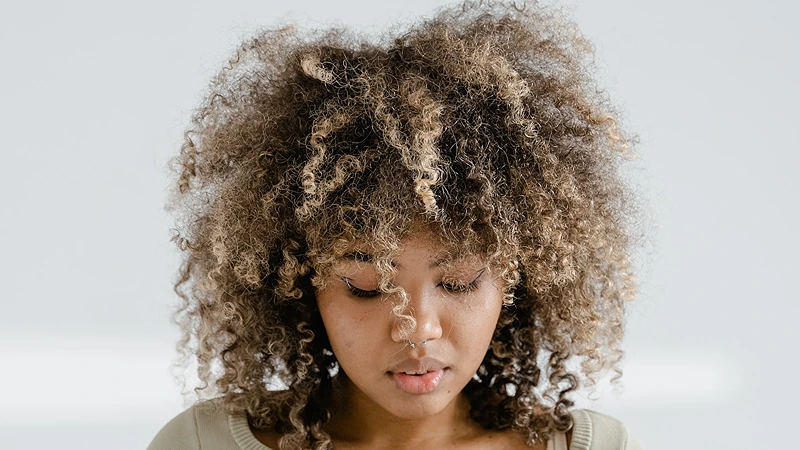
Tired of battling frizzy and unmanageable hair? Introducing DIY Natural Keratin for Hair – an alternative remedy designed to tackle the challenges of frizz and unruliness. Discover a natural and effective solution that could transform your hair care routine.
In this article, we delve into this innovative approach and guide you through the simple steps to harness its potential. Say goodbye to bad hair days and embrace the possibility of radiant, smooth, and revitalized locks with DIY Natural Keratin for Hair.
Ingredients Needed
Choose high-quality ingredients to boost the effectiveness and safety of your DIY beauty products.
- Instant yeast
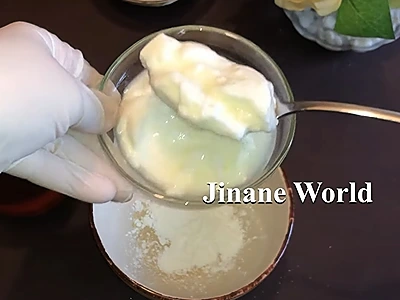
- Yoghurt
- Cornstarch
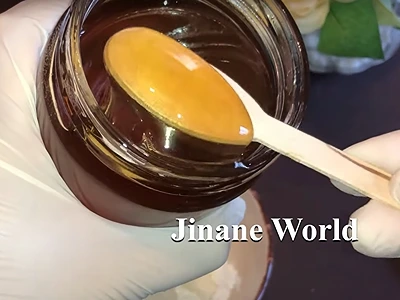
- Honey, natural and organic
Tools Needed
- Bowl
- Tablespoon
- Wooden teaspoon
- Small silicone spatula
Prior to use, ensure that both your utensils and containers are properly cleaned and disinfected. Wash them with warm soapy water, dry with a tissue, and then sanitize by spraying with 70% medical alcohol. Wipe them clean and let them air dry before use.
Steps: DIY Natural Keratin for Hair
Spoons Explained!
In some articles, we use spoon measurements for non-liquid ingredients. These terms apply to both tablespoons and teaspoons:
- One Spoon: Ingredient filled and leveled in a measuring spoon.
- Rounded Spoon: Ingredient slightly piled above the spoon’s edge.
- Heaped Spoon: Ingredient scooped as high as possible on the spoon.
- Slightly Heaped Spoon: A bit more than a rounded spoon but not overly heaped.
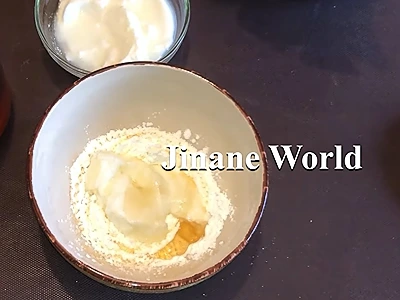
1- Start by adding one rounded tablespoon of instant yeast in a bowl.
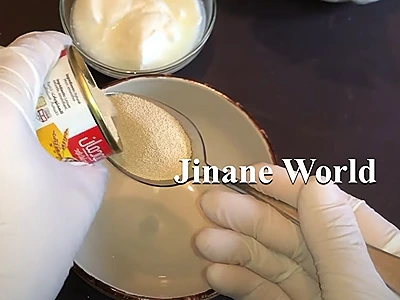
2- Add one rounded tablespoon of cornstarch.

3- Add one heaped tablespoon of yoghurt.
4- Add one teaspoon of natural honey. It is advisable to use a wooden teaspoon to scoop the honey.
Note: If you don’t like the smell of instant yeast, you can add 2 drops of your preferred essential oil.
5- All the ingredients have now been added.
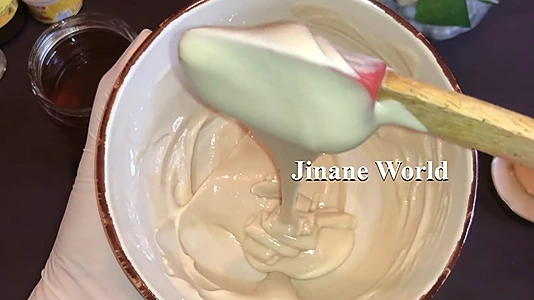
6- Mix thoroughly till you get a homogeneous blend.
7- Your DIY Natural Keratin for Hair is now done!
How To Use: DIY Natural Keratin for Hair
Once you’ve crafted your DIY Natural Keratin for Hair, it’s time to unlock its potential for transforming your frizzy and unmanageable locks. Here’s a step-by-step guide on how to use it effectively:
a. Strand by Strand Application: Begin by sectioning your hair to make the application process easier. Take small sections of hair and apply the natural keratin mixture from the roots to the hair ends. Ensure each strand is coated evenly to maximize the benefits.
b. Bathing Cap Coverage: After applying the keratin mixture, cover your hair with a bathing cap. This step creates a controlled environment that helps the keratin penetrate deeply into each strand, enhancing its effectiveness.
c. One-Hour Waiting Time: Allow the DIY Natural Keratin to work its magic by leaving the mixture on your hair for approximately one hour. During this time, the keratin is absorbed, and its nourishing properties begin to revitalize your hair.
d. Shampoo and Condition: After the waiting period, it’s time to rinse off the keratin mixture. Start by thoroughly shampooing your hair to remove any residue. Follow up with your favorite conditioner to lock in the benefits and ensure your hair remains soft and manageable.
By following these simple yet effective steps once a week, you can make the most of your DIY Natural Keratin for Hair treatment.

Benefits
DIY Natural Keratin for Hair offers a range of remarkable benefits that go beyond conventional hair treatments. Here are the top five advantages you can expect from incorporating DIY Natural Keratin into your beauty regimen:
Frizz Control: Bid farewell to the relentless frizz that often accompanies humid days or styling. DIY Natural Keratin forms a protective barrier around each strand, taming frizz and keeping your hair smoother and more controlled, regardless of the weather.
Enhanced Manageability: Unruly hair can often feel like a challenge to style and maintain. With DIY Natural Keratin, your hair becomes more manageable and easier to work with. Say hello to effortless styling and waves that stay in place.
Intense Nourishment: Infused with natural ingredients like yogurt, honey, and instant yeast, this DIY keratin treatment provides a surge of nourishment to your hair. It helps repair and rejuvenate damaged strands, restoring their health and vitality.
Long-Lasting Shine: Dull and lackluster hair can be transformed into a radiant crown of glory. DIY Natural Keratin not only promotes shine but also helps maintain it over time, giving your hair a luminous, healthy glow.
Overall Hair Health: Beyond the immediate benefits, DIY Natural Keratin works to improve the overall health of your hair. Regular use can lead to stronger, more resilient strands, reduced breakage, and a noticeable improvement in the texture of your hair.
Frequently Asked Questions
What is DIY Natural Keratin for Hair?
DIY Natural Keratin is a homemade hair treatment crafted from natural ingredients like yogurt, honey, and instant yeast. It’s designed to address frizz and unmanageability, providing a nourishing boost to your hair health.
How does DIY Natural Keratin work?
The natural ingredients in DIY Natural Keratin penetrate the hair strands, creating a protective layer that helps reduce frizz, enhance manageability, and promote overall hair health.
How often should I use DIY Natural Keratin?
For optimal results, use DIY Natural Keratin once a week only. Overuse may lead to excessive protein buildup, so moderation is key.
Can I follow DIY Natural Keratin with my usual hair care routine?
Yes, after rinsing out the keratin mixture, follow up with your regular shampoo and conditioner. This helps maintain the nourishing effects while leaving your hair clean and fresh.
Here are more articles on how to make natural haircare products:
- Effective DIY Hair Treatment: Nourishing Oil Bath for Frizzy and Dry Hair
- DIY Hair Thickening Cream: Boost Hair Volume Naturally
- Effective DIY Split End Treatment: 6 Natural Oils for Healthy Hair
- DIY Natural Serum for Split Ends with Egg Yolk: Revive and Shine Your Hair
- Care for Your Hair: Power-Packed DIY Shampoo for Hair Growth and Health
Video How-To on My Channel | Jinane World
The steps to make the DIY Natural Keratin for Hair are demonstrated between the timestamps 2m7s and 4m20s in this video.