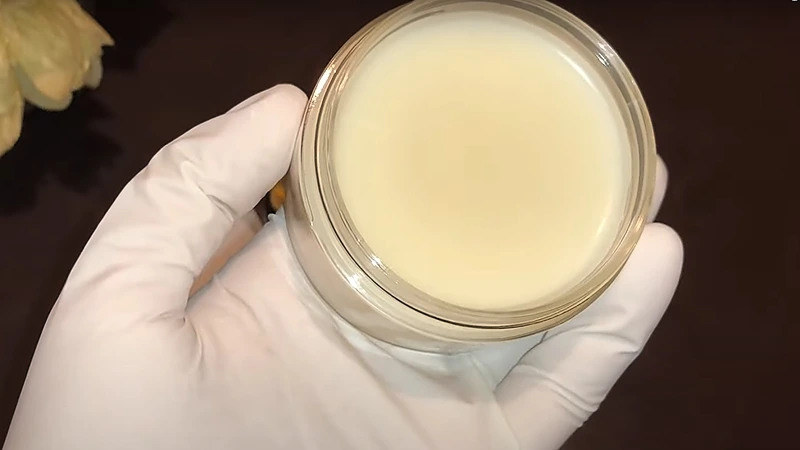
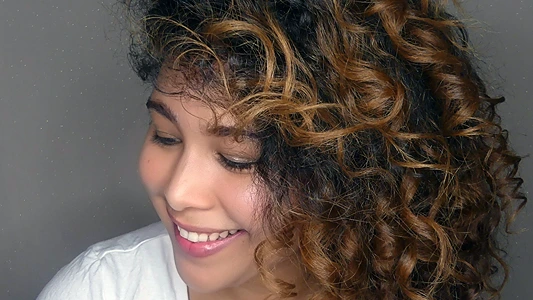
This DIY Hair Thickening Cream is carefully crafted using three potent ingredients: shea butter, coconut oil, and castor oil. These natural wonders are known for their nourishing and revitalizing properties, making them ideal for transforming your hair from fine and flat to full and fabulous. No more spending on expensive commercial products; with just a few simple steps, you can create your very own hair thickening cream right at home.
Join us on this exciting journey as we explore the benefits of each ingredient and guide you through the easy DIY process. Get ready to be amazed by the results of our DIY Hair Thickening Cream!
Ingredients Needed
- Shea butter (unscented)
- Coconut oil
- Castor oil
- Jasmine essential oil
Notes on Ingredients
Choose high-quality ingredients to boost the effectiveness and safety of your DIY beauty products.
When an essential oil is included, I use either concentrated or diluted essential oils. If using concentrated essential oils, use up to 0.5% by weight to ensure safety for all skin types. To use diluted essential oils, mix 1 gram (0.035 oz) of concentrated essential oil with 100 grams (3.5 oz) of sweet almond oil or jojoba oil.
If a recipe calls for fragrance oil, you can use diluted essential oil instead to benefit from both its scent and therapeutic effects. This provides a natural alternative to synthetic fragrance oils and offers additional benefits.
Tools Needed
- Scale to weigh quantities
- Bowl
- Tablespoon
- Teaspoon
- Small silicone spatula
- Glass container to store the DIY Hair Thickening Cream
Prior to use, ensure that both your utensils and containers are properly cleaned and disinfected. Wash them with warm soapy water, dry with a tissue, and then sanitize by spraying with 70% medical alcohol. Wipe them clean and let them air dry before use.
Steps: DIY Hair Thickening Cream
1- Start by adding 50 grams (1.76 oz) of shea butter into a bowl.
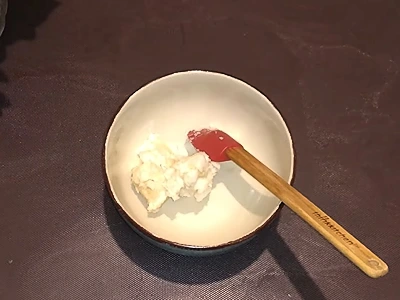
2- Add 50 grams (1.76 oz) of coconut oil.
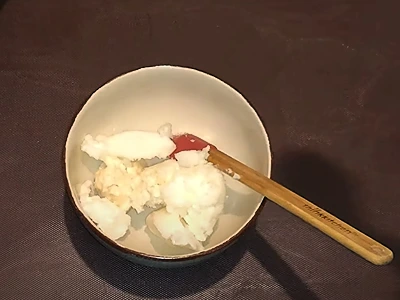
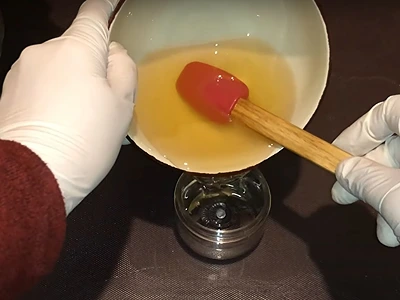
3- Melt the contents in a bain-marie (hot water bath). A bain-marie is done by placing the bowl in a larger pot of hot steaming water. This will gradually melt whatever is inside the bowl. As it melts, make sure to mix every now and then.
4- Add 20 milliliters (0.67 US fl oz) of castor oil. Mix the contents.
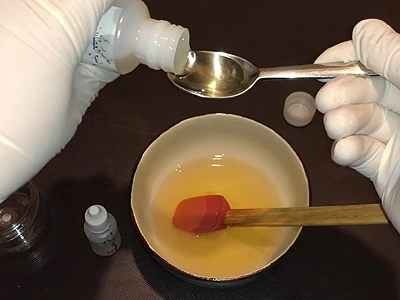
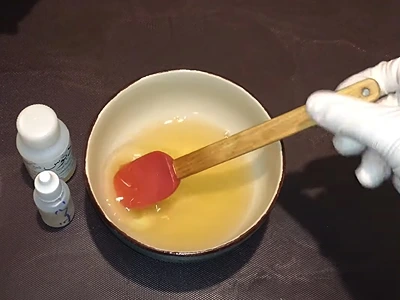
5- After the contents have cooled down a little, add 4 drops of jasmine essential oil.
6- With the small spatula, mix the ingredients well.
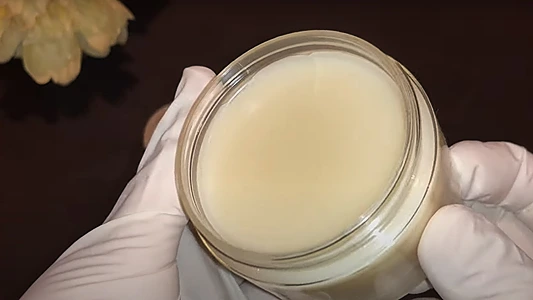
7- Pour the mix into a glass container.
8- Leave it to cool down fully. And you’re done!
How To Use: DIY Hair Thickening Cream
Using this DIY Hair Thickening Cream is a simple yet effective process that requires just a little dedication once a week. Follow these easy steps to achieve the best results:
a. Application: Before applying the cream, ensure your hair is clean and free from any styling products. Part your hair into sections, making it easier to apply the cream evenly. Using your fingertips or a clean brush, gently massage the DIY hair thickening cream onto your scalp, focusing on the roots.
b. Covering: Once you’ve applied the cream to your scalp, cover your hair with a warm towel. The gentle warmth will help the oils penetrate deeper into your hair follicles, providing enhanced nourishment and promoting hair thickening.
c. Waiting Period: Now comes the relaxing part. Leave the DIY Hair Thickening Cream on your scalp for 3 hours. During this time, you can go about your daily activities or simply sit back and unwind while the cream works its magic.
d. Rinse and Cleanse: After the waiting period is over, it’s time to rinse and cleanse your hair. Use a gentle shampoo to wash away the cream thoroughly. You may need to shampoo twice to ensure there’s no residue left behind.
e. Patience and Consistency: Achieving noticeable results may take some time, so it’s essential to be patient and consistent with this hair care routine. Use the DIY Hair Thickening Cream once a week to see gradual improvements in your hair’s thickness and volume.
Remember, natural remedies work best with consistent use and a healthy overall hair care routine.

Benefits: DIY Hair Thickening Cream
Using this DIY Hair Thickening Cream offers a wide range of benefits for your hair and scalp. Here are the top five advantages you can expect from incorporating this natural remedy into your hair care routine:
Increased Hair Volume: The DIY Hair Thickening Cream’s powerful blend of shea butter, coconut oil, and castor oil deeply nourishes and strengthens your hair, leading to improved volume and thickness. Say hello to fuller, more luscious locks that exude vitality and bounce.
Enhanced Hair Growth: The combination of castor oil and coconut oil in the cream promotes healthier hair growth. These oils are rich in essential fatty acids, vitamins, and nutrients that nourish the hair follicles, stimulating new hair growth and reducing hair breakage.
Revitalized Scalp: Applying the cream directly to your scalp helps revitalize and moisturize it. Dry and flaky scalp issues are addressed, promoting a healthier environment for hair growth and reducing the risk of dandruff and itchiness.
Nourished and Silky Hair: The natural ingredients in the DIY Hair Thickening Cream infuse your hair with essential moisture, restoring its softness and smoothness. Experience a significant reduction in frizz and flyaways, leading to more manageable and effortlessly styled hair.
Cost-Effective and Chemical-Free: Unlike many commercial hair thickening products that contain harsh chemicals, our DIY cream is entirely natural and free from harmful additives. Making the cream at home is not only cost-effective but also allows you to have full control over the ingredients you use on your hair.
Frequently Asked Questions: DIY Hair Thickening Cream
FAQ 1: Can this DIY Hair Thickening Cream be used on all hair types?
Reply: Absolutely! The DIY Hair Thickening Cream is suitable for all hair types, whether you have straight, wavy, curly, or coily hair. The natural ingredients work harmoniously to nourish and strengthen hair, promoting thickness and volume, regardless of your hair’s texture.
FAQ 2: How frequently should I apply the DIY Hair Thickening Cream?
Reply: For optimal results, we recommend applying the DIY Hair Thickening Cream once a week. Consistency is key in achieving the desired hair thickness and volume. Over time, you’ll notice the cumulative benefits of regular use.
FAQ 3: Can I leave the DIY Hair Thickening Cream on my hair overnight?
Reply: While leaving the cream on overnight might seem tempting, we advise against it. Three hours of application with a warm towel is sufficient for the natural ingredients to penetrate deeply into your scalp and hair follicles. Leaving it on for extended periods may lead to greasy hair or scalp irritation.
FAQ 4: Will this DIY Hair Thickening Cream cause any adverse reactions?
Reply: This DIY Hair Thickening Cream uses all-natural ingredients, making it generally safe for most individuals. However, it’s always wise to conduct a patch test before the first application, especially if you have known allergies to any of the ingredients. If you experience any unusual reactions, discontinue use immediately and consult a dermatologist.
FAQ 5: Can I modify the recipe to suit my preferences?
Reply: Absolutely! The DIY Hair Thickening Cream recipe is flexible, allowing you to tailor it to your liking. However, it’s essential to maintain the proportions of shea butter, coconut oil, and castor oil to ensure the cream’s effectiveness. Feel free to experiment with essential oils or other nourishing ingredients, but always be mindful of potential allergies or sensitivities.
Here are more articles on how to make natural haircare products:
- Effective DIY Split End Treatment: 6 Natural Oils for Healthy Hair
- DIY Natural Serum for Split Ends with Egg Yolk: Revive and Shine Your Hair
- Care for Your Hair: Power-Packed DIY Shampoo for Hair Growth and Health
- DIY Aloe Vera Coconut Oil for Hair: Achieving Strong and Shiny Locks at Home With 2 Ingredients
- Empower Your Curls: How to Make a DIY Cream for Curly Hair at Home
Video How-To on My Channel | Jinane World
The steps to make the DIY Hair Thickening Cream are demonstrated in the first 07m of this video.