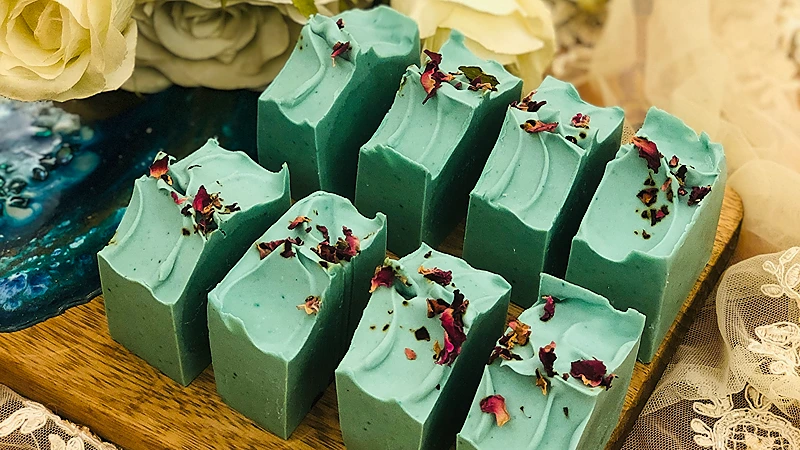
Discover the incredible potential of rosemary with the DIY Rosemary Hair Soap – a solid shampoo that invigorates hair growth and delivers essential nourishment.
Uncover the secrets behind the revitalizing impact of this aromatic herb, all encapsulated within the convenience of a cleansing bar.
Ingredients Needed
Choose high-quality ingredients to boost the effectiveness and safety of your DIY beauty products.
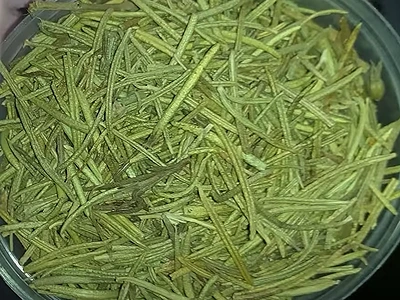
- Dried rosemary leaves
- Distilled water
- Sodium hydroxide (also called caustic soda or lye)
- Olive oil
- Palm oil. Look for certified sustainable palm oil.
- Coconut oil
- Shea butter. It will be used as superfat.
- Titanium dioxide powder. It is commonly used as a white pigment in various cosmetic products, including soaps, to achieve a desired color and appearance.
- Vegetable glycerine
- Mica color powder, green
- Rosemary essential oil
Tools Needed
- Safety items: Latex gloves, safety goggles, face mask
- Scale to weigh quantities
- Large plastic container
- Three glass beakers
- Glass mixing rod
- Silicone spatula
- Tablespoon
- Knife
- Electric hand mixer
- Rectangular silicone mold to hold 800 grams (28.2 oz) of soap mix
Prior to use, ensure that both your utensils and containers are properly cleaned and disinfected. Wash them with warm soapy water, dry with a tissue, and then sanitize by spraying with 70% medical alcohol. Wipe them clean and let them air dry before use.
Safety Precautions
We are using the cold process soap making technique in this guide. This requires mandatory safety measures that you should take during the process:
- No part of your skin should be exposed at any time during the process (a long-sleeved shirt and an apron are good ideas here)
- Don’t let any children or pets come near your soap making work table
- Your soap making table should be in a ventilated area at all times (an open window is a good idea )
- Latex gloves, safety goggles, and face masks should be worn at all times
- Only use silicone, plastic, and stainless steel tools
- All utensils and tools used for cold process soap making should be dedicated solely to this purpose and not used for food preparation.
Steps: DIY Rosemary Hair Soap
1- Ensure that you are applying the necessary safety precautions mentioned above before starting.
Prepare Sodium Hydroxide Solution
2- Put 75 grams (2.64 oz) of sodium hydroxide in one beaker.
3- Pour 175 grams (6.17 oz) of distilled water into a second beaker.
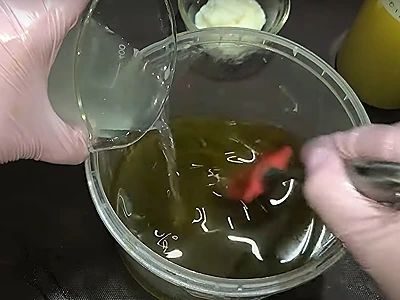
4- Slowly empty the beaker containing the sodium hydroxide into the beaker containing the distilled water:
- Start with a small amount and mix with a glass mixing rod; continue until you add all of the sodium hydroxide.
- It is important not to do this in the opposite way: it’s dangerous to pour the distilled water on top of the sodium hydroxide!
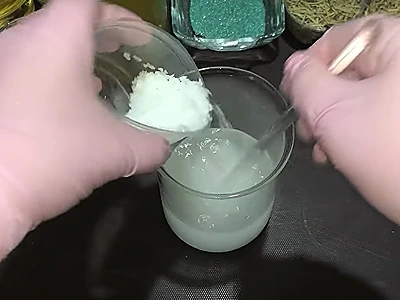
5- After the sodium hydroxide has dissolved fully, let the contents cool down to room temperature. Ensure that the beaker containing the sodium hydroxide solution is safely out of reach of children and pets.
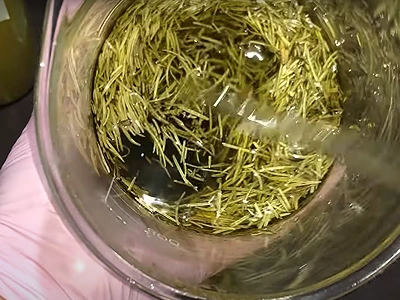
Prepare Rosemary-Infused Olive Oil
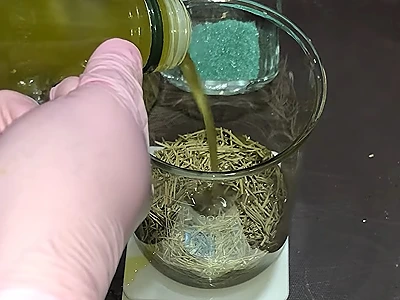
6- In a separate beaker, put 25 grams (0.88 oz) of dried rosemary leaves.
7- Pour 300 grams (10.58 oz) of olive oil over the dried rosemary leaves.
8- Place the beaker containing the olive oil and the rosemary in a bain-marie (hot water bath). A bain-marie is done by placing the beaker in a larger pot of hot steaming water. This will gradually heat the contents in the beaker. Every now and then, stir the contents gently. In this case, keep the beaker in the pot of hot steaming water on a low-temperature stovetop for 30 minutes.
9- After 30 minutes in the bain-marie, the olive oil color has changed, indicating that the oil is now infused with rosemary essence.
10- Allow the mixture of olive oil and rosemary to cool down to room temperature.
11- Next, carefully strain and filter out the rosemary leaves from the infused olive oil.
Prepare the Mixture of Oils
12- Before continuing, let’s prepare the quantities of the following ingredients:
- Rosemary-infused olive oil: 250 grams (8.81 oz)
- Palm oil: 125 grams (4.40 oz)
- Coconut oil: 125 grams (4.40 oz)
- Shea butter as superfat : 25 grams (0.88 oz)
- Prepare a mix of 1 teaspoon of titanium dioxide powder, and 30 grams (1.05 oz) of vegetable glycerine
- Mica powder, green color: 4 grams (0.14 oz)
Note: If the palm oil and the coconut oil are semi-solid because of cold temperature, and if the shea butter is solid, melt them separately in a bain-marie (hot water bath).
13- In a large plastic container, pour the 250 grams (8.81 oz) of the rosemary-infused olive oil.
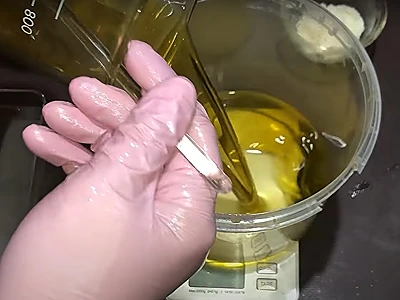
14- Add the 125 grams (4.40 oz) of palm oil.
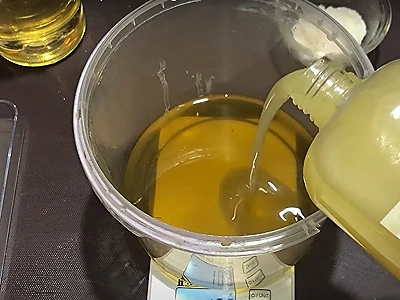
15- Add the 125 grams (4.40 oz) of coconut oil.
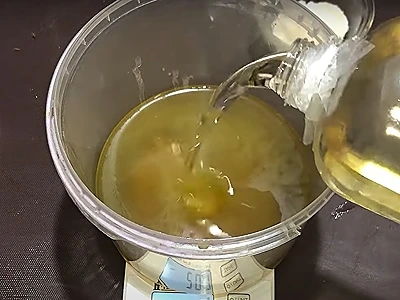
16- With a silicone spatula, stir the oils thoroughly.

Making the Soap
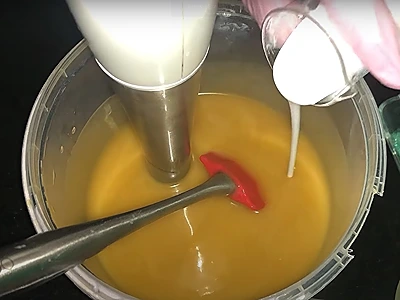
17- Slowly, and while stirring with the spatula, pour the sodium hydroxide solution prepared earlier over the oils.
18- Using an electric hand mixer, whip up the contents for 3-5 seconds, then stop the electric mixer and stir with the spatula for a few seconds. Repeat the process three more times.

19- Now, we add the solution of the titanium dioxide and glycerine. Why are we using this ingredient? Because the soap mix in the container is currently yellow in color; we want to lighten it and add green mica color in order to give our final soap the rosemary hue.
Slowly pour the titanium dioxide solution, and keep alternating every few seconds between mixing with the electric mixer and stirring manually with the spatula.
20- Now that you have added the titanium dioxide solution, you can see that the yellow color of the mix has lightened considerably.
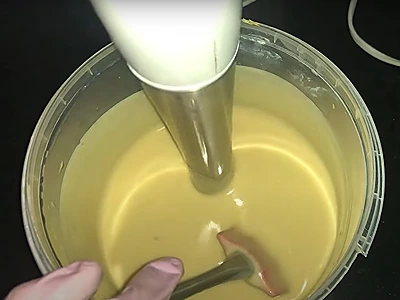
21- Add the 4 grams (0.14 oz) of green mica color, and mix alternately with the electric mixer and the spatula.
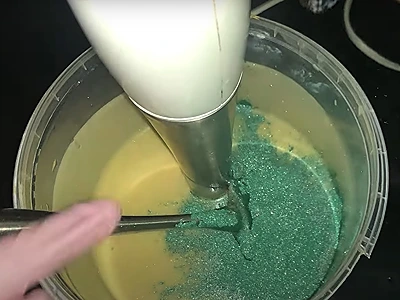
22- Add the 25 grams (0.88 oz) of shea butter (superfat).
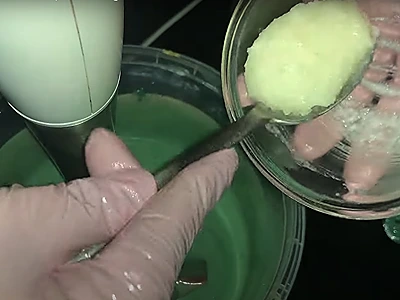
23- Continue alternating between the electric mixer and manual stirring, till you see the soap mix thicken: a viscous, thick layer covers the lower part of the shaft of the electric mixer. When you achieve this thickening, this means that the saponification (the process of making the soap) is complete.
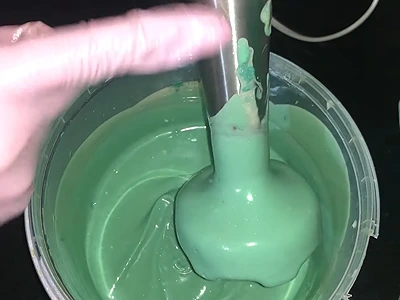
24- Finally, add 20 drops of rosemary essential oil. Give the mixture one final whip-up with the electric mixer. Don’t let the mix thicken excessively, as this will make it difficult to pour into the soap mold.
25- Pour the soap mix into the rectangular mold.
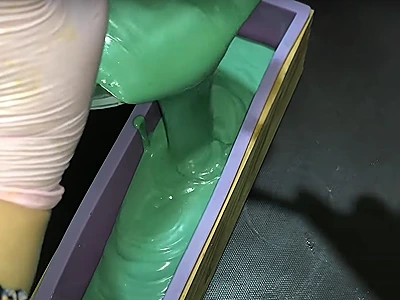
26- Holding the filled mold with both hands, gently shake it, and tap it a few times on the work table, to allow the mix to settle and to get rid of any air bubbles.
27- Let the mold cool down for 10 minutes, for the soap to harden a little. This will allow us to imprint a design on the soap surface.
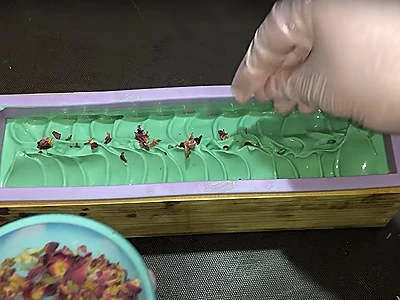
28- After 10 minutes, use a tablespoon to make a nice design on the surface of the soap, as per the image below: with the back of the spoon, push the soap starting at the edge of the mold toward the center. Repeat on the other side.
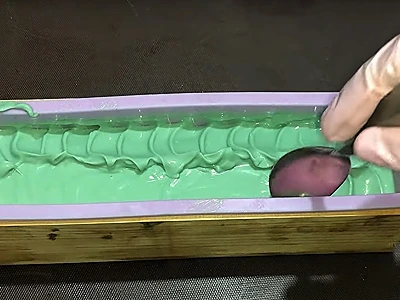
29- You can leave it as is, or sprinkle some dried rose petals on the surface for decoration.
30- Allow the soap in the mold to cool down and harden for 12-24 hours or more, depending on your room temperature.
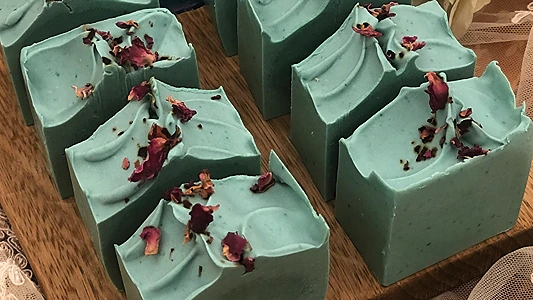
31- After the soap has fully hardened, carefully remove it from the mold, and cut it with a knife into appropriate bar sizes.
32- Important: Now, you must leave the soap bars to cure for a minimum duration of 6 weeks. This will allow the sodium hydroxide to dissipate completely. Only then can you use the soap or package it for gifting.
How to Use: DIY Rosemary Hair Soap
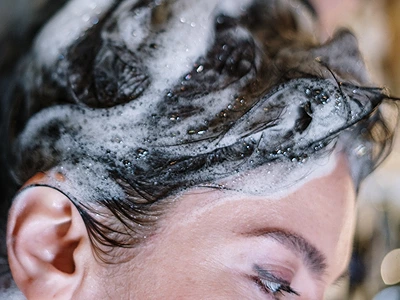
Using the DIY Rosemary Hair Soap is a simple yet indulgent experience that offers benefits for both your hair and skin. To use, follow these steps:
a. Wet: Begin by wetting your hair thoroughly. If you’re also using the soap on your skin, wet the desired areas.
b. Lather: Rub the soap between your hands or directly onto your hair. Gently massage your scalp and work the lather through your hair. If using on the skin, apply in a gentle, circular motion.
c. Rinse: Thoroughly rinse your hair or skin with water until all the soap is washed away.
d. Condition (Optional): Depending on your hair type, you might choose to follow up with a conditioner. This is particularly helpful if you have longer hair.
e. Dry and Enjoy: After rinsing, pat your hair and skin dry with a towel. Feel the natural freshness and nourishment that the rosemary-infused soap provides.
For optimal results, use the DIY Rosemary Hair Soap regularly as part of your hair and skincare routines. The versatile formula ensures you can enjoy the benefits of rosemary’s properties from head to toe.
Benefits
Here are the top 7 benefits of using the DIY Rosemary Hair Soap:
Enhances Hair Growth: Rosemary is renowned for its potential to stimulate hair follicles, promoting healthy hair growth.
Nourishes Scalp: The soap’s natural ingredients provide essential nutrients to your scalp, helping to maintain its health and balance.
Reduces Dandruff: Rosemary’s anti-inflammatory and antimicrobial properties can assist in reducing dandruff and soothing an irritated scalp.
Strengthens Hair: Regular use of the soap can strengthen hair strands, making them more resilient to damage and breakage.
Improves Hair Texture: The nourishing effects of rosemary can lead to softer, smoother, and more manageable hair.
Cleanses Gently: As a solid shampoo, it effectively cleanses without stripping away the natural oils that your hair and skin need.
Multipurpose Formula: Beyond hair, this soap’s gentle formula makes it suitable for use on the skin, providing a refreshing and rejuvenating cleanse.
Experience these exceptional benefits firsthand as you integrate the DIY Rosemary Hair Soap into your routine, and embrace the revitalizing touch of nature’s bounty.
Frequently Asked Questions
Is it suitable for all hair types?
Yes, the DIY Rosemary Hair Soap is formulated to work well with various hair types, including oily, dry, and normal hair.
Can I use it on colored or treated hair?
Absolutely, the gentle nature of the soap makes it suitable for colored or treated hair, helping to maintain vibrancy and health.
How often should I use the soap?
You can use the soap as often as you would your regular shampoo. Some find that using it a few times a week provides optimal results.
Will it leave my hair or skin dry?
No, the soap is designed to cleanse without stripping away natural oils. It leaves both hair and skin feeling refreshed, not dry.
Can I use it as a body soap too?
Yes, the soap’s mild formula makes it suitable for use on the body. Enjoy the same nourishing benefits for your skin.
Is it suitable for sensitive skin?
The soap’s natural ingredients make it generally well-tolerated, but if you have sensitive skin, it’s a good idea to do a patch test first.
Does it have a strong rosemary scent?
The soap carries a pleasant, mild rosemary scent that lingers gently, providing a refreshing experience without overwhelming fragrance.
Here are more articles on how to make your own natural soaps:
- DIY Cold Process Green Tea Soap for Oily Skin: Green Beauty Unveiled
- Create Stunning DIY Glycerine Soap for Gift Ideas That Inspire Joy
- DIY Cold Process Lavender Soap: Crafting Soothing Self-Care
- Create Dazzling DIY Glycerine Soap for Gifts: Lively and Unique!
- DIY Natural Soap for Oily Skin with Green Clay: Reveal Your Best Skin
Video How-To on My Channel | Jinane World
The steps to make the DIY Rosemary Hair Soap are demonstrated in this video.