Introducing our guide to creating your very own DIY Cold Process Green Tea Soap for Oily Skin. In this article, we’re diving into the world of DIY skincare, harnessing the power of green tea to craft a soap tailored to oily skin’s needs. Discover how to bring forth the beauty of balanced skin with the enriching benefits of green tea and natural ingredients.
We share the recipe, steps, and insights to create a refreshing and effective green tea soap right at home. Welcome to a journey of green beauty that’s ready to be unveiled.
Ingredients Needed
- Distilled water
- Sodium hydroxide (also called caustic soda or lye)
- Olive oil
- Pure palm oil, certified sustainable
- Coconut oil
- Green tea powder
- Green tea bag
- Mint carrier oil, or green tea carrier oil
- Lemon essential oil. For sensitive skin, use instead green tea or chamomile essential oil.
Notes on Ingredients
Choose high-quality ingredients to boost the effectiveness and safety of your DIY beauty products.
When an essential oil is included, I use either concentrated or diluted essential oils. If using concentrated essential oils, use up to 0.5% by weight to ensure safety for all skin types. To use diluted essential oils, mix 1 gram (0.035 oz) of concentrated essential oil with 100 grams (3.5 oz) of sweet almond oil or jojoba oil.
If a recipe calls for fragrance oil, you can use diluted essential oil instead to benefit from both its scent and therapeutic effects. This provides a natural alternative to synthetic fragrance oils and offers additional benefits.
Tools Needed
- Safety items: Latex gloves, safety goggles, face mask
- Scale to weigh quantities
- Three beakers
- Large silicone spatula
- Tablespoon
- Knife
- Electric hand mixer
- Rectangular silicone mold to hold 800 grams (28.2 oz) of soap mix
Prior to use, ensure that both your utensils and containers are properly cleaned and disinfected. Wash them with warm soapy water, dry with a tissue, and then sanitize by spraying with 70% medical alcohol. Wipe them clean and let them air dry before use.
Safety Precautions
We are using the cold process soap making technique in this guide. This requires mandatory safety measures that you should take during the process:
- No part of your skin should be exposed at any time during the process (a long-sleeved shirt and an apron are good ideas here)
- Don’t let any children or pets come near your soap making work table
- Your soap making table should be in a ventilated area at all times (an open window is a good idea )
- Latex gloves, safety goggles, and face masks should be worn at all times
- Only use silicone, plastic, and stainless steel tools
Steps: DIY Cold Process Green Tea Soap
Ensure that you are applying the necessary safety precautions mentioned above before starting.
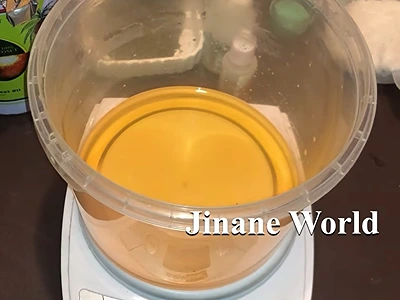
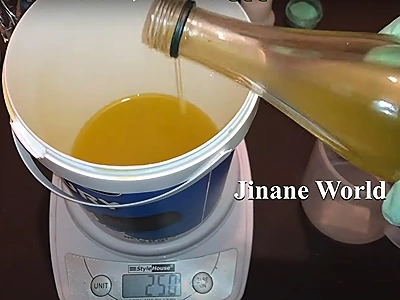
1- Start by warming 150 grams (5.29 oz) of distilled water, and drop in a green tea bag to allow the green tea to infuse into it, creating a beneficial base for your soap.
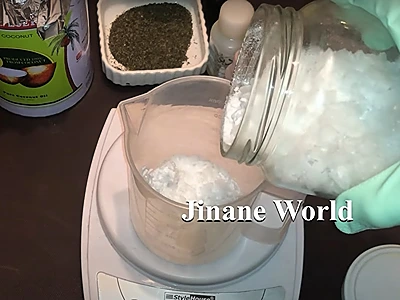
2- Put 75 grams (2.64 oz) of sodium hydroxide in a separate beaker.
3- Slowly empty the beaker containing the sodium hydroxide into the container or beaker containing the green-tea-infused distilled water.
- Start with a small amount and mix with a spatula; continue until you add all of the sodium hydroxide.
- It is important not to do this in the opposite way: it’s dangerous to pour the distilled water on top of the sodium hydroxide!
Note: Stir only with a silicone spatula, large wooden spoon, or stainless steel spoon.
4- After the sodium hydroxide has dissolved fully, let the contents cool down. Ensure the beaker containing the sodium hydroxide solution is safely out of reach of children and pets.
5- In a third beaker, pour 250 grams (8.81 oz) of olive oil.
6- To the olive oil, add 125 grams (4.40 oz) of palm oil.
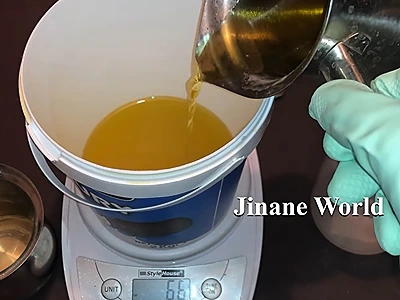
7- To the olive oil and palm oil, add 125 grams (4.40 oz) of coconut oil.
Note: If the palm oil and the coconut oil are semi-solid because of cold temperature, melt them in a hot water bath (bain-marie).

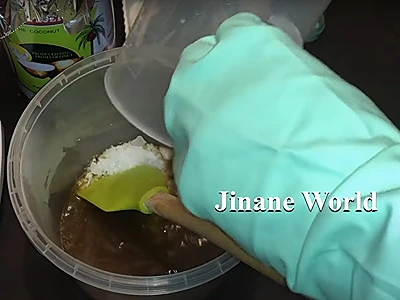
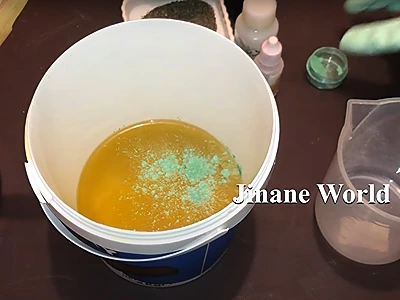
8- Add a little mica powder, green color, to the three oils.
9- Mix well.
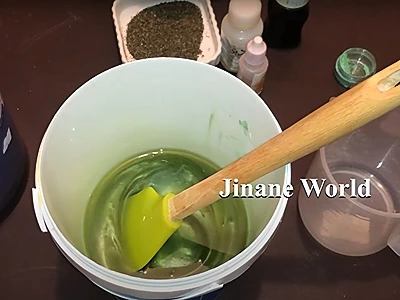
10- Slowly, and while stirring with the spatula, pour the sodium hydroxide solution prepared earlier over the oils.
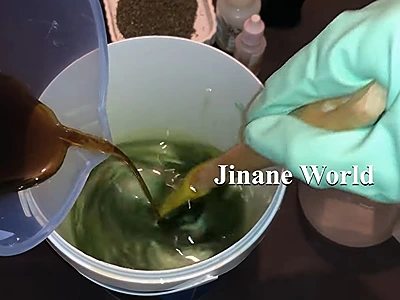
11- Mix thoroughly with the spatula.
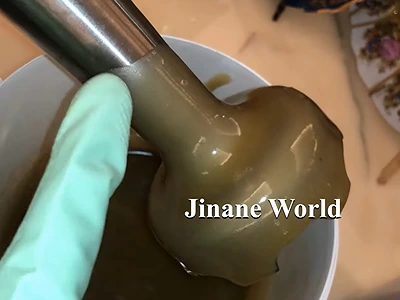
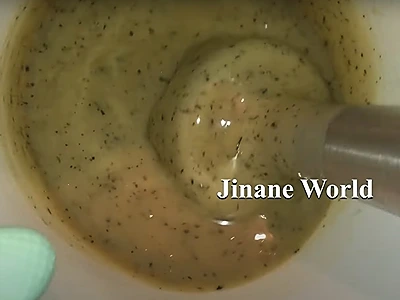
12- Using an electric hand mixer, whip up the contents for 3-5 seconds, then stop the electric mixer, and stir manually with the spatula or with the mixer shaft itself for a few seconds. Repeat the process.
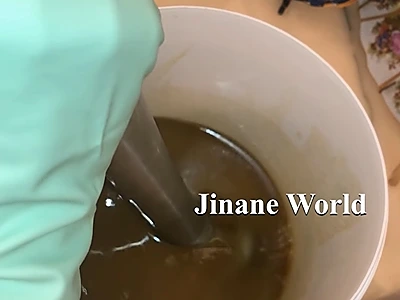
13- Continue alternating between the electric mixer and manual stirring, till you see the soap mix thicken. When you achieve this thickening, and you do not see any oil layer on the surface, this means that the saponification (the process of making the soap) is almost done.
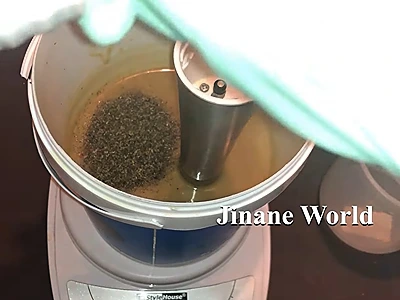
14- Add 6 grams (0.21 oz) of green tea powder. Stir with the spatula.
15- Add 10 grams (0.35 oz) of mint carrier oil. You can use instead green tea carrier oil. Mix the contents with the spatula.
16- Add 5 grams (0.17 oz) of lemon essential oil. For sensitive skin, use instead green tea essential oil or chamomile essential oil. Again, stir the contents with the spatula.
17- Give the soap mixture one final whip-up with the electric mixer. Don’t let the mix thicken excessively, as this will make it difficult to pour into the soap mold.
18- Pour the mix into the rectangular mold.
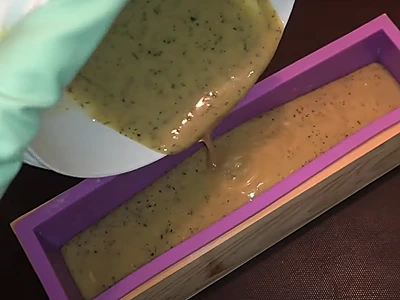
19- Holding the filled mold with both hands, tap it a few times against the work table to get rid of any bubbles.
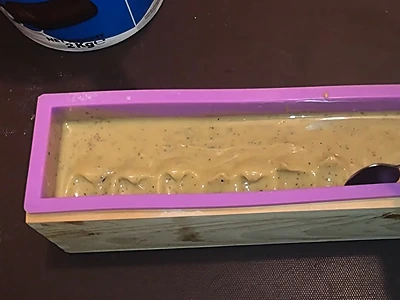
20- Allow the mold to cool down for 10 minutes, for the soap to harden a little. This will allow us to imprint a design on the soap surface.
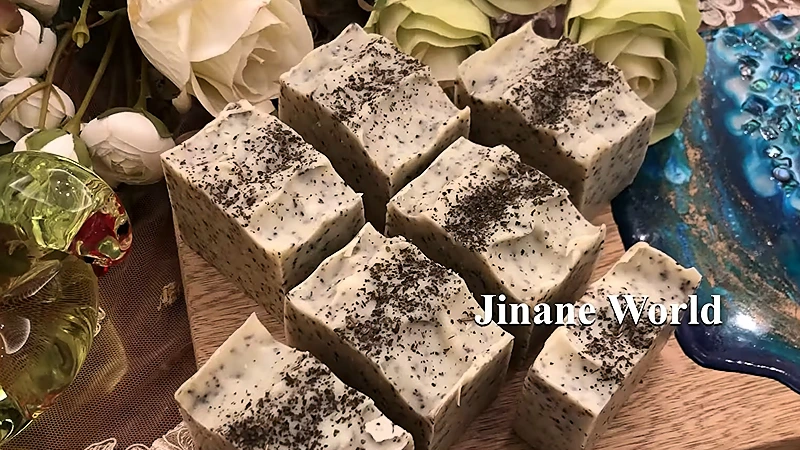
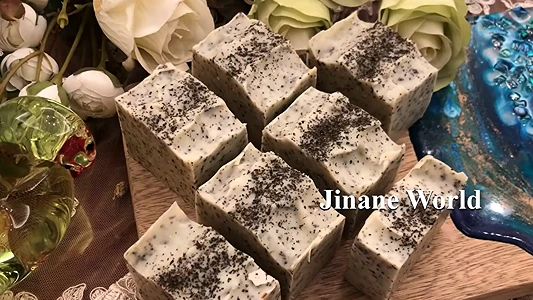
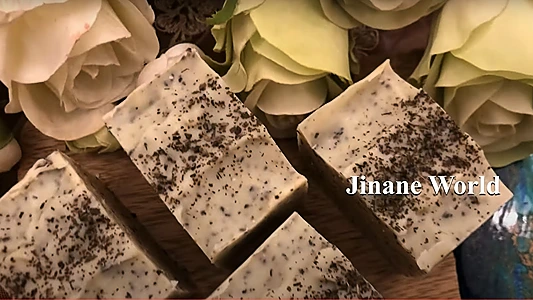
21- With a spoon, make a nice design on the surface of the soap, as per the image below. With the back of the spoon, push the soap starting at the edge toward the center. Repeat on the other side. Sprinkle some green tea powder on the surface.
22- Let the soap in the mold cool down and harden for 12-24 hours, depending on your room temperature.
23- After the soap has fully solidified, carefully remove it from the mold, and cut it with a knife into appropriate bar sizes.
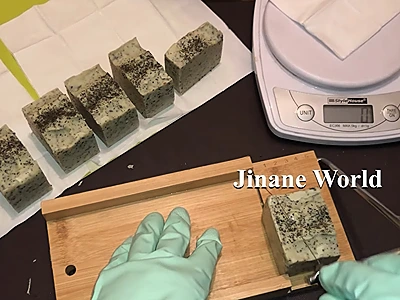
24- Important: Now, you must leave the soap bars to cure for a minimum duration of 6 weeks. This will allow the sodium hydroxide to dissipate completely. Only then can you use the soap or package it for gifting.
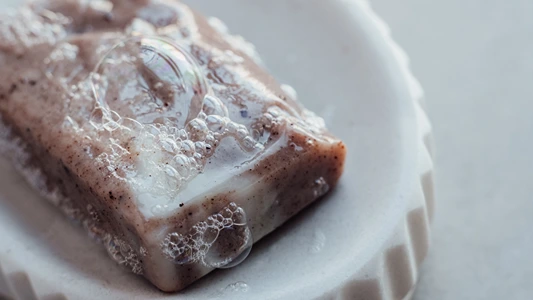
How to Use: DIY Cold Process Green Tea Soap
After making the DIY Cold Process Green Tea Soap, and after the curing period of six weeks or more, you can use the soap.
a. Wet Your Face: Start by splashing your face with lukewarm water to prepare your skin for cleansing.
b. Lather the Soap: Take the DIY Cold Process Green Tea Soap and lather it between your hands to create a gentle foam.
c. Apply to Face: Gently massage the lather onto your face using circular motions. Focus on areas prone to excess oil, like the forehead, nose, and chin (T-zone).
d. Avoid Eye Area: Be careful to avoid getting the soap in your eyes. If accidentally exposed, rinse thoroughly with water.
e. Massage and Rinse: Massage your face for about 20-30 seconds, allowing the soap’s ingredients to work on your skin. Then, rinse your face thoroughly with cool water until all traces of soap are gone.
f. Pat Dry: Gently pat your face dry with a clean, soft towel. Avoid rubbing your skin to prevent irritation.
g. Follow with Toner and Moisturizer: After cleansing, follow up with a gentle toner to balance your skin’s pH levels. Then, apply a lightweight, oil-free moisturizer to keep your skin hydrated without adding excess oil.
h. Frequency: Use the DIY Cold Process Green Tea Soap once or twice a day, preferably in the morning and before bedtime.
i. Store Properly: Store your soap in a cool, dry place away from direct sunlight to maintain its freshness and effectiveness.
Remember, consistency is key when it comes to skincare. Over time, you should notice improvements in oil control and the overall appearance of your skin. If you experience any irritation or discomfort, discontinue use and consult a dermatologist.
Benefits
Here are the top 5 benefits of using DIY Cold Process Green Tea Soap for Oily Skin:
Oil Control: The natural properties of green tea help regulate excess oil production, reducing shine and keeping your skin matte throughout the day.
Antioxidant Protection: Green tea is rich in antioxidants that combat free radicals, helping to prevent premature aging and maintain a youthful complexion.
Acne Management: The antibacterial and anti-inflammatory properties of green tea can assist in preventing and managing acne breakouts, leading to clearer skin.
Gentle Cleansing: The cold process method ensures a gentle cleansing experience that effectively removes impurities without excessively drying the skin, promoting a healthy balance.
Soothing Hydration: Alongside its oil-controlling effects, green tea also offers soothing hydration, leaving your skin feeling refreshed, revitalized, and balanced.
Frequently Asked Questions
Can I use this soap if I have acne-prone skin?
Yes, the soap’s antibacterial and anti-inflammatory properties can be beneficial for managing acne. However, if you have severe acne or a skin condition, consult a dermatologist before introducing new products.
Can I use the soap around my eyes?
It’s best to avoid the eye area when using the soap, as it could cause irritation. If contact occurs, rinse your eyes thoroughly with water.
Is DIY Cold Process Green Tea Soap safe for sensitive skin?
Green tea is generally well-tolerated, but sensitive skin types should do a patch test before regular use to ensure there’s no adverse reaction.
Can I customize the soap’s fragrance or color?
Absolutely, you can experiment with different essential oils and natural colorants, but ensure they’re suitable for your skin type and won’t cause irritation.
Is the DIY process complicated for beginners?
The cold process method can be a bit challenging for beginners, so follow the instructions carefully. Research and preparation are key to a successful soap-making experience.
Here are more articles on how to make your own natural soaps:
- Create Stunning DIY Glycerine Soap for Gift Ideas That Inspire Joy
- DIY Cold Process Lavender Soap: Crafting Soothing Self-Care
- Create Dazzling DIY Glycerine Soap for Gifts: Lively and Unique!
- DIY Natural Soap for Oily Skin with Green Clay: Reveal Your Best Skin
- Colorful DIY Glycerine Soap with Toys: Making Handwashing Fun for Kids
Video How-To on My Channel | Jinane World
The steps to make the DIY Cold Process Green Tea Soap for Oily Skin are demonstrated in this video.