Introducing our comprehensive guide on DIY Natural Nail Growth Oil! If you’re looking to enhance the strength and health of your nails naturally, you’ve come to the right place. In this article, we will delve into the powerful benefits of creating your own nail growth oil using easily accessible ingredients.
Our focus is on the remarkable properties of DIY Natural Nail Growth Oil, which has gained popularity among beauty enthusiasts. Discover the secrets behind this potent formula and unlock the potential for achieving stronger and healthier nails. Get ready to embark on a journey of nail transformation with our simple and effective DIY approach.
Ingredients Needed
- Olive oil
- Castor oil
- Sweet almond oil
- Bitter almond oil
- Vitamin E capsule
- Essential oil – Optional
Notes on Ingredients
Choose high-quality ingredients to boost the effectiveness and safety of your DIY beauty products.
When an essential oil is included, I use either concentrated or diluted essential oils. If using concentrated essential oils, use up to 0.5% by weight to ensure safety for all skin types. To use diluted essential oils, mix 1 gram (0.035 oz) of concentrated essential oil with 100 grams (3.5 oz) of sweet almond oil or jojoba oil.
If a recipe calls for fragrance oil, you can use diluted essential oil instead to benefit from both its scent and therapeutic effects. This provides a natural alternative to synthetic fragrance oils and offers additional benefits.
Tools Needed
- Stainless steel cup
- Tablespoon
- Teaspoon
- Wooden popsicle
- Small funnel
- Small, glass nail oil bottle with brush lid to store the DIY Natural Nail Growth Oil
Prior to use, ensure that both your utensils and containers are properly cleaned and disinfected. Wash them with warm soapy water, dry with a tissue, and then sanitize by spraying with 70% medical alcohol. Wipe them clean and let them air dry before use.
Steps: DIY Natural Nail Growth Oil
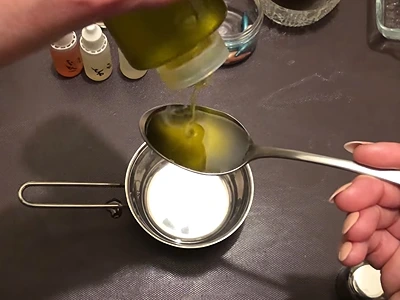
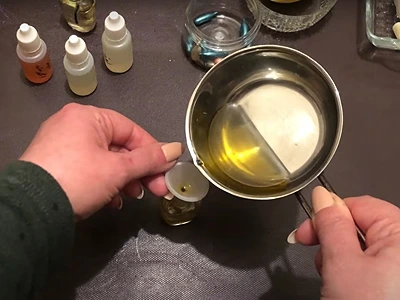
1- Start by adding 1 tablespoon (15 milliliters or 0.5 US fluid ounces) of olive oil into the cup.
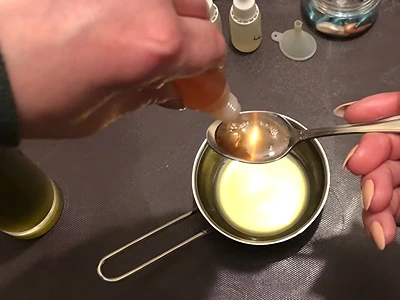
2- Add 1 teaspoon (5 milliliters or 0.17 US fl oz) of castor oil.
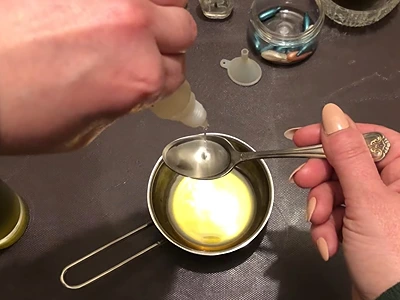
3- Add 1 teaspoon (5 milliliters or 0.17 US fl oz) of sweet almond oil.

4- Add 1 teaspoon (5 milliliters or 0.17 US fl oz) of bitter almond oil. Exercise caution with the bitter almond oil; excess amounts may not be suitable for the skin. It’s recommended to adhere to the specified measurements to maintain the balance and safety of the DIY Natural Nail Growth Oil.
5- Cut the vitamin E capsule, and squeeze its contents into the cup.
6- With a popsicle, stir the contents for 2 minutes, to achieve a homogeneous mixture.
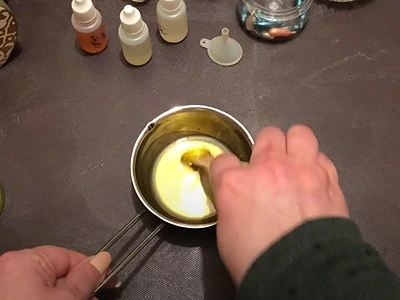
7- As an optional step, and to give the DIY Natural Nail Growth Oil a nice scent, you can add 5 drops of an essential oil. Here, I am adding patchouli.
8- Mix again.
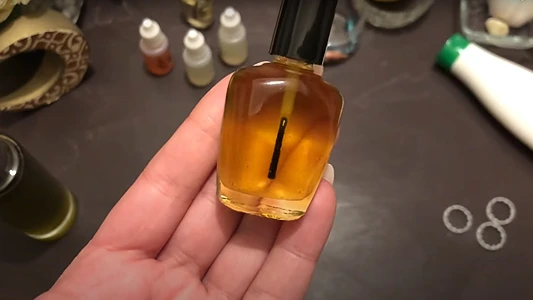
9- Using a small funnel, pour the oil mix into the glass bottle.
10- Seal the bottle with its brush lid, then shake it against your palm for a minute or 2.
11- The DIY Natural Nail Growth Oil is now done!
How To Use: DIY Natural Nail Growth Oil
To maximize the benefits of DIY Natural Nail Growth Oil, follow this step-by-step method that combines soaking and daily oil application:
Part 1: Weekly Nail Soaking
- Prepare a nail-soaking solution by mixing freshly squeezed lemon juice with crushed garlic in a small bowl. Ensure the mixture is well combined.
- Submerge your nails in the lemon juice and garlic solution, ensuring they are fully immersed. Allow them to soak for 15 minutes. This weekly soaking helps cleanse and nourish the nails.
- After the soaking period, remove your nails from the mixture and pat them dry with a clean towel. Do not wash them. Let them rest for 15 minutes, allowing them to absorb the benefits of the lemon juice and garlic. Repeat this soaking step once a week.
Part 2: Daily Oil Application
- On a daily basis, apply DIY Natural Nail Growth Oil to your nails and cuticles. Take a small amount of the oil and gently massage it into each nail and the surrounding cuticles.
- Use circular motions during the massage to stimulate blood circulation and promote nutrient absorption. The DIY Natural Nail Growth Oil nourishes and strengthens the nails.
- Leave the oil on your nails for as long as possible, ideally for at least 30 minutes. For more intensive treatment, you can leave it on overnight.
- For optimal results, apply the DIY Natural Nail Growth Oil daily or more frequently, depending on your preference and the needs of your nails. Consistency is key to achieving noticeable improvements in nail strength and growth.
By following this method, which includes weekly nail soaking and daily oil application, you provide your nails with a rejuvenating treatment.
The weekly soaking with lemon juice and garlic helps cleanse and prepare the nails, while the daily application of DIY Natural Nail Growth Oil nourishes and promotes healthier nail growth. Enjoy the journey towards stronger, more beautiful nails with this effective DIY approach!
Benefits: DIY Natural Nail Growth Oil
Using DIY Natural Nail Growth Oil can provide several benefits for your nails. Here are some of the advantages you can expect:
Enhanced Nail Growth: The nourishing ingredients in DIY Natural Nail Growth Oil can help stimulate and promote faster nail growth. It provides the necessary nutrients to support healthy nail development.
Stronger and Healthier Nails: The oil’s natural properties help strengthen the nails, making them less prone to breakage and brittleness. Regular use can lead to stronger, more resilient nails.
Moisturized Cuticles: DIY Natural Nail Growth Oil not only benefits the nails but also moisturizes and conditions the cuticles. It helps prevent dryness and promotes softer, healthier cuticles.
Improved Nail Health: The oil’s combination of natural ingredients can aid in improving overall nail health. It helps maintain the natural moisture balance of the nails and supports their overall well-being.
Nail Repair and Protection: DIY Natural Nail Growth Oil can contribute to repairing damaged nails and protecting them from further harm. It provides a nourishing barrier that shields the nails from external factors that may cause damage or weakening.
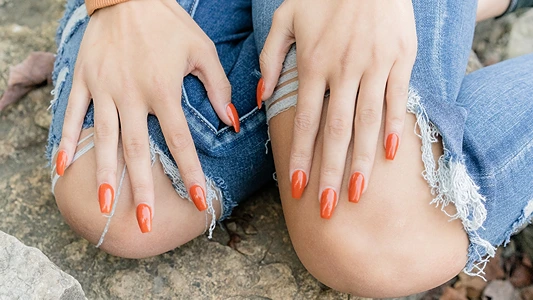
Enhanced Nail Appearance: With consistent use of DIY Natural Nail Growth Oil, you can expect to see improvements in the appearance of your nails. They may appear shinier, smoother, and more attractive.
Promotes Nail Flexibility: The nourishing properties of the oil help promote flexibility in the nails, making them less prone to cracking or splitting.
By incorporating DIY Natural Nail Growth Oil into your nail care routine, you can enjoy these benefits and achieve stronger, healthier, and more beautiful nails.
More articles on DIY natural and handmade body oils and serums:
- DIY Vitamin C Serum: Boost Your Glow with Fresh Orange Peel Magic
- DIY Lavender Essential Oil: Ignite Your Skincare Routine with the Power of Nature
- DIY Face Serum: A Natural, Radiant Boost for Your Skin
- DIY Hyaluronic Acid Serum: How to Make Your Own for Glowing Skin
- How to Make Body Bronzer The Easy Way
Video How-To on My Channel | Jinane World
The steps to make the DIY Natural Nail Growth Oil are demonstrated in this video