Welcome to the ultimate guide on achieving a radiant and luxurious glow with our DIY Gold Serum for Skin! Enriched with 24K pure gold leaf, along with nourishing sweet almond oil, pumpkin seed oil, rose oil, and lavender oil as carriers, this serum promises to unlock the secret to a luminous complexion.
Say goodbye to dull and lackluster skin as you embark on a journey to unveil your skin’s true brilliance. In this article, we’ll delve into the step-by-step process of creating this golden elixir, its incredible benefits, and why this luxurious skincare concoction deserves a coveted spot in your beauty routine. So, let’s get started and embrace the glow!
Ingredients Needed
Choose high-quality ingredients to boost the effectiveness and safety of your DIY beauty products.
- Sweet almond oil – Carrier
- Pumpkin seed oil – Carrier
- Rose oil – Carrier
- Lavender oil – Carrier
- 24 karat pure gold leaf
Tools Needed
- Measuring spoons
- Stainless steel cup
- Small silicone spatula
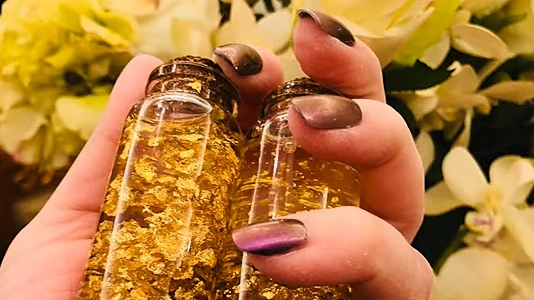
- 40-milliliter (1.35 US fl oz) glass bottle with cork stopper to store the DIY Gold Serum for Skin.
Important: This serum must be stored in a glass container only. If you use a plastic container for example, the gold fragments in the serum will attach to the inner surface of the container, thus separating from the serum oils.
Prior to use, ensure that both your utensils and containers are properly cleaned and disinfected. Wash them with warm soapy water, dry with a tissue, and then sanitize by spraying with 70% medical alcohol. Wipe them clean and let them air dry before use.
Steps: DIY Gold Serum for Skin
Preparing the Mix of Oils
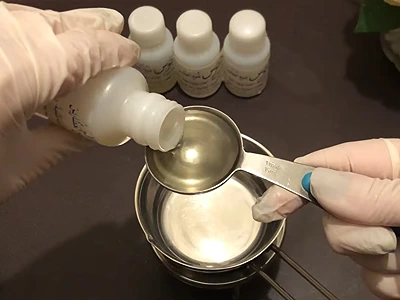
1- Start by adding 15 milliliters (0.50 US fl oz) of sweet almond carrier oil into a stainless steel cup.
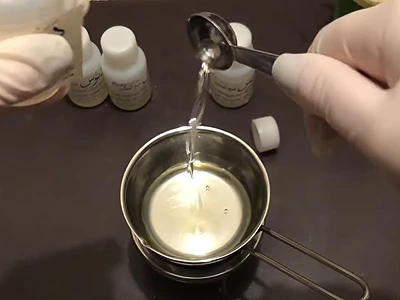
2- Add 10 milliliters (0.33 US fl oz) of pumpkin carrier oil.
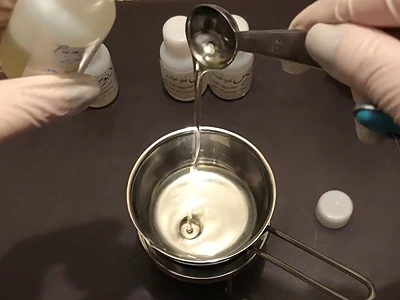
3- Add 5 milliliters (0.17 US fl oz) of rose carrier oil.
4- Add 5 milliliters (0.17 US fl oz) of lavender carrier oil.
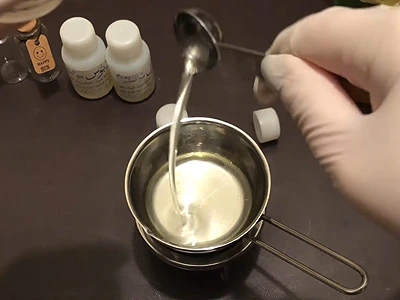
5- With a small spatula, mix the oils thoroughly for 2 minutes.
Adding the Gold
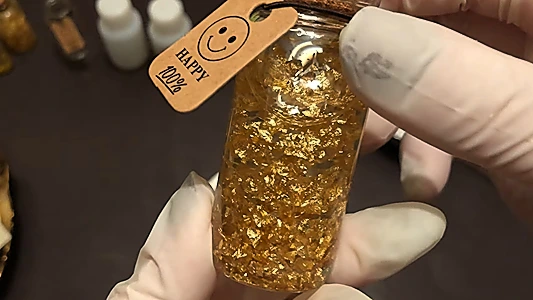
6- Now we will add the 24K pure gold leaves. Such a leaf is very delicate. It can be blown away easily with any breeze in the room where you are working. As soon as you touch the leaf with your finger or spatula, it quickly contracts and attach to it. That is a sign that it is pure gold.
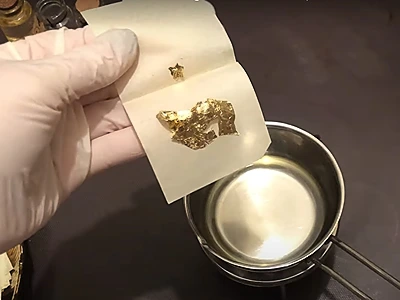
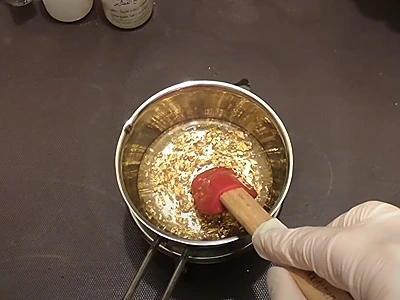
7- We will add a total of 4 gold leaves. Open the first leaf wrapping, and pick up the leaf with a small spatula. Place it in the oil mix. Stir well, and you see that it disintegrates easily into small pieces. Do the same for the other 3 gold leaves.
Note: It is up to you how many gold leaves you want to include. You can use 4 like I did, or less.
8- Mix well for 2 minutes.
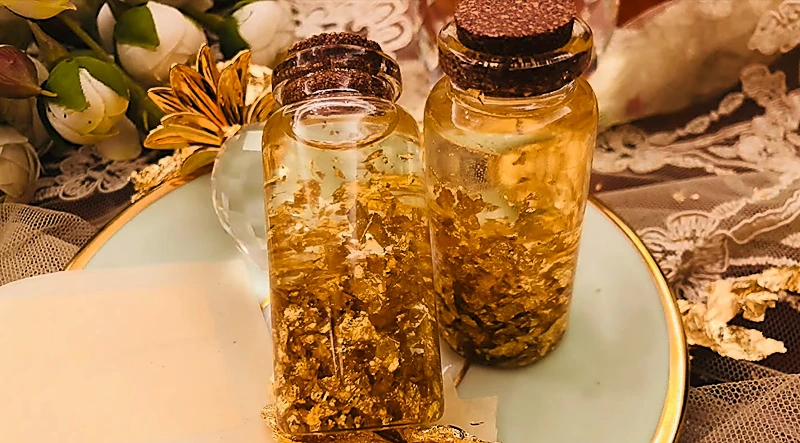
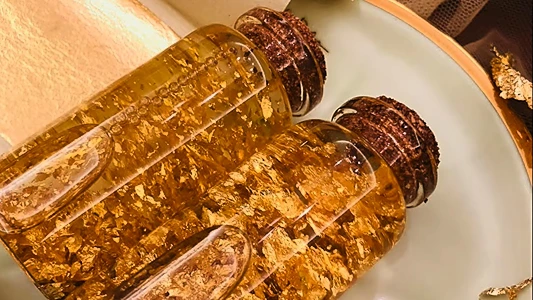
9- Pour the serum into a glass container and seal it.
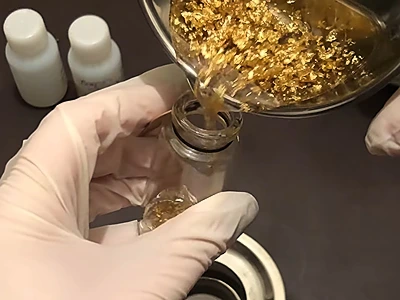
10- Your DIY Gold Serum for Skin is now done! You can use it immediately.
Let’s Try it Out
10- With a dropper, I pick up a little of the serum from the bottle. Notice how gold fragments are picked up with the serum as well.

11- I squeeze out 2 drops of the serum onto my skin. Again, gold pieces come along as well.
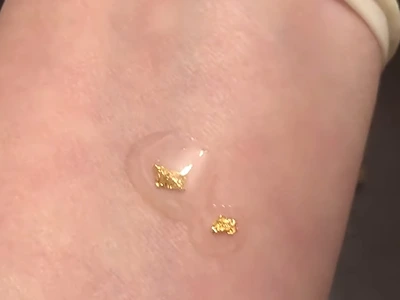
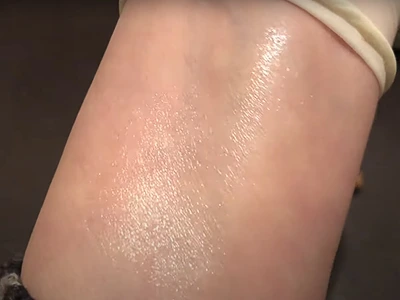
12- Rub the serum on the skin. See how the gold fragments melt quickly.
How To Use: DIY Gold Serum for Skin
Using our DIY Gold Serum for Skin is a delightful and indulgent experience that will leave you feeling like royalty. Follow these simple steps to make the most of this luxurious skincare elixir:
a. Preparation: Before applying the gold serum, ensure your face is clean and free from any makeup or impurities. Gently cleanse and pat dry your skin to create a smooth canvas for the serum.
b. Dispense the Serum: Shake the DIY Gold Serum for Skin bottle gently to mix the oils and gold leaf. Using a dropper, dispense a few drops of the serum onto your fingertips.
c. Warm the Serum: Rub your palms together to warm the serum slightly. This step enhances absorption and ensures an even application.
d. Application: Gently press the serum onto your face and neck using upward motions. Avoid tugging or pulling on the skin. The serum’s lightweight texture will effortlessly glide across your skin.
e. Massage & Pat: Take a moment to massage the serum into your skin using circular motions. This helps the oils and gold leaf penetrate deeply for maximum benefits. Then, pat your face gently with your fingertips to aid absorption.
f. Enjoy the Glow: Let the DIY Gold Serum for Skin work its magic! Allow the serum to fully absorb into your skin for at least 5-10 minutes before applying any additional products.
g. Frequency: For best results, use the gold serum 1-2 times a day, preferably in your morning and evening skincare routines.
h. Follow with Moisturizer: After the serum has been fully absorbed, follow up with your favorite moisturizer to lock in the nourishing goodness of the serum and provide extra hydration to your skin.
i. Sunscreen: During your morning routine, remember to apply sunscreen to protect your skin from harmful UV rays. This step is crucial in preserving the radiance and health of your skin.
With regular use, you’ll notice a remarkable improvement in your skin’s texture, tone, and overall glow. Embrace the power of 24K gold and let your skin shine with natural beauty!
Benefits: DIY Gold Serum for Skin
Indulging in the luxurious DIY Gold Serum for Skin brings an array of exceptional benefits that will leave you with a radiant and rejuvenated complexion:
Youthful Radiance: Infused with 24K pure gold leaf, the serum promotes improved blood circulation, giving your skin a youthful and radiant glow. The gold particles help revitalize the skin’s appearance, reducing the signs of aging and imparting a luminous, lit-from-within complexion.
Skin Nourishment: The carefully selected carrier oils, including sweet almond, pumpkin seed, rose, and lavender oils, provide essential nutrients and antioxidants to nourish and protect your skin. These oils help combat free radicals, promoting a healthier and more resilient complexion.
Hydration Boost: The DIY Gold Serum for Skin works as a powerful humectant, attracting and locking in moisture, making it ideal for all skin types, especially for dry or dehydrated skin. The intense hydration helps plump the skin, reducing the appearance of fine lines and wrinkles.
Even Skin Tone: With regular use, the serum helps even out the skin tone, diminishing the appearance of dark spots, hyperpigmentation, and redness. Achieve a more balanced complexion that exudes natural radiance.
Soothing Sensation: Lavender oil in the serum provides a soothing effect, helping to calm irritated or sensitive skin. Experience a gentle and relaxing skincare ritual with the added benefits of aromatherapy.
Firming and Tightening: The collagen-boosting properties of gold contribute to improved skin elasticity and firmness, giving your skin a tightened and lifted appearance. Enjoy a more contoured and sculpted facial profile.
Primer for Makeup: The serum’s lightweight and silky texture make it an excellent makeup primer. It creates a smooth canvas for foundation application, extending the wear of your makeup and imparting a natural, radiant finish.
Frequently Asked Questions: DIY Gold Serum for Skin
FAQ 1: Can I use the DIY Gold Serum for Skin on all skin types?
Reply: Absolutely! The DIY Gold Serum for Skin is formulated with a blend of carrier oils that cater to all skin types. Whether you have dry, oily, combination, or sensitive skin, this serum is designed to nourish and enhance your complexion without causing irritation. Its non-comedogenic nature ensures it won’t clog pores, making it safe and effective for everyone.
FAQ 2: Will the gold leaf in the serum clog my pores or feel heavy on the skin?
Reply: Not at all. The 24K pure gold leaf used in the serum is finely crushed and dispersed throughout the carrier oils, making it lightweight and easily absorbed by the skin. The gold particles are incredibly fine, ensuring they won’t clog pores or leave a heavy residue. Instead, they provide a luxurious and comfortable feel, leaving your skin with a radiant glow.
FAQ 3: Can the DIY Gold Serum for Skin replace my moisturizer?
Reply: While the serum offers intense hydration, it is recommended to follow up with a moisturizer after applying the serum. The serum serves as a potent treatment, locking in moisture and essential nutrients. However, a moisturizer will act as a protective barrier, ensuring the hydration stays locked in and providing additional nourishment to your skin.
FAQ 4: How long will it take to see results with the DIY Gold Serum for Skin?
Reply: Individual results may vary, but with consistent use, you can start noticing improvements in your skin’s texture and radiance within a few weeks. Some users have reported experiencing a more glowing complexion and reduced fine lines after just a few applications. For the best results, incorporate the serum into your daily skincare routine.
FAQ 5: Can I use the DIY Gold Serum for Skin in the morning and at night?
Reply: Absolutely! The serum is versatile and can be used both in the morning and evening skincare routines. Applying it in the morning will help create a smooth base for makeup and provide a radiant, fresh look. In the evening, the serum will work its magic overnight, nourishing and revitalizing your skin while you rest. Remember to follow with sunscreen in the morning to protect your skin from harmful UV rays.
Here are more articles on DIY natural and handmade body oils and serums:
- DIY Dark Spot Serum: Sandalwood and Frankincense Marvel for Your Skin
- DIY Anti-Cellulite Serum: 3 Oils for Powerful Revitalization!
- DIY Natural Cuticle Oil: Enhance and Pamper Your Cuticles for Beautiful, Healthy Nails
- DIY Natural Nail Growth Oil: Get Stronger, Healthier Nails
- DIY Vitamin C Serum: Boost Your Glow with Fresh Orange Peel Magic
Video How-To on My Channel | Jinane World
The steps to make your own DIY Gold Serum for Skin are demonstrated in this video.