
Introducing our definitive guide to creating your very own Easy DIY Lip Gloss at home! In this article, we’ll take you through a fun and easy do-it-yourself (DIY) journey to craft your personalized lip gloss with delightful flavors and nourishing oils.
With our step-by-step instructions and the magic of natural ingredients, you’ll be amazed at how simple and rewarding the process can be. So, get ready to indulge in the art of lip gloss making with our Easy DIY Lip Gloss tutorial. Your lips will thank you for the nourishment and the burst of deliciousness!
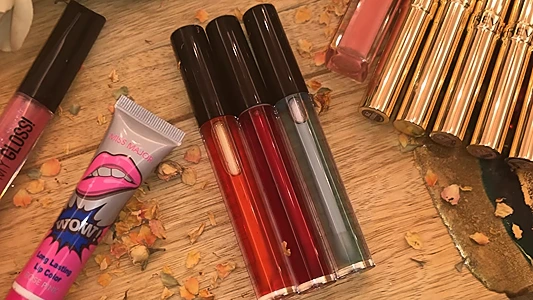
Ingredients Needed
Choose high-quality ingredients to boost the effectiveness and safety of your DIY beauty products.
- Coconut Oil (or sweet almond oil)
- Food Flavoring
- Oil-soluble Color Powder
Tools Needed
- Stainless steel cup
- Tablespoon
- Glass mixing rod
- Wooden toothpick
- Lip gloss glass bottle with wand
Prior to use, ensure that both your utensils and containers are properly cleaned and disinfected. Wash them with warm soapy water, dry with a tissue, and then sanitize by spraying with 70% medical alcohol. Wipe them clean and let them air dry before use.
Steps: Easy DIY Lip Gloss
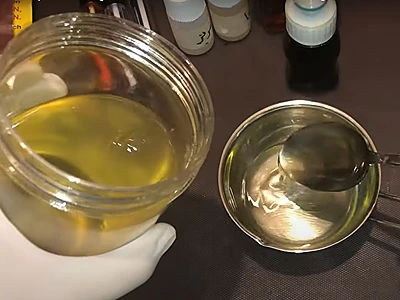
1- Start by adding 2 tablespoons (total 30 milliliters or 1 US fl oz) of coconut oil (or sweet almond oil).
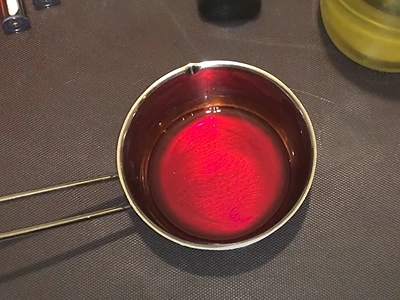
2- With the tip of a toothpick, add just a touch of red oil-soluble color powder. Start with a tiny amount first, then add a bit more if you see the color is too light after mixing. The color of the Easy DIY Lip Gloss should be light and not strong.
3- Mix thoroughly to dissolve all the color powder.
4- Add 2-3 drops of strawberry food flavoring.
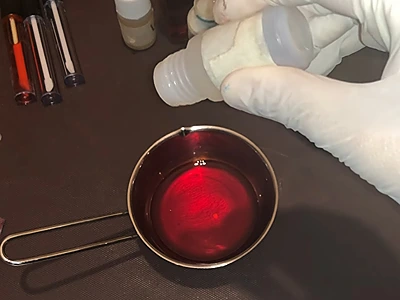
5- Mix well.
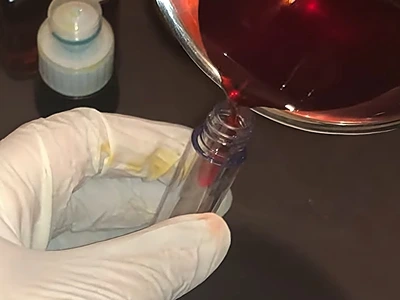
6- Pour the lip gloss into a glass bottle. Your Easy DIY Lip Gloss is done!
Note: You can use any food flavoring and oil-soluble color powder that you like.
How to Use Easy DIY Lip Gloss
Using your Easy DIY Lip Gloss is a breeze! Follow these simple steps to get the best results:
a. Prepare Your Lips: Before applying the lip gloss, make sure your lips are clean and dry. You can gently exfoliate your lips with a soft toothbrush or a lip scrub for a smoother application.
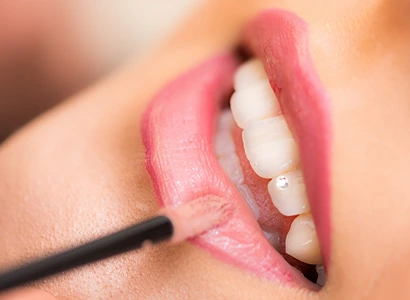
b. Apply a Thin Layer: Dip the applicator wand or your fingertip into the lip gloss and pick up a small amount. Remember, a little goes a long way. Start by applying a thin layer evenly to your lower lip.
c. Smack Those Lips: Press your lips together to distribute the gloss and create an even finish. If you prefer a more intense shine, apply another layer, but remember not to overdo it to avoid a sticky feel.
d. Define the Cupid’s Bow: For a professional touch, use the applicator’s tip or a lip brush to define the cupid’s bow (the curve at the top of your upper lip) and the corners of your mouth.
e. Blot (Optional): If you want a matte finish or reduce the glossiness, gently blot your lips with a tissue or blotting paper.
f. Reapply as Needed: Enjoy the delicious Yummy Flavors and nourishing effects of your lip gloss throughout the day. Reapply whenever you feel the need for an extra pop of color and moisture.
Pro tips:
- Experiment with different flavors and shades to match your mood or outfit. Have fun mixing and matching to create your signature lip gloss!
- You can apply the Easy DIY Lip Gloss alone on your lips, or on top of your lipstick.
Benefits of Easy DIY Lip Gloss
Using coconut oil or sweet almond oil as the nourishing base for your Easy DIY Lip Gloss offers a plethora of benefits for your lips. Here are some of the advantages you’ll enjoy:
Deep Hydration: Both coconut oil and sweet almond oil are highly moisturizing, providing deep hydration to your lips. They help lock in moisture, preventing dryness and chapped lips.
Nourishment & Softness: These natural oils are rich in essential fatty acids and vitamins, such as vitamin E, which nourish and condition your lips, leaving them feeling soft and supple.
Gentle & Safe: Coconut oil and sweet almond oil are gentle on the skin and safe for most people, including those with sensitive lips. You can trust these natural ingredients to pamper your lips without any harmful chemicals.
Antioxidant Protection: Both oils contain antioxidants that help protect your lips from environmental stressors and free radicals, promoting healthier and younger-looking lips.
Enhanced Flavors: The oils act as excellent carriers for the delicious flavorings you add to your lip gloss. They help disperse the flavors evenly, ensuring a delightful and long-lasting taste experience.
Customization: Whether you choose coconut oil or sweet almond oil, you have the freedom to customize your lip gloss with various flavorings and colors, creating a lip product that perfectly complements your style and preferences.
Affordability & Accessibility: Coconut oil and sweet almond oil are readily available and cost-effective alternatives to store-bought lip glosses. Making your DIY lip gloss is not only fun but also budget-friendly.
Soothing & Healing: If your lips are dry or irritated, the soothing properties of these oils can help alleviate discomfort and aid in the healing process.
Eco-Friendly: Making your own lip gloss with natural oils reduces the demand for commercial products and packaging, contributing to a more sustainable and eco-friendly beauty routine.
By incorporating coconut oil or sweet almond oil into your DIY Lip Gloss, you’re not only treating your lips to a delightful and nourishing experience but also embracing the goodness of nature in your beauty regimen.

Frequently Asked Questions: Easy DIY Lip Gloss
1. FAQ: Can I use coconut oil and sweet almond oil interchangeably in the DIY lip gloss recipe?
Reply: Absolutely! Both coconut oil and sweet almond oil work wonderfully as nourishing bases for your lip gloss. They have similar hydrating and softening properties, so you can freely choose between them based on your preference or availability of ingredients. Experiment with each oil to find your perfect lip gloss texture and feel.
2. FAQ: How can I make my DIY lip gloss last longer once it’s made?
Reply: To extend the shelf life of your lip gloss, store it in a cool, dry place, away from direct sunlight and heat sources. Using clean and sanitized lip gloss containers or tubes will also help maintain the quality of your product. Additionally, you can add a natural preservative, such as vitamin E oil, to inhibit the growth of bacteria and prolong the freshness of your lip gloss.
3. FAQ: Is DIY lip gloss safe to use on sensitive lips?
Reply: Yes, DIY lip gloss made with natural ingredients like coconut oil or sweet almond oil is generally safe for most people, including those with sensitive lips. However, it’s always essential to patch test the lip gloss on a small area of your lips before applying it fully. If you have any allergies or known sensitivities to specific ingredients, it’s best to avoid using them in your DIY lip gloss recipe.
Remember to follow good hygiene practices, use high-quality ingredients, and exercise caution when creating and using your DIY lip gloss to ensure a safe and enjoyable experience.
Here are more articles on how to make your own natural makeup products:
- Homemade Makeup Remover: Refreshing and Natural Blend
- Easy DIY Lipstick and Lip Moisturizer: Get Luscious Lips with 2 Ingredients Only
- DIY Lip and Cheek Tint: Embrace a Rosy Radiance Naturally
Video How-To on My Channel | Jinane World
The steps to make this Easy DIY Lip Gloss are demonstrated in this video.