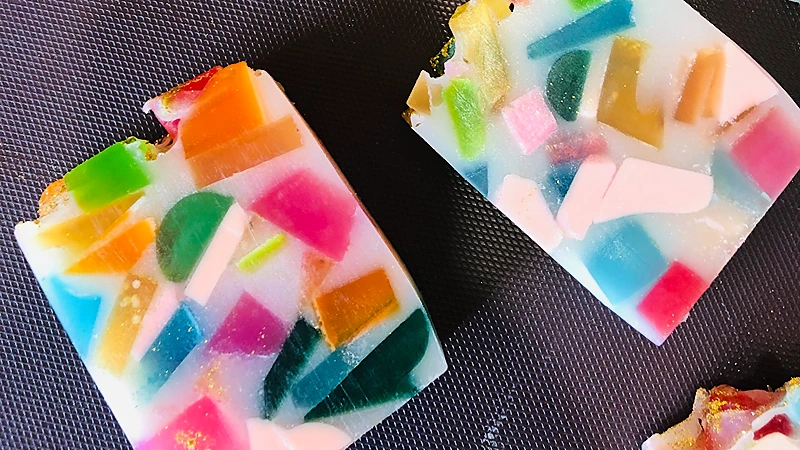
Welcome to the colorful world of DIY Glycerine Soap for Gifts! If you’re looking to add a touch of dazzle to your gifting ideas, you’re in the right place. In this article, we’ll show you how to create vibrant and lively glycerine soap bars right in the comfort of your home.
With a few simple steps and a splash of creativity, you can transform ordinary soap into stunning, personalized gifts that are sure to impress your loved ones. Let’s dive into the art of making dazzling DIY glycerine soap and discover the joy of gifting with a touch of handmade charm!
Ingredients Needed
Choose high-quality ingredients to boost the effectiveness and safety of your DIY beauty products.
- White glycerine soap, of high quality
- An assortment of old soap bars or purchased bars that have different colors
- Musk essential oil. Or any essential oil that you prefer
- Optional – Glitter
Tools Needed
- Scale to weigh quantities
- 2 large plates, one to hold the white glycerine soap cut pieces, the other to hold the cut shapes of the single-color soap bars.
- Large bowl
- Knife
- Large silicone spatula
- Medical alcohol 70%
- Silicone soap mold, rectangular in shape, to hold 500 grams (17.63 oz) of soap
Prior to use, ensure that both your utensils and containers are properly cleaned and disinfected. Wash them with warm soapy water, dry with a tissue, and then sanitize by spraying with 70% medical alcohol. Wipe them clean and let them air dry before use.
Steps: DIY Glycerine Soap for Gifts
To make 4-5 colorful DIY glycerine soap bars for gifts, we require 500 grams (17.63 oz) of white high-quality glycerine soap.
We also need 4 single-color soap bars, each bar in one color, like pink, orange, green, and light blue. Of course, you can use any mix of colors you prefer. You can use old soaps that you already have, or buy new ones.
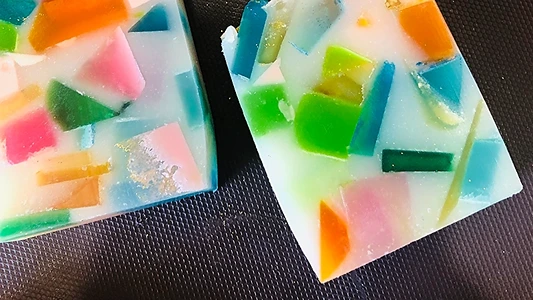
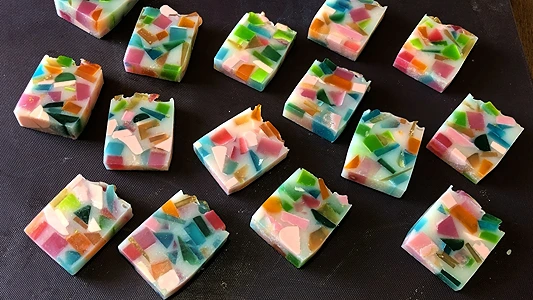
For my own work, as shown in the images below, I used 1 kilogram (35.27 oz) of glycerine soap because I had many leftover soap bars that I wanted to recycle. I ended up with 12-13 colorful glycerine soap bars, that my family used and some that I gifted away.
But for this article, we will stick to 500 grams to make 4-5 bars.
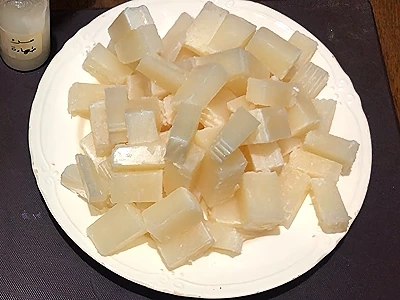
1- Start by cutting the 500 grams (17.63 oz) of white glycerine soap into small pieces.
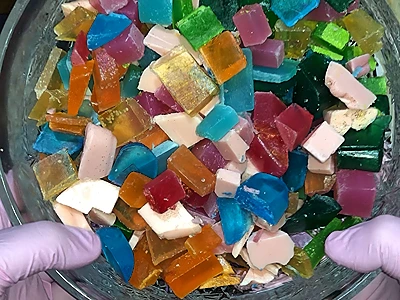
2- Also, cut the 4 single-color soap bars into small differently-shaped pieces.
3- Place the white glycerine soap pieces in a large bowl.
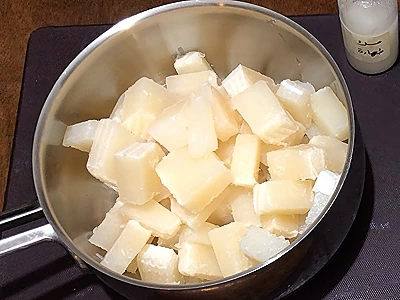
4- Melt the white glycerine soap pieces in a bain-marie (hot water bath). A bain-marie is done by placing the bowl in a larger pot of hot steaming water. This will gradually melt whatever is inside the bowl. As it melts, make sure to mix every now and then.
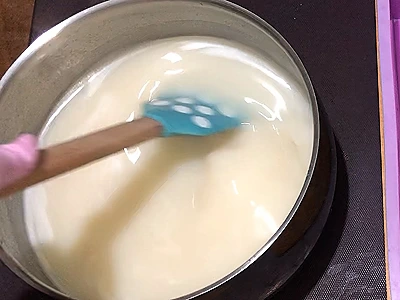
5- Wait for the melted glycerine soap in the large bowl to cool down, enough to allow you to hold the bowl comfortably with your hands. We do this to be able to add the essential oil in the next step, otherwise the essential oil will evaporate.
6- After the melted glycerine soap has cooled down sufficiently, add 15 drops of musk essential oil, or any one that you like.
7- Mix well.
8- We will pour the melted glycerine soap into the rectangular silicone mold in 3 layers, each filling a third of the mold height. We do it in 3 layers to ensure that we don’t end up with gaps.
Pour the first layer.
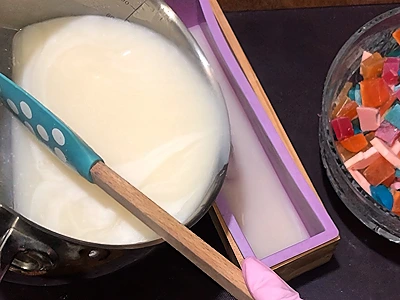
9- Distribute the colored shapes randomly in the first layer.
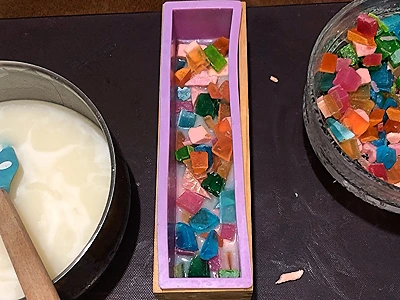
10- Stir the melted glycerine soap in the bowl before pouring the second layer.
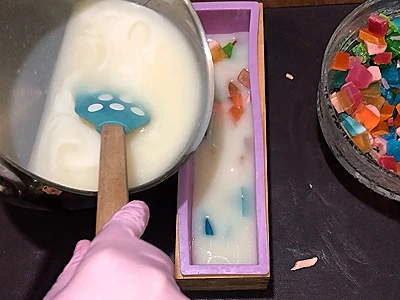
11- Again, distribute colored shapes randomly in the second layer.
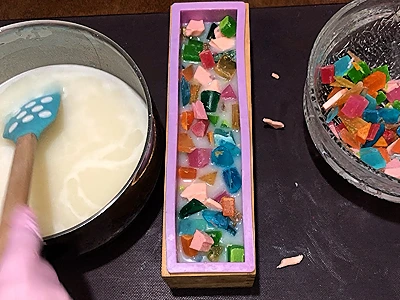
12- Pour the third and final layer.
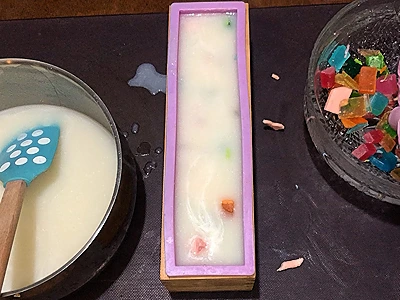
13- Distribute the colored shapes randomly in the third layer.
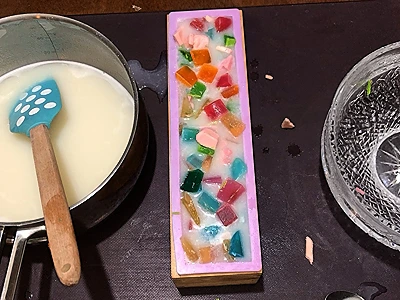
14- Spray the surface with medical alcohol 70% to remove any bubbles.
15- Leave the soap in the mold to cool down completely and harden. For me, and with the larger mold, it took 12 hours, but this depends on your room temperature.
16- Optional – After the soap in the mold has solidified, pick up a little glitter with your finger, and wipe across the surface of the hard soap, just to give the surface an attractive sparkle.
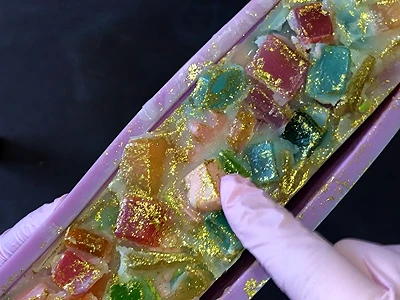
17- Carefully, remove the soap bar from the mold.
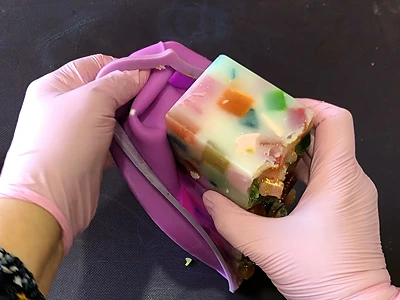
18- You can see that the bar has no gaps.
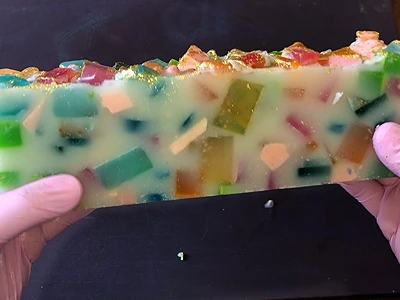
19- With a knife, cut the soap into adequate sizes.
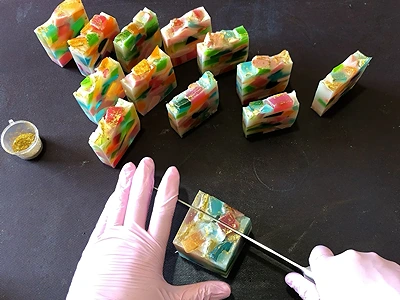
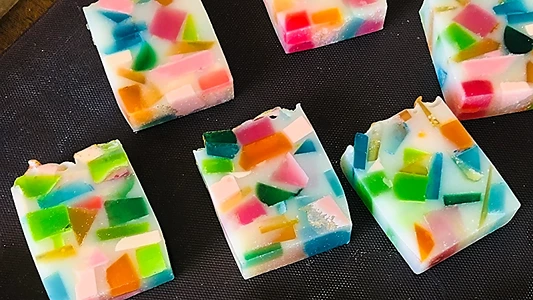
20- And you’re done! You can use the soap on the next day.
How to Use the DIY Glycerine Soap for Gifts
Using your DIY Glycerine Soap for Gifts is as simple as using any regular soap! Here’s a brief guide to make the most of these vibrant and lively creations:
- Wet your hands or body under running water.
- Grab your colorful glycerine soap bar.
- Rub the soap gently between your hands or directly on your body to create a lather.
- Massage the lather over your skin, ensuring a thorough cleanse.
- Rinse off the soap with water, leaving your skin feeling fresh and clean.
- Pat your skin dry with a towel, and enjoy the subtle scent and softness your glycerine soap brings.
Benefits
Discovering the art of making DIY Glycerine Soap for Gifts brings along a range of benefits, making it an enjoyable hobby or pastime for many. Here are the top five advantages of engaging in this creative and rewarding activity:
Expressive Creativity: Crafting your own glycerine soap allows you to unleash your creativity and artistic flair. With a variety of colors, shapes, and scents, you can design unique soap bars that reflect your personality and style.
Personalized Gifts: One of the most significant benefits is the ability to create personalized gifts for your loved ones. Handmade glycerine soap showcases thoughtfulness and affection, making each gift a meaningful and cherished token of your care.
Mindful Relaxation: Making DIY Glycerine Soap is a soothing and meditative process. As you focus on melting, pouring, and designing, it provides a calming and relaxing experience, reducing stress and promoting mindfulness.
Chemical-Free Formulation: By using high-quality glycerine soap and choosing natural colorants and scents, you ensure your creations are free from harmful chemicals. This makes them suitable for sensitive skin and environmentally friendly.
Sense of Accomplishment: Completing a batch of vibrant glycerine soap bars fills you with a sense of accomplishment and pride. Witnessing your creations come to life provides a satisfying feeling of achievement.
Embrace DIY Glycerine Soap for Gifts as a delightful pastime that not only results in beautiful soap bars but also nourishes your creativity and brings joy to those you care about.
Tips and Tricks
Opt for High-Quality Glycerine Soap: Start with a premium quality glycerine soap base as the foundation for your creations. High-quality soap ensures better clarity, consistency, and a smooth texture, making it easier to work with and resulting in superior finished products.
Experiment with Colors and Layers: Have fun with a variety of natural colorants, such as mica powders, dried herbs, or essential oils. Create captivating color combinations and experiment with layering different colors to craft visually stunning soap bars.
Add Essential Oils for Aromatherapy: Enhance your glycerine soap’s appeal by incorporating aromatic essential oils. Besides adding a delightful fragrance, certain oils offer therapeutic benefits, such as calming lavender or invigorating citrus scents.
Work with Silicone Molds: Invest in silicone soap molds to create intricate shapes and designs effortlessly. Silicone molds are flexible and make it easy to pop out your finished soap bars without any sticking or damage.
Bonus Tip: Practice Patience: Allow your glycerine soap creations to cool and set properly before removing them from the molds. Rushing the process may lead to distorted shapes or cracked soap bars.
Frequently Asked Questions
FAQ 1: Can I use any soap for making DIY Glycerine Soap for Gifts?
Reply: It’s best to start with a high-quality glycerine soap base for the best results. Glycerine soap offers a smooth texture, making it easier to work with and ensuring consistent, professional-looking soap bars.
FAQ 2: Are there any safety precautions to consider during the soap-making process?
Reply: Absolutely. Safety is essential when crafting DIY Glycerine Soap. Always handle hot melted soap with care to avoid burns, and work in a well-ventilated area. Additionally, wear protective gloves and use heat-resistant tools to minimize the risk of accidents.
FAQ 3: How long does it take for the glycerine soap to set and be ready to use or gift?
Reply: The setting time for glycerine soap varies depending on factors like room temperature and the size of the soap bars. In hot weather, it could take 12 hours for the soap to solidify completely, whereas in cold weather it might take 5 hours. However, allowing the soap to rest overnight ensures a firm and consistent texture before use or gifting.
Here are more articles on how to make your own natural soaps:
- DIY Natural Soap for Oily Skin with Green Clay: Reveal Your Best Skin
- Colorful DIY Glycerine Soap with Toys: Making Handwashing Fun for Kids
- DIY Musk Bath Bomb: Elevate Your Home Spa with Ultimate Relaxation
- DIY Rose & Frankincense Soap: A Luxurious Beauty Essential
- Invigorate Your Skin with DIY Matcha Creamy Soap: A Refreshing Tutorial
Video How-To on My Channel | Jinane World
The steps to make the DIY Glycerine Soap for Gifts are demonstrated in this video.
