
Discover an easy solution designed to address the unique needs of oily and mixed skin types – the DIY Natural Serum for Oily Skin. Crafted with the enriching goodness of Aloe Vera and Tea Tree, this serum offers a potent blend to restore balance and radiance to your complexion.
In this article, we’ll unveil a simple yet effective recipe, leveraging the natural benefits of these ingredients to create a serum that not only combats excess oil but also nurtures and revitalizes your skin. Join us on this enlightening journey to unlock the potential of the Aloe Vera and Tea Tree Power Blend.
Ingredients Needed
- Sweet Almond Oil or coconut oil
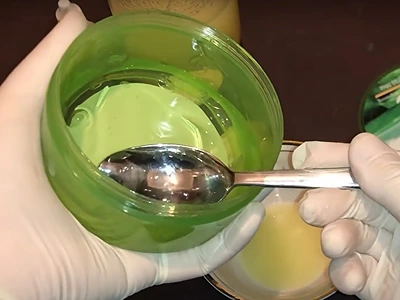
- Aloe Vera Gel
- Tea Tree Essential Oil
Notes on Ingredients
Choose high-quality ingredients to boost the effectiveness and safety of your DIY beauty products.
When an essential oil is included, I use either concentrated or diluted essential oils. If using concentrated essential oils, use up to 0.5% by weight to ensure safety for all skin types. To use diluted essential oils, mix 1 gram (0.035 oz) of concentrated essential oil with 100 grams (3.5 oz) of sweet almond oil or jojoba oil.
If a recipe calls for fragrance oil, you can use diluted essential oil instead to benefit from both its scent and therapeutic effects. This provides a natural alternative to synthetic fragrance oils and offers additional benefits.
Tools Needed
- Bowl
- Tablespoon
- Teaspoon
- Small whisk
- A serum glass bottle to store your DIY Natural Serum for Oily Skin
Prior to use, ensure that both your utensils and containers are properly cleaned and disinfected. Wash them with warm soapy water, dry with a tissue, and then sanitize by spraying with 70% medical alcohol. Wipe them clean and let them air dry before use.
Steps: DIY Natural Serum for Oily Skin
Spoons Explained!
In some articles, we use spoon measurements for non-liquid ingredients. These terms apply to both tablespoons and teaspoons:
- One Spoon: Ingredient filled and leveled in a measuring spoon.
- Rounded Spoon: Ingredient slightly piled above the spoon’s edge.
- Heaped Spoon: Ingredient scooped as high as possible on the spoon.
- Slightly Heaped Spoon: A bit more than a rounded spoon but not overly heaped.
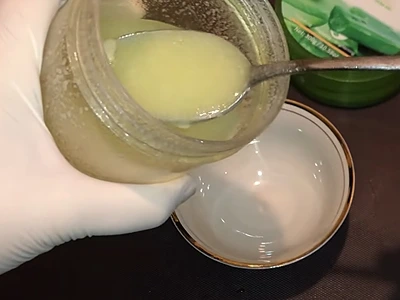
1- Start by putting one tablespoon of sweet almond oil or coconut oil in a bowl. In the image below, I used coconut oil; the weather was warm and the coconut oil was liquid (in cold temperatures, it solidifies).
2- Add 4 drops only of tea tree essential oil.
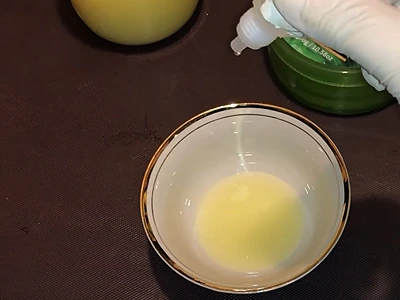
3- Add one rounded teaspoon of aloe vera gel.
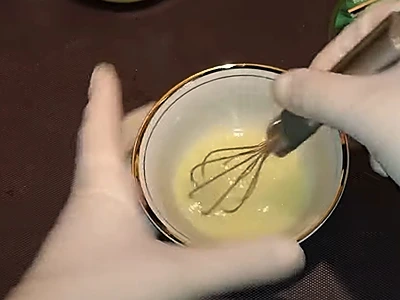
4- With a small whisk, mix thoroughly the ingredients.
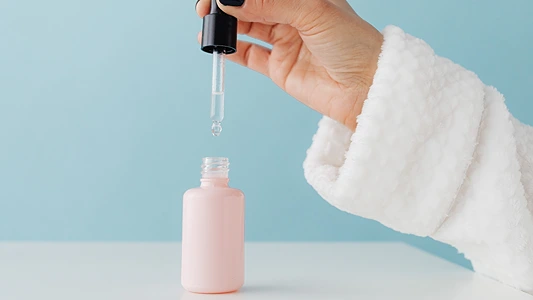
5- Scoop the serum into a serum glass bottle, and you’re done!

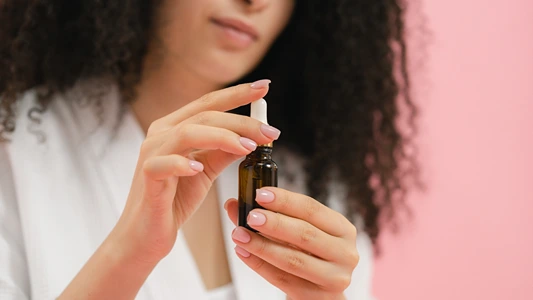
How To Use: DIY Natural Serum for Oily Skin
Perfectly suited for both oily and mixed skin types, the DIY Natural Serum for Oily Skin holds the key to a balanced and revitalized complexion. Follow these simple steps to make the most of its benefits:
a. Cleanse: Gently cleanse your face to ensure your skin is free from impurities and makeup residue.
b. Apply: Before going to bed, apply a small amount of the serum onto your fingertips. Gently massage it onto your cleansed face, using circular motion. The serum’s lightweight texture ensures easy absorption.
c. Even Distribution: Pay special attention to areas prone to excess oil, such as the T-zone. Ensure an even distribution of the serum, allowing it to work its magic.
d. Overnight Revitalization: Leave the serum on overnight. As you rest, the Aloe Vera and Tea Tree Power Blend will diligently address oiliness while nurturing your skin.
e. Morning Rinse: Upon waking, cleanse your face as part of your morning routine. Wash away any residual serum to reveal a refreshed and balanced complexion.
f. Daily Consistency: For optimal results, make this ritual a part of your nightly routine. Apply the serum to clean skin every night before sleep to maintain the ideal balance for your oily or mixed skin.
Benefits
Balanced Complexion: The DIY Natural Serum for Oily Skin’s unique blend of Aloe Vera and Tea Tree works harmoniously to regulate oil production, leaving your skin with a balanced and shine-free glow.
Pore Refinement: Say hello to refined pores. The serum’s natural properties help to minimize the appearance of pores, giving your skin a smoother and more even texture.
Nurturing Hydration: Hydration without the greasy aftermath. Aloe Vera’s moisturizing prowess combined with Tea Tree’s purifying qualities create a powerful duo that replenishes moisture levels while keeping oiliness in check.
Clarifying Action: Experience the magic of Tea Tree’s clarifying prowess. This serum gently assists in clarifying troubled areas, promoting a clearer and more radiant complexion over time.
Nighttime Restoration: While you sleep, your skin undergoes a rejuvenating process. The serum’s nightly application aids in restoring and revitalizing your skin, helping you wake up to a fresher, more revitalized appearance.
Embrace these remarkable benefits and let the DIY Natural Serum for Oily Skin become your go-to solution for a harmonized, radiant, and revitalized complexion.
Frequently Asked Questions
Can I use the serum during the day?
For optimal results, it’s recommended to use the DIY Natural Serum for Oily Skin before bedtime. Its overnight action allows the Aloe Vera and Tea Tree blend to work effectively in addressing oiliness and promoting skin balance.
How often should I apply the serum?
Apply the serum every night before sleep for consistent results. This nightly ritual helps maintain a balanced complexion and allows the serum to work its magic while you rest.
Can I use this serum with other skincare products?
Absolutely! Incorporate the serum seamlessly into your existing skincare routine. Apply it after cleansing and toning, and before moisturizing, for enhanced results.
Will the serum make my skin dry or tight?
No need to worry. The Aloe Vera infusion ensures that your skin remains hydrated and supple, preventing any discomfort often associated with oil-control products.
How long will it take to see results?
Results may vary. You could see a difference within a few weeks of consistent use. Continued use over time can lead to more significant improvements in oil balance and overall complexion.
Here are more articles on DIY natural and handmade body oils and serums:
- Simple DIY Jasmine Carrier Oil: Unveil Your Pathway to Beautiful Skin
- DIY Serum for Thicker Eyelashes: Get Gorgeous Lashes
- DIY Jasmine Toner for Face: A Floral Delight for Ravishing Skin
- Get Glowing with DIY Gold Serum for Skin: Easy and Luxurious!
- DIY Dark Spot Serum: Sandalwood and Frankincense Marvel for Your Skin
Video How-To on My Channel | Jinane World
The steps to make your own DIY Natural Serum for Oily Skin are demonstrated between the timestamps 2m37s and 5m38s of this video.