Unveiling the secrets of the DIY Korean Candy Scrub — In the quest for radiant and youthful skin, the beauty world is constantly unveiling innovative secrets. One such hidden gem is the DIY Korean Candy Scrub.
In this article, we’ll delve into the closely guarded secrets of crafting your very own DIY Korean Candy Scrub, a unique beauty concoction renowned for its stretchy and elastic scrubbing. Join us on this journey as we reveal the insider tips and tricks to harness the power of this Elastic Marvel for Gorgeous Skin.
Ingredients Needed
Choose high-quality ingredients to boost the effectiveness and safety of your DIY beauty products.
- Fine sugar powder
- Corn flour
- Xanthan gum
- Coco betaine
- Polysorbate 80
- Mica color powder
- Fragrance oil
Tools Needed
- Scale to weigh quantities
- Large bowl
- Measuring cup
- Teaspoons
- One or more container(s) to store your DIY Korean Candy Scrub balls.
Prior to use, ensure that both your utensils and containers are properly cleaned and disinfected. Wash them with warm soapy water, dry with a tissue, and then sanitize by spraying with 70% medical alcohol. Wipe them clean and let them air dry before use.
Steps: DIY Korean Candy Scrub
Spoons Explained!
In some articles, we use spoon measurements for non-liquid ingredients. These terms apply to both tablespoons and teaspoons:
- One Spoon: Ingredient filled and leveled in a measuring spoon.
- Rounded Spoon: Ingredient slightly piled above the spoon’s edge.
- Heaped Spoon: Ingredient scooped as high as possible on the spoon.
- Slightly Heaped Spoon: A bit more than a rounded spoon but not overly heaped.
In the steps below, we will make the DIY Korean Candy Scrub in the shape of small balls, each weighing 20 grams (0.70 oz).
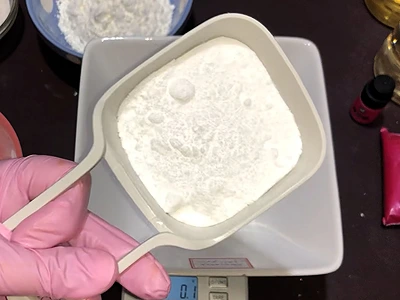
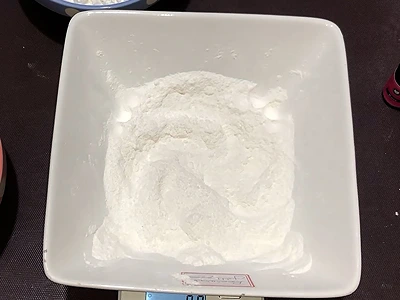
1- Start by putting 3/4 cup (125 grams or 4.41 oz) of sugar powder in a large bowl.
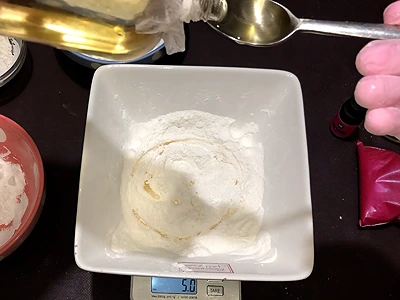
2- Add one heaped teaspoon (6 grams or 0.21 oz) of corn flour.
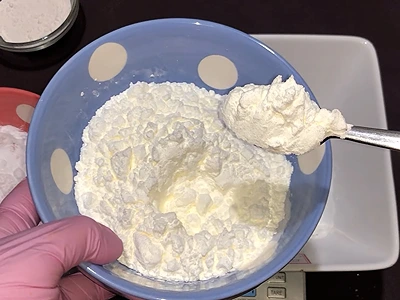
3- Add 1.5 heaped teaspoons (8 grams or 0.28 oz) of xanthan gum.
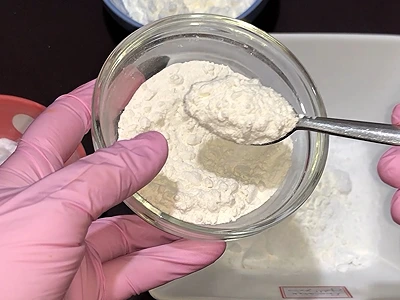
4- With a teaspoon, mix the three ingredients rigorously until you achieve a uniform, powdery texture, ensuring there are no clumps remaining.
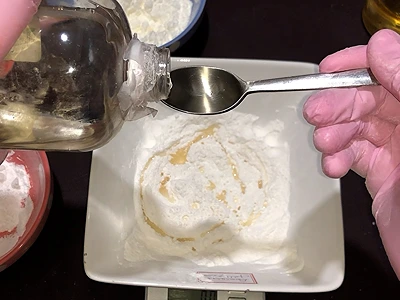
5- Add two teaspoons (10 grams or 0.35 oz) of polysorbate 80.
6- Add three teaspoons (11.9 grams or 0.42 oz) of coco betaine.
Now the Fun Begins: Kneading the Mix and Making the Balls
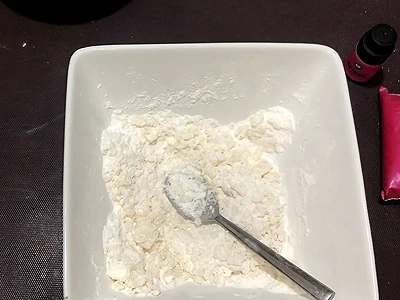
7- Using a teaspoon, make sure to mix thoroughly the liquid ingredients with the powdery ingredients. This will prevent the mixture from sticking to your hands when you knead the contents later on.
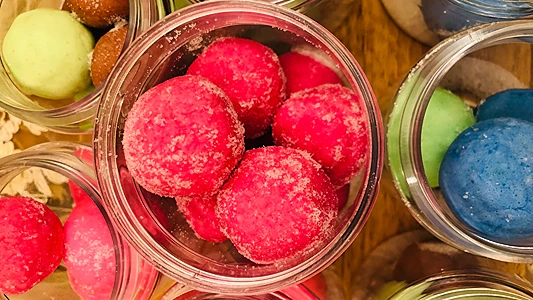
8- Add some mica color powder. Here, I am using red.
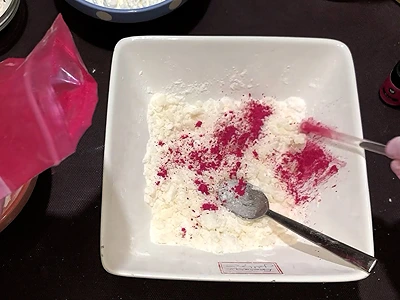
9- Mix the color powder with a teaspoon.
10- With your hands, work and knead the contents. Pick up some, rub them between your palms, then knead them thoroughly in the bowl.
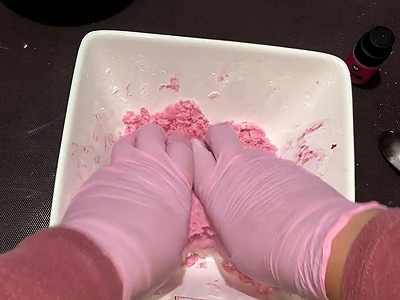
11- Add ten drops of fragrance oil. Here, I am using rose fragrance.
12- Continue working the mixture and kneading it with your hands, until you notice that when you squeeze a handful, it retains its shape.
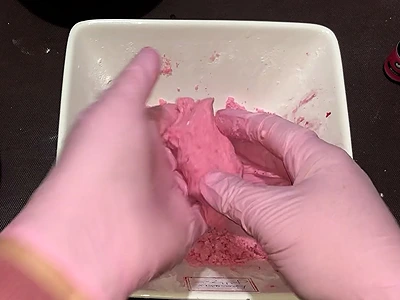
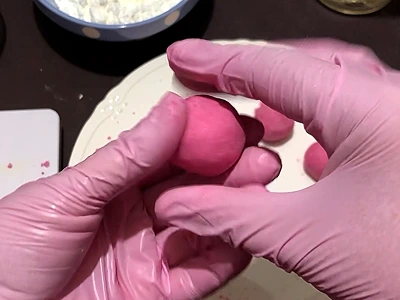
13- When you achieve the previous step’s consistency, gather the mixture into a dough-like shape.
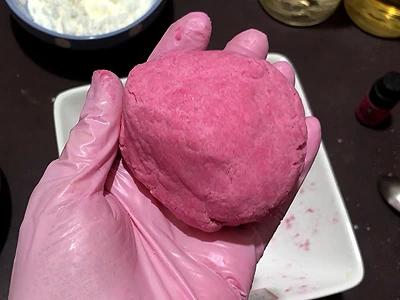
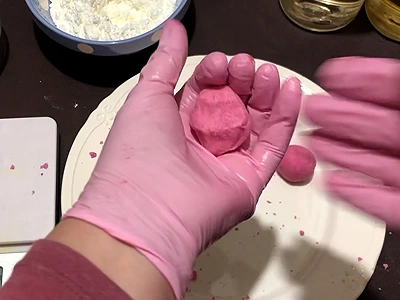
14- With your fingers, take out a piece of the dough-like shape, and squeeze it and shape it into a small scrub ball.
Check that the weight of the ball is about 20 grams (0.70 oz). Such a size of the DIY Korean Candy Scrub balls is good to use for the hands and legs. For scrubbing the body, you can make the ball 30 grams (1.05 oz).
Note: The quantities of ingredients we have used are enough to make eight scrub balls of 20 grams (0.70 oz) each.
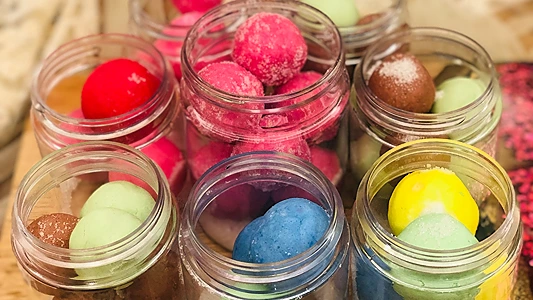
15- When you finish rolling all the scrub balls, allow them to dry for 24 hours.
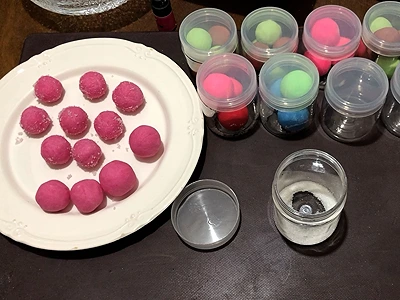
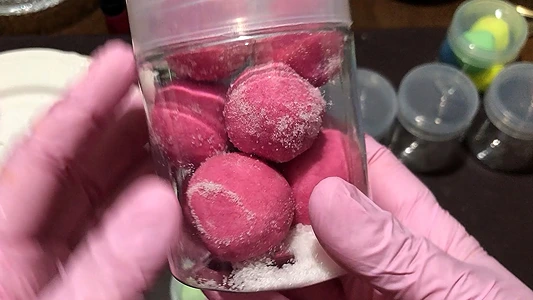
16- After the scrub balls have dried, store three or four of them in each container.
- One option: Sprinkle some granulated sugar in the container.
- Another option: Prepare a mix of almond oil and granulated sugar, and dip some scrub balls in to cover them.
Let’s Try It Out
17- Have a bowl of water ready.
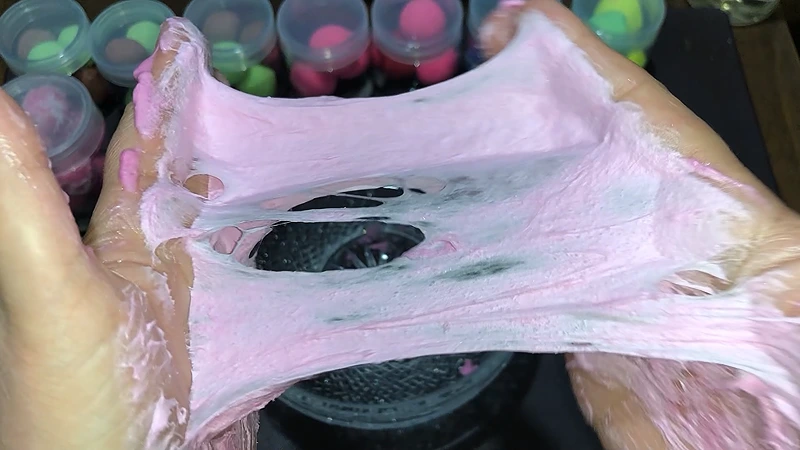
18- Take one scrub ball, dampen it with water, and squash it between your palms while rubbing. Add more water as needed and continue rubbing until the scrub transforms into an elastic and stretchy texture. You can see this effect as you pull your palms apart.
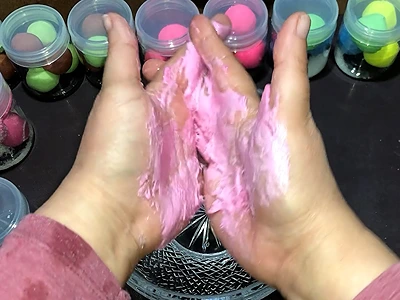
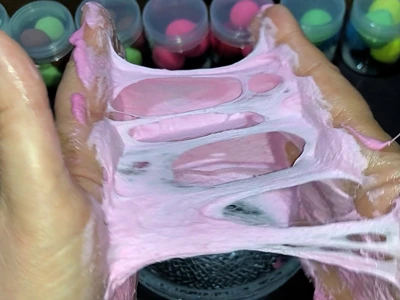
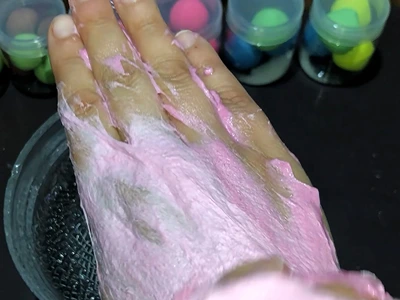
19- Spread the scrub on your hands and exfoliate.
How To Use: DIY Korean Candy Scrub
Using your homemade DIY Korean Candy Body Scrub is a delightful experience that not only exfoliates but also brings a unique stretchy sensation to your skin. Here’s a step-by-step guide to making the most of this Elastic Marvel:
Step 1: Prepare Your Scrub Balls
Start with a warm shower or bath to soften your skin. Ensure that your body is clean and damp, as this will enhance the effectiveness of the scrub. Take one or two of the small candy scrub balls and place them in the palms of your hands.
Step 2: Squish and Squash
With some water, squish and squash the small balls between your palms. Continue working them until they start to develop into a stretchy, elastic consistency. This transformation is where the magic begins.
Step 3: Apply and Experience the Stretch
Begin applying the transformed DIY Korean Candy Body Scrub to your body in circular motions. As you massage it onto your skin, you’ll immediately notice the unique stretchy texture. This remarkable feature not only adds an element of fun to your skincare routine but also allows the scrub to adhere more effectively, providing a thorough exfoliation experience.
Step 4: Massage with Care
Gently massage the scrub into your skin, paying special attention to rough or dry areas. Enjoy the sensation of the scrub stretching and smoothing your skin’s surface.
Step 5: Rinse and Revel
After 2-3 minutes of massaging, rinse your body thoroughly with warm water. As you do, you’ll feel the residue of the scrub wash away, leaving behind a sense of renewed elasticity.
Step 6: Moisturize and Lock in the Goodness
Pat your skin dry with a clean towel and follow up with your preferred moisturizer. This will help lock in the benefits of the DIY Korean Candy Body Scrub and maintain your skin’s newfound elasticity.
Step 7: Scrub Routine
Use your DIY Korean Candy Body Scrub as needed, typically 1-2 times a week, depending on your skin’s sensitivity and needs. Over-exfoliating can lead to irritation, so listen to your body and enjoy the stretchy transformation it offers.
Benefits
Here are the top benefits of using DIY Korean Candy Body Scrub for your skin:
1. Exceptional Exfoliation:
The DIY Korean Candy Body Scrub offers exceptional exfoliation, thanks to its fine sugar powder and unique stretchy consistency. It effectively removes dead skin cells, unclogs pores, and leaves your skin feeling smooth and refreshed.
2. Improved Elasticity:
One of the standout benefits is the noticeable improvement in skin elasticity. As you massage the stretchy scrub onto your skin, it helps enhance its natural elasticity, leaving you with skin that feels more supple and youthful.
3. Enhanced Hydration:
The scrub contains moisturizing ingredients like Coco Betaine and Polysorbate 80, which help retain moisture in your skin. This added hydration contributes to a more radiant complexion and helps combat dryness.
4. Even Skin Tone:
Regular use of the DIY Korean Candy Body Scrub can help even out your skin tone. By removing dead skin cells and encouraging cell turnover, it may reduce the appearance of blemishes, scars, and uneven pigmentation.
5. A Spa-Like Experience:
Beyond its skincare benefits, using the DIY Korean Candy Body Scrub provides a spa-like experience in the comfort of your own home. The unique stretchy texture and the pleasant fragrance oil turn your skincare routine into a self-care ritual that’s both enjoyable and effective.
Frequently Asked Questions
1. What exactly is DIY Korean Candy Body Scrub?
DIY Korean Candy Body Scrub is a unique skincare product made from candy-like balls that, when squished and worked with water, transform into a stretchy and exfoliating scrub for the body.
2. Is it suitable for all skin types?
Yes, the DIY Korean Candy Body Scrub is generally suitable for all skin types. However, if you have particularly sensitive skin, it’s advisable to do a patch test before applying it all over your body.
3. How often should I use it?
You can use the DIY Korean Candy Body Scrub 1-2 times a week, depending on your skin’s needs. Avoid over-exfoliating to prevent skin irritation.
4. Can I use it on my face?
It’s recommended to use this scrub primarily on the body, as the skin on the face is typically more sensitive. Consider a gentler facial exfoliator for your face.
5. Does it contain any harmful ingredients?
The DIY Korean Candy Body Scrub is made with skin-friendly ingredients, but it’s essential to check the ingredient list for any potential allergens if you have sensitive skin or allergies.
6. Can I store it for an extended period?
Store the scrub in an airtight container in a cool, dry place to prolong its shelf life. However, it’s best to use it within six months to ensure freshness and effectiveness.
7. Will it replace my regular moisturizer?
While the scrub contains moisturizing ingredients, it’s not a replacement for a dedicated moisturizer. After using the scrub, it’s advisable to follow up with your preferred body lotion or moisturizer to lock in hydration.
Here are more articles on do-it-yourself scrubs:
- Revitalize Your Skin with DIY Orange Sugar Body Scrub – Natural Recipe
- DIY Lip Scrub for Soft Lips: Softness Unleashed
- Easy DIY Natural Face Scrub with Coffee: Deep Scrubbing for Acne, Skin Tightening, Radiance
- Highly Effective DIY Pomegranate Body Scrub: Your Skin’s New Best Friend
- Soft DIY Foaming Body Scrub with Shredded Coconut: Exfoliate and Glow
Video How-To on My Channel | Jinane World
The steps to make your own DIY Korean Candy Scrub are demonstrated in this video.