Looking for a natural way to keep your skin hydrated and glowing? Look no further than this DIY moisturizing cream! Made with coconut oil, pure shea butter, jojoba oil, and essential oils like tea tree and almond, this cream is packed with nourishing ingredients that will leave your skin feeling soft, smooth, and rejuvenated.
In this article, we’ll walk you through the steps to create your own DIY moisturizing cream, and share some tips for getting the most out of this all-natural beauty product. So let’s get started and give your skin the TLC — tender loving care — it deserves!
Ingredients Needed
- Coconut oil
- Pure shea butter
- Jojoba oil
- Tea tree essential oil
- Almond essential oil
Notes on Ingredients
Choose high-quality ingredients to boost the effectiveness and safety of your DIY beauty products.
When an essential oil is included, I use either concentrated or diluted essential oils. If using concentrated essential oils, use up to 0.5% by weight to ensure safety for all skin types. To use diluted essential oils, mix 1 gram (0.035 oz) of concentrated essential oil with 100 grams (3.5 oz) of sweet almond oil or jojoba oil.
If a recipe calls for fragrance oil, you can use diluted essential oil instead to benefit from both its scent and therapeutic effects. This provides a natural alternative to synthetic fragrance oils and offers additional benefits.
Tools Needed
- Measuring cup
- bowl
- Electric mixer
- Container to store the cream
Prior to use, ensure that both your utensils and containers are properly cleaned and disinfected. Wash them with warm soapy water, dry with a tissue, and then sanitize by spraying with 70% medical alcohol. Wipe them clean and let them air dry before use.
Article continues below…
Featured Recipes
Glow from the inside out! Elevate your skincare with our unique DIY single recipes! Each formula is designed with special ingredients to target specific needs, whether it’s boosting collagen, reducing wrinkles, or diminishing dark circles. These recipes aren’t on our blog; even if some titles seem similar, they use different ingredients.
10% discount for 3 or more recipes!


Steps: DIY Moisturizing Cream
1- Measure ½ cup (125 milliliters) of coconut oil and place it in a bowl.
2- Add 1 tablespoon (15 milliliters) of pure shea butter.

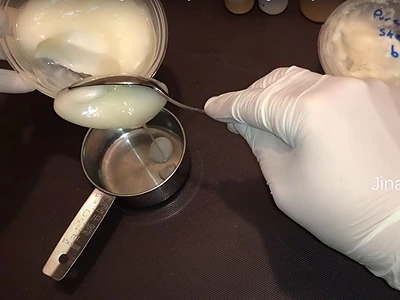
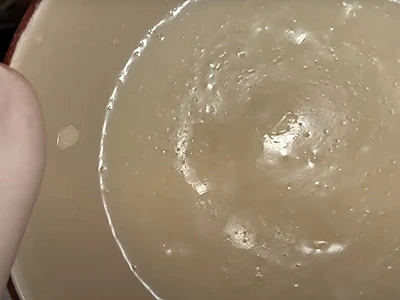
3- Melt the contents partially in a hot water bath. A hot water bath is done by placing the bowl in a larger pot of hot steaming water. This will gradually melt whatever is inside the bowl without causing it to burn. We are melting the contents partially here (a minute or two might be enough), because we will use later the electric mixer to whip the contents to a creamy texture.

4- Once the contents of the bowl have melted partially, add 2 tablespoons (30 milliliters) of jojoba oil into the bowl.
5- Add 5 drops of almond essential oil.
6- Add 5 drops of tea tree essential oil.
7- Mix the contents.
Note: Make sure not to exceed 5 drops of each essential oil.
8- Place the bowl in the fridge for 10 minutes to cool the contents.
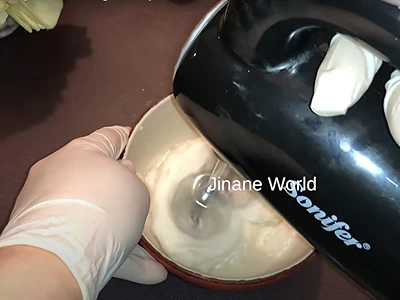
9- Using an electric mixer, blend the contents till you achieve a creamy texture.
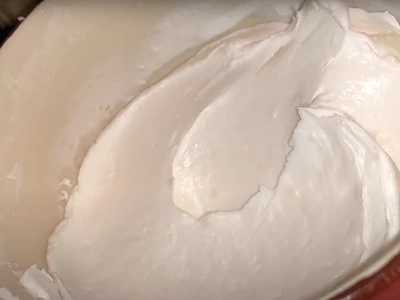
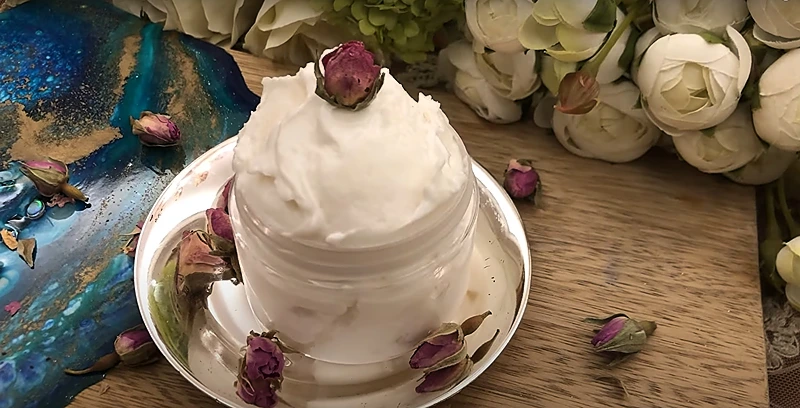
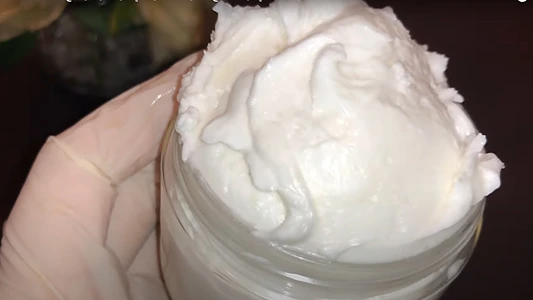
10- Once all the ingredients have been blended together, store the completed face moisturizer in a container.
Note: In summer, you have to store the DIY moisturizing cream in the fridge, because the coconut oil might melt in higher temperatures. In winter time, you can keep it out.
How To Use DIY Moisturizing Cream
Using your DIY moisturizing cream is simple and easy!
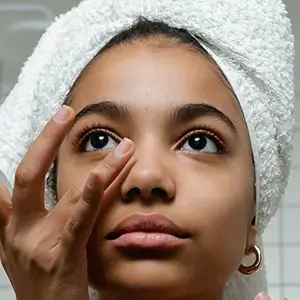
a. Start by washing your face and hands with a gentle cleanser to remove any impurities.
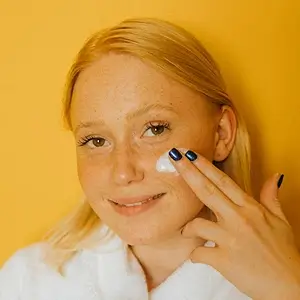
b. Next, apply a small amount of the cream to your face and hands, using your fingertips to gently massage it into your skin. Be sure to focus on any dry or rough areas, such as around your nose, on your elbows, or on your hands.
c. The best time to use your moisturizing cream is after a shower or bath, when your skin is still slightly damp. This will help the cream absorb more easily into your skin. You can also use the cream throughout the day as needed, especially during colder months or when your skin feels dry or itchy.
d. Remember, a little goes a long way with this DIY moisturizing cream, so start with a small amount and add more as needed.
e. With regular use, you’ll notice your skin looking and feeling healthier, smoother, and more radiant.
Benefits of DIY Moisturizing Cream
Hydrates and nourishes: The natural ingredients in the DIY moisturizing cream, such as coconut oil, shea butter, and jojoba oil, provide deep hydration and nourishment to your skin, leaving it feeling soft, smooth, and moisturized.
Soothes dry and itchy skin: If you suffer from dry or itchy skin, the DIY moisturizing cream can help to soothe and calm these symptoms, leaving your skin feeling more comfortable and less irritated.
Improves skin tone and texture: Regular use of the moisturizing cream can help to improve the overall tone and texture of your skin, reducing the appearance of fine lines and wrinkles, and leaving your complexion looking more radiant and youthful.
Protects against environmental damage: The antioxidants in natural ingredients like almond oil and tea tree oil can help to protect your skin against environmental damage from things like pollution and UV rays, helping to keep your skin healthy and youthful-looking.
Cost-effective and customizable: Making your own moisturizing cream is a cost-effective way to take care of your skin, and you can customize the ingredients to suit your skin type and individual needs. Plus, it’s a fun and rewarding DIY project that you can enjoy in the comfort of your own home!
More articles on DIY natural body creams:
- How To Make Frankincense Cream
- DIY Night Cream With 2 Powerful Ingredients
- Pamper Your Skin with this DIY Lavender Body Cream with Coconut Oil and Shea Butter for a Radiant Glow
- DIY Licorice Cream for Skin: Boost Your Skincare Routine
Video How-To on My Channel | Jinane World
The steps to make the DIY moisturizing cream are demonstrated in this video.