Introducing our DIY Natural Jelly for Soft Feet. If you’re looking for an effective and affordable solution to care for your dry, cracked heels and achieve irresistibly soft feet, then this is the article for you. Say goodbye to expensive foot care products and hello to a simple homemade remedy that will leave your feet feeling rejuvenated.
With just two readily available ingredients, you can create a nourishing and moisturizing jelly that will transform your feet. Let’s dive into the easy step-by-step process and discover the power of this DIY natural jelly for soft feet.
Ingredients Needed
- Natural Beeswax: Measure out the required amount as indicated in the recipe steps and shred it finely.
- Olive Oil
- Pure Essential Oil – Optional
- Vitamin E – Optional
Notes on Ingredients
Choose high-quality ingredients to boost the effectiveness and safety of your DIY beauty products.
When an essential oil is included, I use either concentrated or diluted essential oils. If using concentrated essential oils, use up to 0.5% by weight to ensure safety for all skin types. To use diluted essential oils, mix 1 gram (0.035 oz) of concentrated essential oil with 100 grams (3.5 oz) of sweet almond oil or jojoba oil.
If a recipe calls for fragrance oil, you can use diluted essential oil instead to benefit from both its scent and therapeutic effects. This provides a natural alternative to synthetic fragrance oils and offers additional benefits.
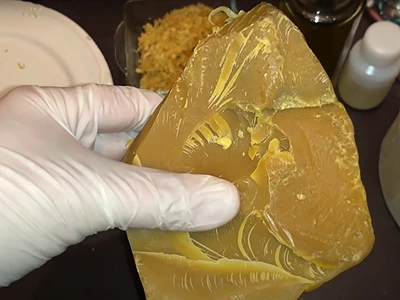
This is how I buy the beeswax, in Kg 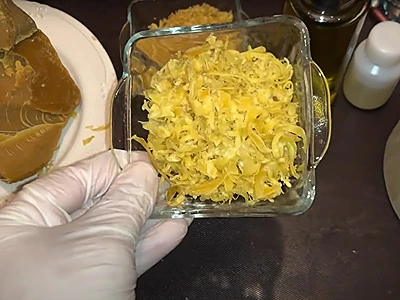
I shred the beeswax like this
Tools Needed
- Glass beaker
- Tablespoons
- Jar or container to store the jelly
Prior to use, ensure that both your utensils and containers are properly cleaned and disinfected. Wash them with warm soapy water, dry with a tissue, and then sanitize by spraying with 70% medical alcohol. Wipe them clean and let them air dry before use.
Steps: DIY Natural Jelly for Soft Feet
To make the DIY Natural Jelly for Soft Feet, please ensure that you adhere exactly to the quantities of the ingredients indicated below. Otherwise, if you add more of the beeswax, the jelly will end up too thick. If you add less, it will become too liquid.
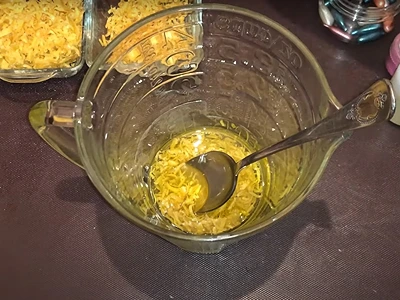
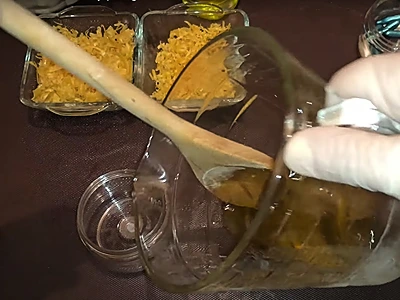
1- Put 2 tablespoons of shredded beeswax in a beaker.
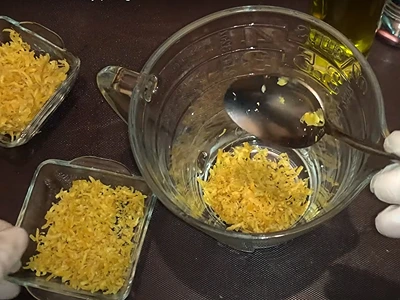
2- Add 6 tablespoons of olive oil.
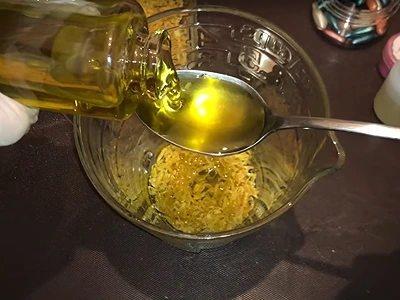
3- These are the 2 ingredients in the beaker.
4- Now, we will melt the contents in a hot water bath (bain-marie). A bain-marie is done by placing the beaker in a larger pot of hot steaming water. This will gradually melt whatever is inside the beaker without causing it to burn. As the contents of the beaker melt, make sure to mix every now and then.
In the image below, you can see the beaker sitting in a pot. The pot is on the stove and has hot steaming water.
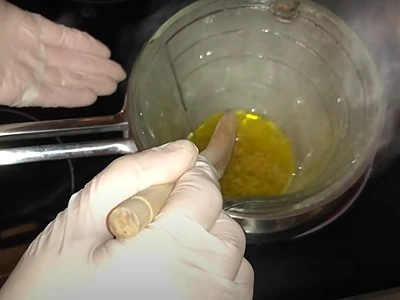
5- After the ingredients have melted, remove the beaker from the bain-marie.
6- Let the contents cool off a bit till the vapor dissipates, before moving on to the next step.
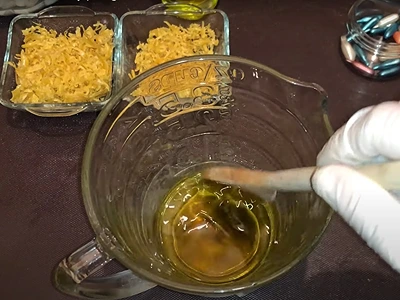
7- Add about 3 drops of your preferred essential oil. This is an optional step.
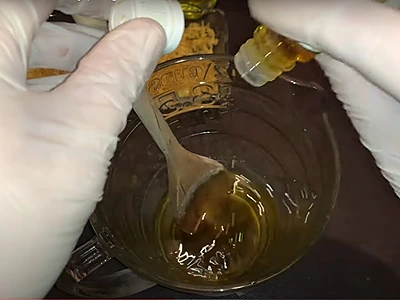
Note: If we don’t add any color, our jelly will end up yellowish, because of the color of the 2 ingredients. At this stage, you can add mica color powder to make the jelly in a different color. So, as an option, choose a mica color to your liking and add a little: just the tip of a wooden popsicle.
8- Squeeze the contents of a vitamin E capsule into the mix. This is optional.
9- Mix the ingredients.
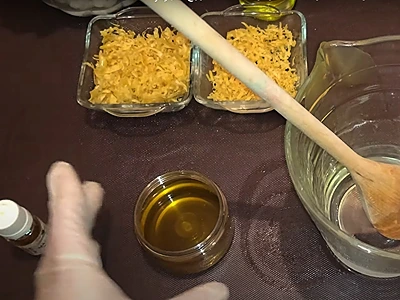
10- Pour the mix into a container for cooling and storage.
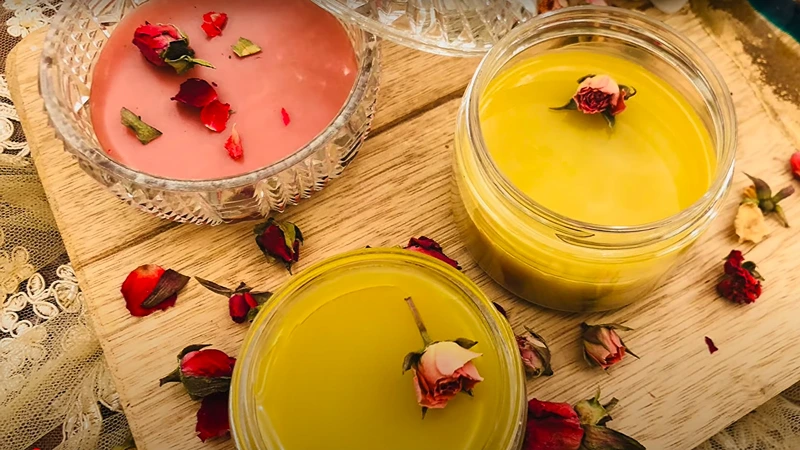
11- This is our final jelly!
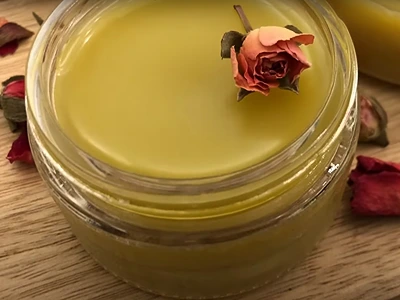
DIY natural jelly for soft feet. Final product 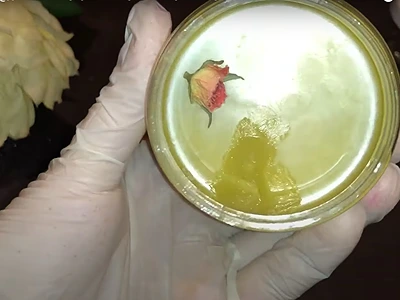
The texture is just like your normal petroleum jelly
How To Use: DIY Natural Jelly for Soft Feet
To make the most of your DIY Natural Jelly for Soft Feet, follow these steps for application:
a. Cleanse your feet: Start by washing your feet with warm water and a mild soap. Gently pat them dry with a towel.
b. Scoop a small amount: Take a small amount of the prepared DIY natural jelly with your fingertips or a clean spoon. Remember, a little goes a long way.
c. Massage into the skin: Rub the jelly onto your heels and any other areas of your feet that need attention. Use circular motions and apply gentle pressure to ensure the jelly is absorbed into the skin.
d. Focus on problem areas: Pay extra attention to dry, cracked heels or any rough patches on your feet. Massage the jelly into these areas to provide intensive moisturization and nourishment.
e. Leave it on: Once applied, leave the jelly on your feet to allow it to deeply penetrate and work its magic. You can choose to wear a pair of clean cotton socks to enhance absorption and prevent the jelly from transferring onto surfaces.
f. Overnight treatment: For maximum benefits, consider applying the jelly before going to bed and leaving it on overnight. This allows ample time for the ingredients to work and for your feet to fully absorb the moisture.
g. Daytime use: If you prefer to use the jelly during the day, ensure you have enough time to let it absorb before putting on socks or shoes. It’s best to give it at least 30 minutes to fully soak into your skin.
Remember to use the DIY natural jelly consistently for best results. Regular application, combined with proper foot care practices, will help keep your feet soft, moisturized, and free from dryness or discomfort. Enjoy the pampering experience and the delight of having beautifully nourished feet!

Benefits: DIY Natural Jelly for Soft Feet
Using the DIY Natural Jelly for Soft Feet offers a range of benefits that will leave your feet feeling rejuvenated and pampered. Here are some key advantages of incorporating this homemade remedy into your foot care routine:
Deep Moisturization: The combination of beeswax and olive oil in the DIY natural jelly provides intense hydration to dry, cracked heels and rough skin on your feet. It helps to replenish lost moisture and lock in hydration, leaving your feet soft, supple, and nourished.
Skin Repair and Healing: Beeswax, known for its emollient properties, helps to promote skin repair and healing. It forms a protective barrier on the skin, shielding it from external factors and allowing the natural healing process to take place. This is especially beneficial for soothing and healing cracked heels.
Nourishment and Vitality: The addition of essential oil and vitamin E enriches the DIY natural jelly with additional nourishing benefits. Essential oils offer aromatherapy benefits and can provide a soothing, refreshing, or invigorating sensation to your feet. Vitamin E is a potent antioxidant that helps to protect your skin from free radicals and maintain its health and vitality.
Cost-Effective Solution: Creating your own natural jelly at home is a cost-effective alternative to purchasing commercial foot care products. With just a few ingredients, you can make a batch of the DIY jelly that will last for a long time, saving you money in the long run.
Customizable and Personalized: One of the great advantages of making your own natural jelly is the ability to customize it according to your preferences. You can choose different essential oils to create a scent that you love, tailor the consistency to your liking, and adjust the proportions of ingredients based on your specific foot care needs.
Relaxation and Self-Care: Incorporating the application of the DIY natural jelly into your foot care routine provides an opportunity for self-care and relaxation. The process of massaging the jelly onto your feet can be soothing and therapeutic, promoting a sense of calm and well-being.
By using the DIY Natural Jelly for Soft Feet regularly, you can enjoy the benefits of softer, smoother, and healthier feet while indulging in a natural and personalized foot care experience.
More articles on DIY body butters and creams:
- DIY Cream for Mild Eczema: Revitalize Your Skin Naturally with 3 Ingredients Only
- DIY Beetroot Body Butter: Nourish and Rejuvenate Your Skin Naturally
- Experience the Magic of a DIY Turmeric Mask: Transform Your Skin with Golden Bliss
- Sparkle and Shine: Create Your Own Shimmering Lotion For a Glamorous Look
- Experience the Magic of DIY Rose Body Butter for Soft and Supple Skin
Video How-To on My Channel | Jinane World
The steps for how to make DIY Natural Jelly for Soft Feet are demonstrated in this video.