
Introducing our DIY Lotion for Soft Skin. In this guide, we’ll reveal the power of argan oil as a luxurious moisturizing ingredient, leaving your skin feeling pampered and radiant.
Let’s embark on this rewarding journey to create a lotion that exudes pure luxury and care for your skin’s unique needs. Say goodbye to dry, lackluster skin and embrace the magic of DIY moisturization today!
Ingredients Needed
- Distilled water
- Cetyl alcohol – It is a binding agent
- BTMS 50 – It is a conditioning emulsifier
- Vegetable glycerine
- Argan oil
- Cocoa butter (or shea butter)
- Essential oil
- Preservative: Liquid germall plus
- Mica color powder
Notes on Ingredients
Choose high-quality ingredients to boost the effectiveness and safety of your DIY beauty products.
When an essential oil is included, I use either concentrated or diluted essential oils. If using concentrated essential oils, use up to 0.5% by weight to ensure safety for all skin types. To use diluted essential oils, mix 1 gram (0.035 oz) of concentrated essential oil with 100 grams (3.5 oz) of sweet almond oil or jojoba oil.
If a recipe calls for fragrance oil, you can use diluted essential oil instead to benefit from both its scent and therapeutic effects. This provides a natural alternative to synthetic fragrance oils and offers additional benefits.
Tools Needed
- Scale to weigh quantities
- Large glass beaker
- Small glass beaker
- Small bowl
- Digital thermometer
- Glass mixing rod
- Electric hand mixer
- An empty lotion bottle of 300-milliliter (10 US fl oz) capacity, or several smaller-capacity lotion bottles.
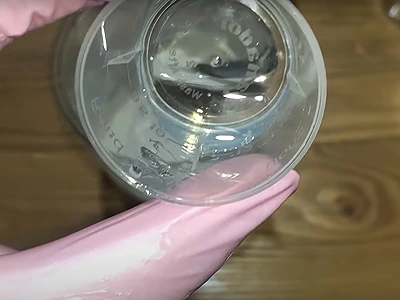
Prior to use, ensure that both your utensils and containers are properly cleaned and disinfected. Wash them with warm soapy water, dry with a tissue, and then sanitize by spraying with 70% medical alcohol. Wipe them clean and let them air dry before use.
Steps: DIY Lotion for Soft Skin
In a Large Beaker
1- Start by pouring 270 grams (9.52 oz) of distilled water in a large beaker.
2- Add 32 grams (1.12 oz) of vegetable glycerine to the distilled water.
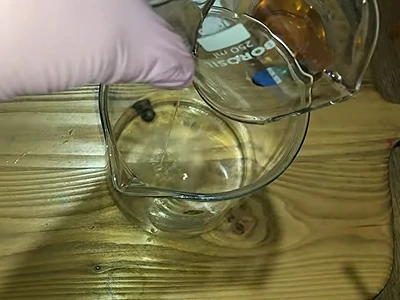
3- Mix well.
In a Small Beaker
4- Add 16 grams (0.56 oz) of BTMS 50 in a small beaker.
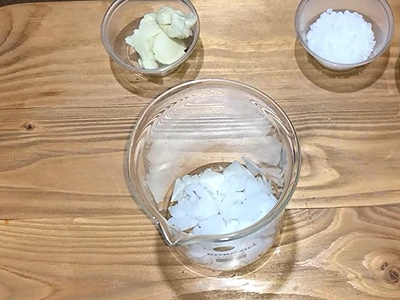
5- Add 12 grams (0.42 oz) of cetyl alcohol.

6- Add 40 grams (1.41 oz) of argan oil.
7- Add 20 grams (0.70 oz) of cocoa butter.
Both Beakers in a Bain-Marie
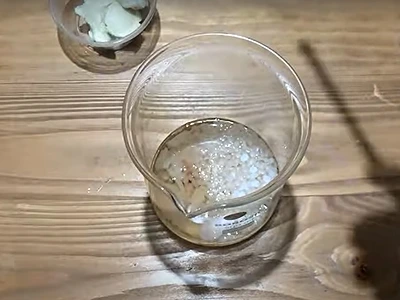
8- Now, place both beakers in a bain-marie (hot water bath). A bain-marie is done by placing the 2 beakers in a large pot of hot steaming water. This will gradually heat/melt whatever is inside the beakers. As the contents melt, make sure to mix every now and then.
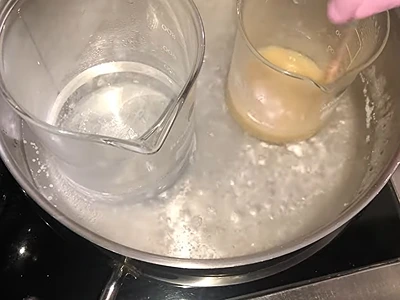
The purpose of the bain-marie here is two-fold: to melt/heat the contents of the beakers, and to bring their temperatures to the correct level. The temperature of both must be in the range 60-70 degrees Celsius (140-158 degrees Fahrenheit). Your lotion will not succeed if their temperature is below this range and if the difference in their temperatures is too large.

Here, the contents of the small beaker have a temperature of 65 degrees Celsius (149 degrees Fahrenheit), and those in the large beaker are at 70 degrees Celsius (158 degrees Fahrenheit). The difference in their temperatures is very good.
Mixing the Contents of the Beakers
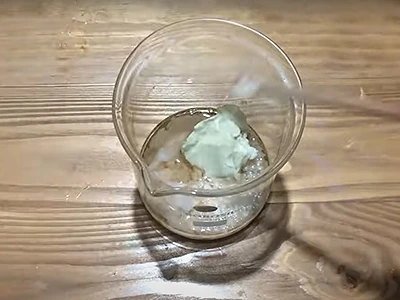
9- Pour the contents of the small beaker into the large beaker, all while stirring.
10- With a glass mixing rod, mix the ingredients by hand thoroughly.
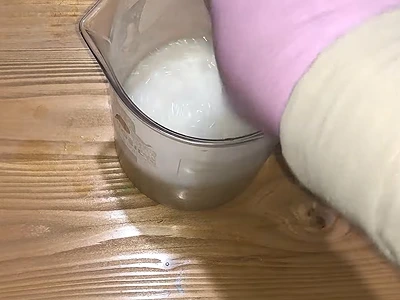
11- Use the electric hand mixer to whip up the contents till their consistency becomes lotion-like (loose cream).
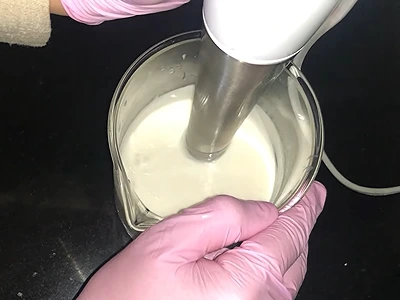
Then, use the electric hand mixer till you obtain a lotion-like consistency 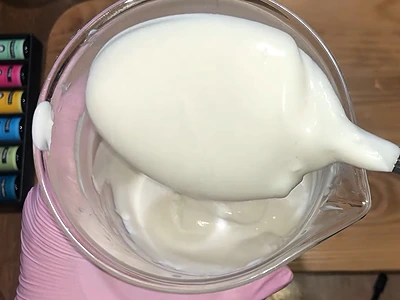
Lotion-like consistency
12- Next step is to add the preservative. We can only add the preservative once the temperature of the contents drops below 40 degrees Celsius (104 degrees Fahrenheit).
13- Add 2 grams (0.07 oz) of the preservative, liquid germall plus.
14- With a mixing rod or whisk, mix well by hand.
15- Use the electric hand mixer one last time to ensure that the preservative is well mixed.
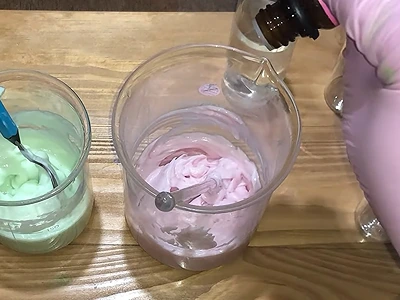
16- Now, we will add some color. The color of a lotion should be light. In a separate small bowl, dissolve a little mica color powder into a small quantity of glycerine. Choose a color that you like. Here, I am using fuchsia color. Add the color mix to the lotion in the beaker, and mix well by hand.
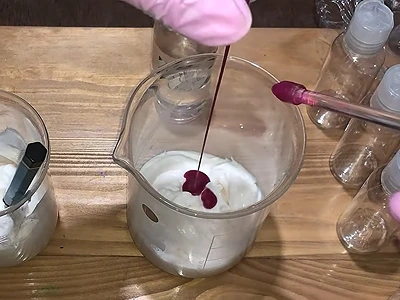
17- Finally, add 3 drops of essential oil. I am using rose essential oil; it goes with the color I chose. You can use any essential oil that you like, but it should be adequate with the color you choose.
18- Mix again by hand.
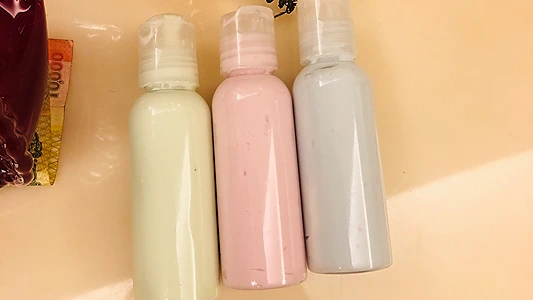
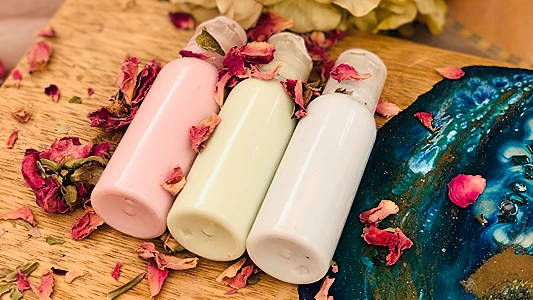
19- Your DIY Lotion for Soft Skin is now done! Scoop the lotion into a bottle.
How To Use: DIY Lotion for Soft Skin
a. Cleanse Your Skin: Before applying your DIY lotion, make sure your skin is clean and free from any impurities. Wash your face and body with a gentle cleanser and pat dry with a towel.
b. Dispense an Appropriate Amount: Take a small amount of your DIY lotion in your palms. The quantity will depend on your preference and the area you want to moisturize.
c. Warm the Lotion: Rub your hands together to warm the lotion slightly. This helps the product spread more easily and enhances absorption into the skin.
d. Apply Gently: Begin applying the lotion to your skin in gentle, circular motions. Start with any dry areas, then move on to the rest of your body. Remember to focus on areas prone to dryness, such as elbows, knees, and heels.
e. Massage for Absorption: Massage the lotion into your skin until it is fully absorbed. The massaging action not only aids absorption but also promotes circulation, leaving your skin feeling rejuvenated.
f. Use Daily: For best results, use your luxurious DIY lotion daily, preferably after bathing or showering when your skin is still slightly damp. This locks in moisture and ensures long-lasting softness.
g. Store Properly: Store your DIY lotion in a cool, dry place away from direct sunlight to maintain its effectiveness and extend its shelf life.
With this simple and effective routine, your skin will bask in the luxurious moisturizing power of your custom-made lotion, keeping it soft, supple, and beautifully hydrated.
Benefits: DIY Lotion for Soft Skin
Nourishes and Hydrates: This DIY lotion, enriched with argan oil and other skin-loving ingredients, deeply nourishes and moisturizes your skin. It helps replenish lost moisture, leaving your skin soft, supple, and well-hydrated.
Softens and Smoothens: The luxurious blend of ingredients in the DIY lotion works to soften rough patches and smoothens the skin’s texture. Experience a velvety touch as the lotion glides effortlessly over your skin.
Promotes Radiance: Regular application of this DIY lotion can enhance your skin’s natural radiance. The potent combination of moisturizing components helps to restore your skin’s healthy glow and vitality.
Customizable to Your Needs: Creating your DIY lotion allows you to customize the formula according to your specific skin type and preferences. You have full control over the ingredients, ensuring a product that suits your individual needs.
Aromatherapy Benefits: If you add essential oils to your DIY lotion, you can enjoy the added bonus of aromatherapy. The soothing scents can uplift your mood, reduce stress, and create a spa-like experience during your skincare routine.
Economical and Sustainable: Making your DIY lotion can be cost-effective in the long run, as you can create larger batches using easily accessible ingredients. Additionally, it reduces the need for single-use plastic packaging, making it an eco-friendly choice.
Connection to Self-Care: The process of making your DIY lotion encourages self-care and mindfulness. Taking the time to pamper yourself with a luxurious skincare ritual can be a delightful and rewarding experience.
Experience the joy of crafting a personalized skincare product that not only cares for your skin’s well-being but also elevates your self-care routine to new heights.
Here are articles on DIY body butters and creams:
- Powerful DIY Matcha Body Butter for Radiant Skin: Step-by-Step Guide
- Powerful DIY Natural Deodorant Cream: Stay Fresh and Confident All Day
- DIY Natural Jelly for Hands: Experience the Magic of Soft, Supple Skin
- DIY Foaming Bath Butter: Elevate Your Natural Skincare Game for Glowing Results
- DIY Natural Jelly for Soft Feet: Unlock Softness with Only 2 Ingredients
Video How-To on My Channel | Jinane World
The steps for how to make the DIY Lotion for Soft Skin are demonstrated in this video.